
It’s Faster to Go Alone
By Jordan B – Obyiscus
Overview
- Mission: Decapitation
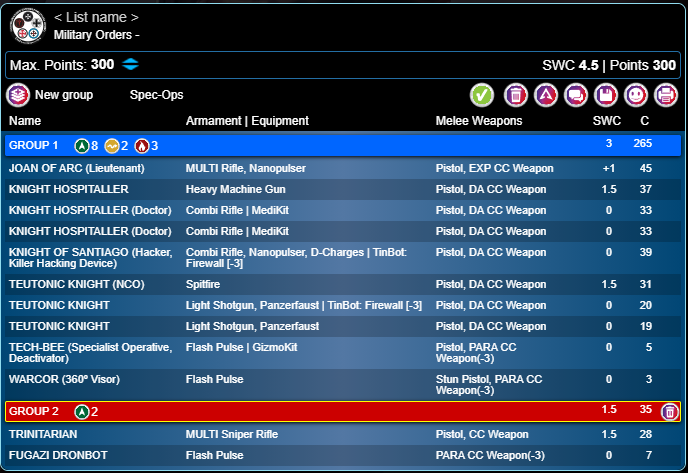
- Forces: Shock Army of Acontecimento vs Military Orders (300)
- Deploy First: Military Orders
- First Turn: Military Orders
Deployment
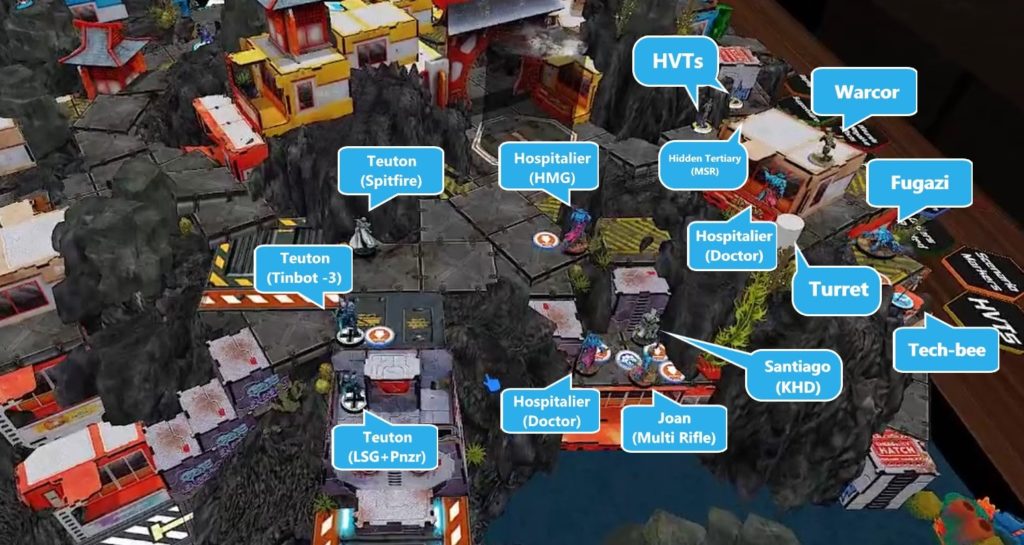
My opponent deployed his fast knights (Teutons) on his centre left (planning to advance up the left flank. He would need to stick to the walkways as the table rules had all rocky part as mountain terrain (slowing most things down and making taking cover slow). He then deployed the Joan train more on his right flank, with most units hiding. His turret was place kind of defending his back and his warcor and flashbot were left standing watching his right flank. In secret he deployed his Trinitarian sniper (his hold back) on top of the roof of the building on his right flank. Essential “fast” knights on the left and slow knights on the right.
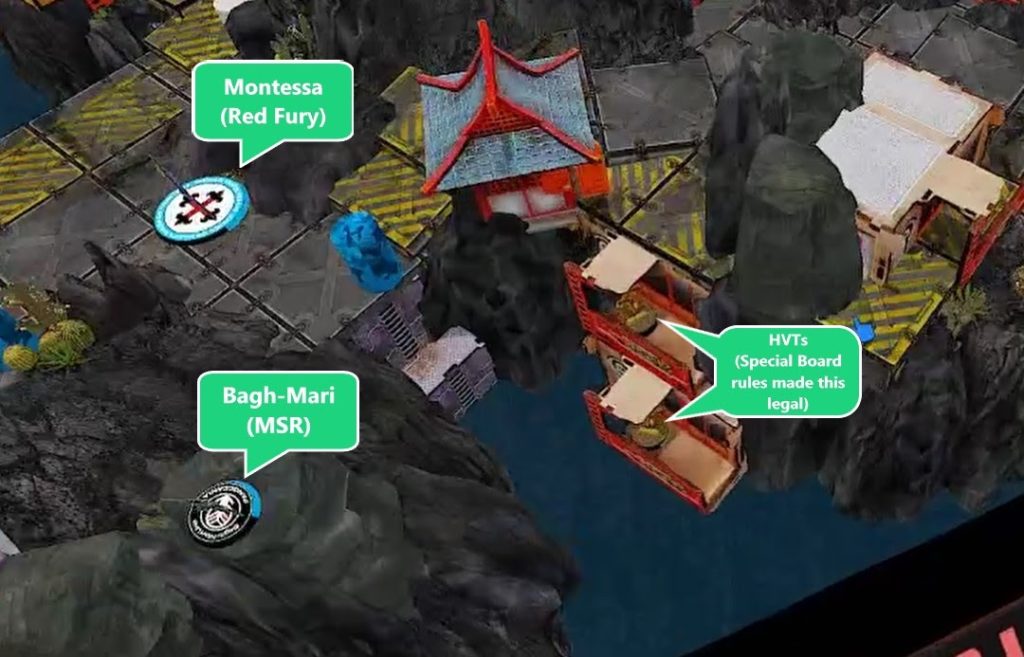
Both of his HVTs (designated targets) were deployed on his right behind a large rock wall.
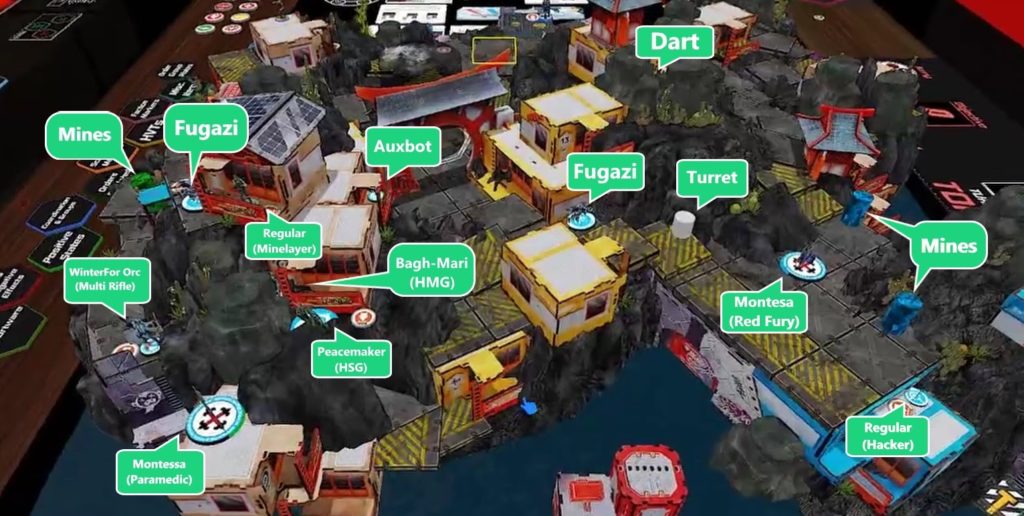
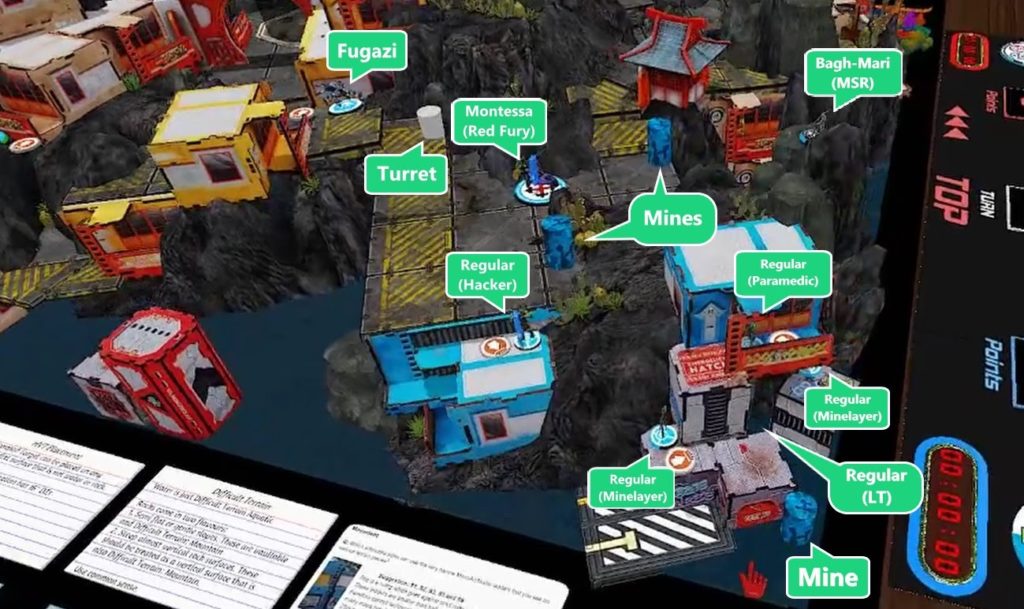
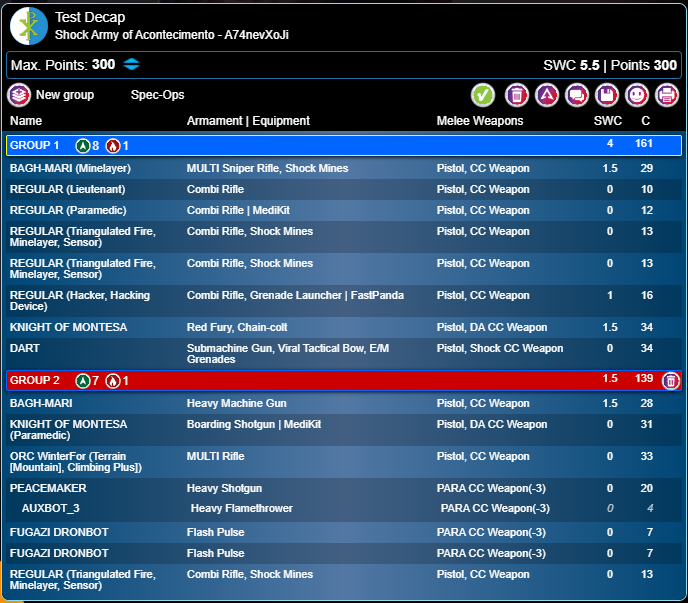
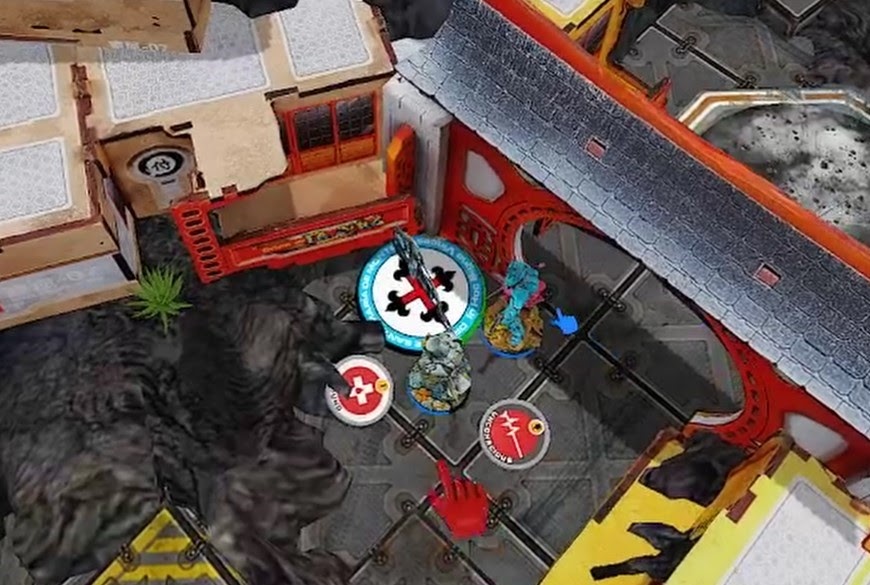
I quickly realized that because of the weird drop offs in both DZs my 2 Montessa would be hard to hide. I placed the Red Fury one up on my right to try and help slow the teutons, supported by my Bagh Mari sniper in his core team of regulars. The Paramedic Montessa was held back behind some rock on my left getting ready to zoom forward thanks to Total terrain. Near the 2nd Montessa I deployed my peacemaker with his auxbot a bit forward watching the gateway.
Mt Lt Regular was deployed hidden below a building in the water and guarded by a mine. Around him were 2 regular minelayers, a regular paramedic (one ladder climb away from seeing the Bagh Mari sniper), and a regular hacker. Another regular minelayer and his mine were deployed on my left flank to defend my left flank approach. Dart deployed prone up in some rocks near the centre of the board.
My two experimental takes were a Bagh-Mari HMG and a WinterFor Orc Multi Rifle, both of which I was running solo on my left flank. Normally I’d on run these models in at least a harris, but both can work as solo attack pieces as well, and their Terrain total and Mountain terrain would end up being a big boon on this map.
My HVTS were placed on my right on the two levels of the building being blocked by the balconies. Normally this would not be legal, but the rules for the table specified and flat surface that wasn’t rock or water.
Turn 1
Top of 1 – Military Orders: Fast Knights Push
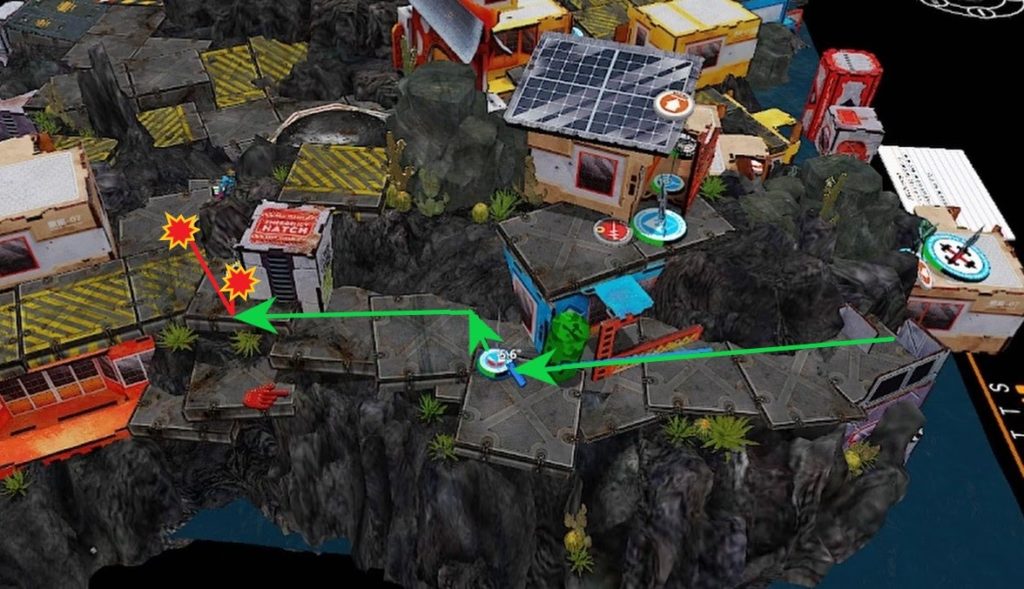
The two non-spitfire teutons took their impetuous movement and dodged the shots from the Bagh-Mari. The first one completely dodged the Bagh-Mari with a good roll. The second Teuton failed his dodge and the Bah-Mari managed to fail one of his shots (despite needing 18s) and the Teuton took a wound. This was the beginning of the Bagh-Mari’s failures.
The three Teutons then performed a coordinated order to take out the Bagh-Mari. Expecting death the Bagh-Mari tried to kill the full health Teuton, hoping the other panzerfaust would miss as well as the out of range spitfire who was on a -9. The opposed Teuton rolled and scored a 1. Looking for 18s it should have been easy for the Bagh-Mari to win…instead he rolled 2 20s and was vaporized by a panzerfaust.
The Spitfire NCO then took a number of orders battling it out against the red fury Montessa. Eventually the Montesa went down, and while the Teutons moved towards the HVTs he was put down for good.
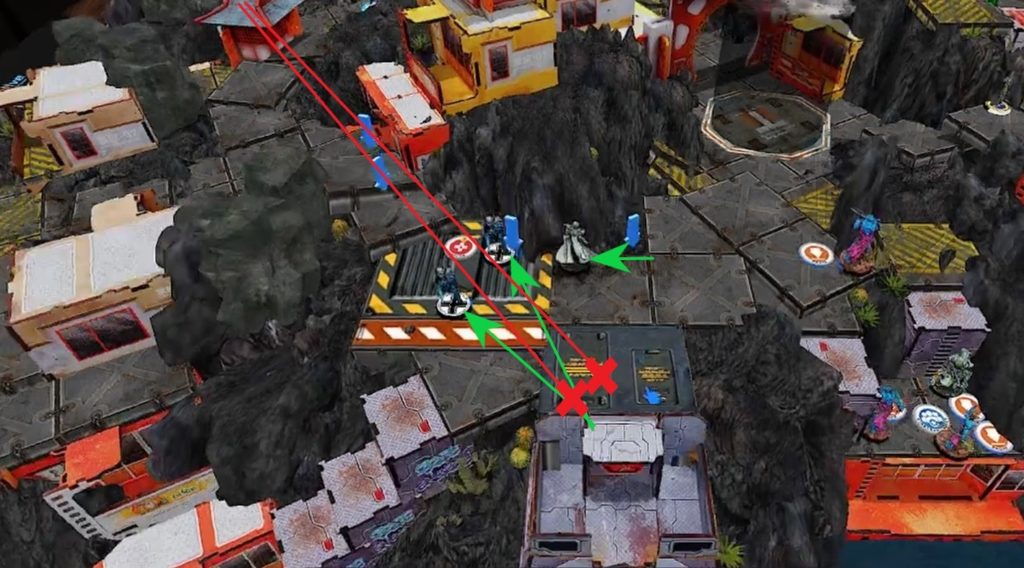
The wounded Teuton then moved up to kill one of the HVTs while going down to a mine. The other cheap Teuton then moved up and began climbing towards the last HVT (while finishing off the dead HVT. Thanks to some dodges the other HVT dodged to hide better.
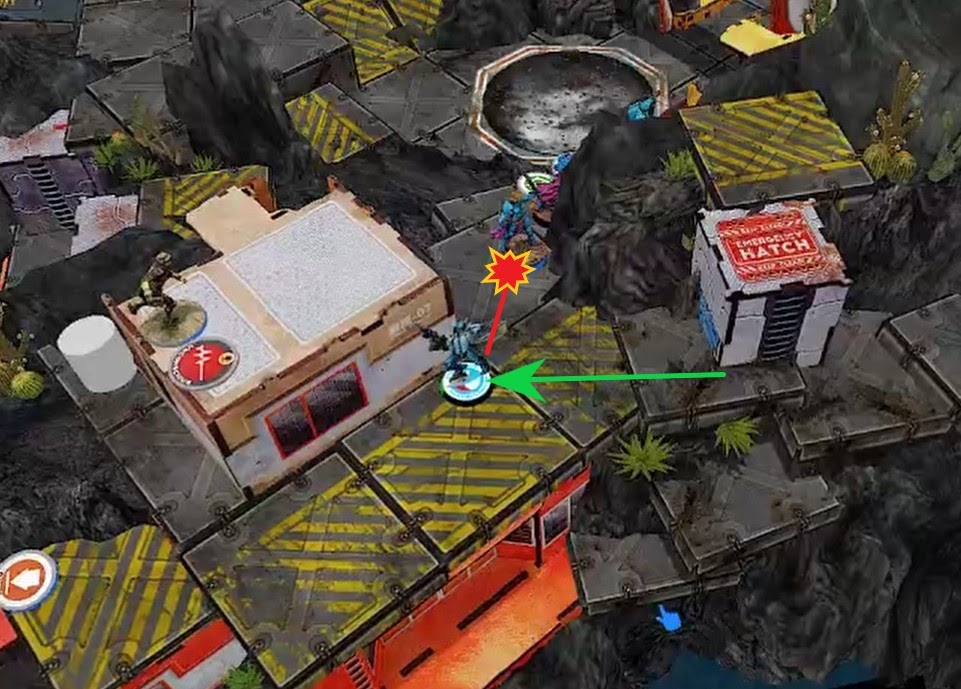
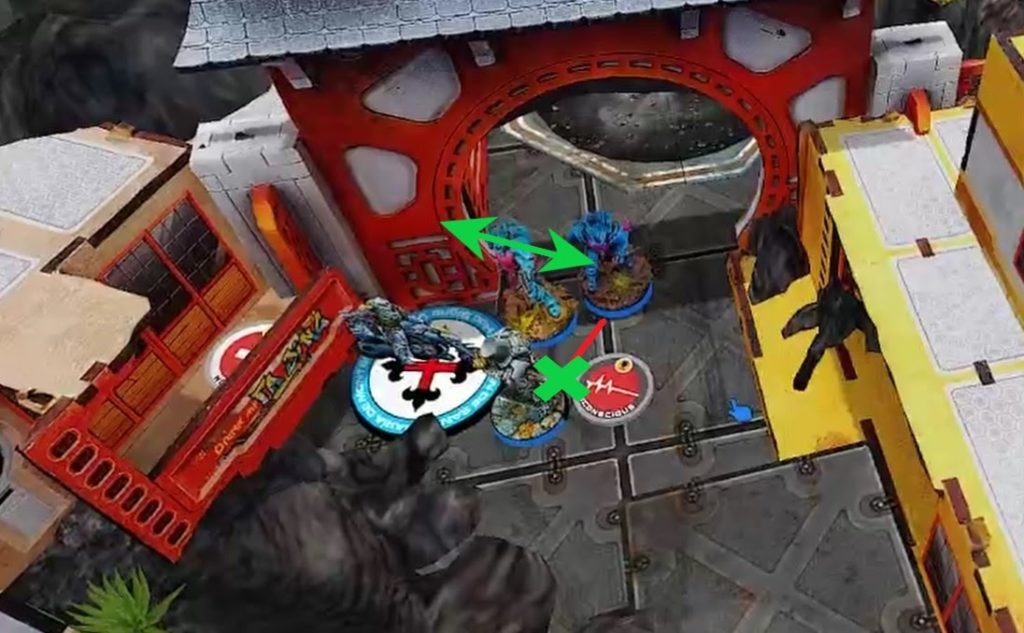
Finally, his Trinitarian sniper revealed and killed my Flashbot (he initially thought it was my Orc, but decided to go through with it anyways.
Bottom of 1 – Shock Army of Acontecimento: Halting the Advance
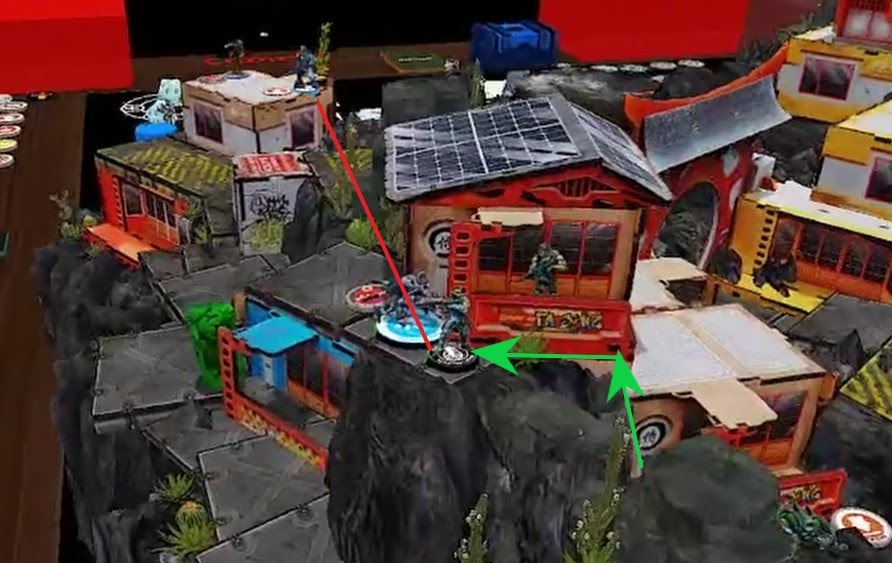
Dart moved forward behind the Teuton Spitfire and gunned him down from behind in one order thanks to the movement bonus from the terrain.
The Regular Paramedic then climbed up the building and fired down onto the remaining Teuton (supported to the reformed 5-man fireteam). The regular eliminated the Teuton free my HVTs up from immediate threat).
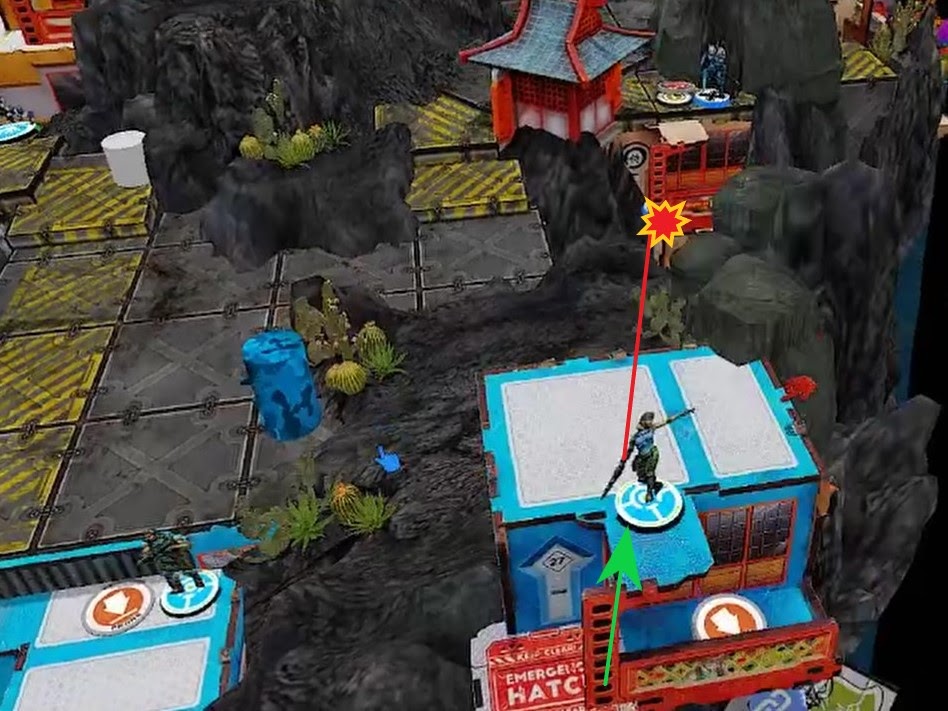
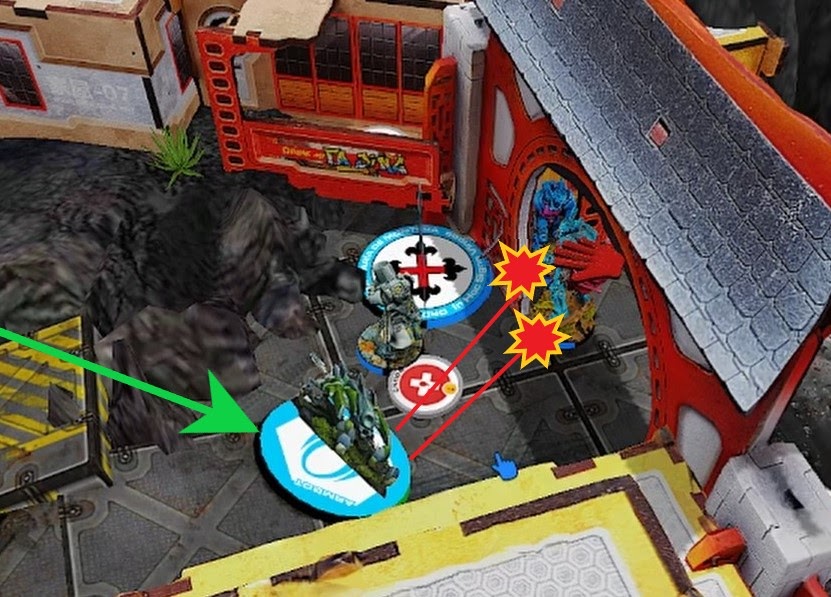
The Bagh-Mari HMG then began his attack. He ran through difficult terrain thanks to his terrain total and gunned down the Warcor, before gunning down the Trinitarian with a helpful Crit. He then attempted to take out the flashbot, but was stunned in the process.
Finally, the Montesaa paramedic dismounted and went prone beside his bike to try and keep him alive for the next turn. Sadly the double speedy boys wasn’t working out too well yet.
Turn 2
Top of 2 – Military Orders: Slow Knights Push
The slow Knights then began moving up on the right, but were hampered by the large amounts of difficult terrain. Eventually his core was able to move up and form a line along the rock wall on my opponent’s right flanks

The HMG Hospitalier was wounded while climbing up by a longshot from the paramedic regular who had been left standing. The HMG then moved forward taking on the Peacemaker’s auxbot, the fugazi, and the regular. In the end the auxbot, regular, and HMG went down (notably the HMG went all the way to dead.
Finally the Core team broke and entered suppression thanks to Joan’s free coordinated order.
Bottom of 2 – Shock Army of Acontecimento: The Orc Assassin Strikes
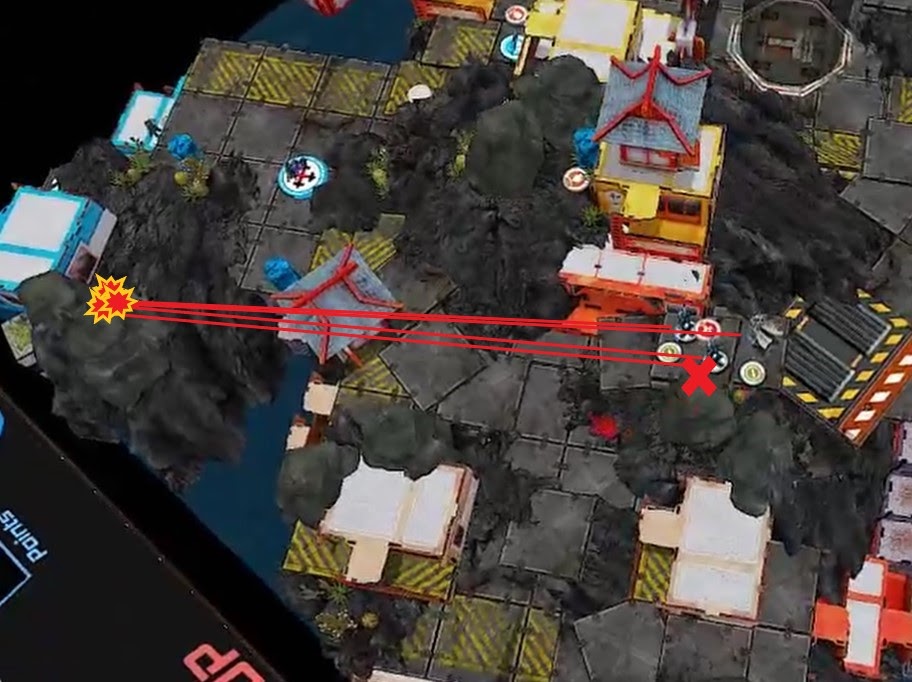
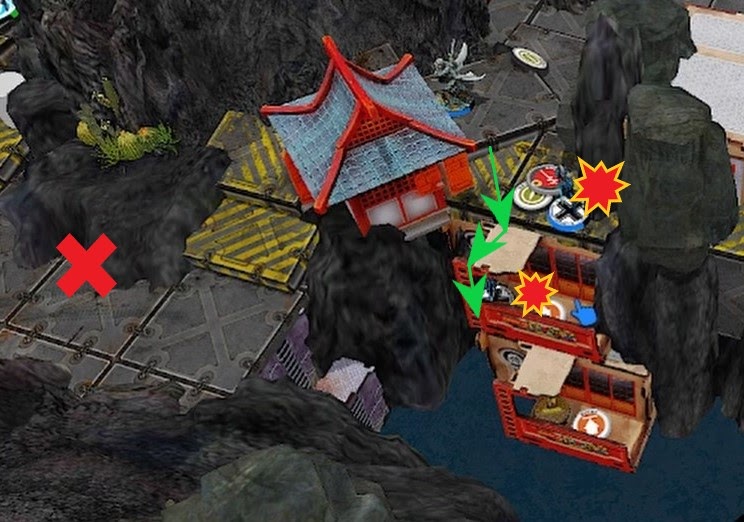
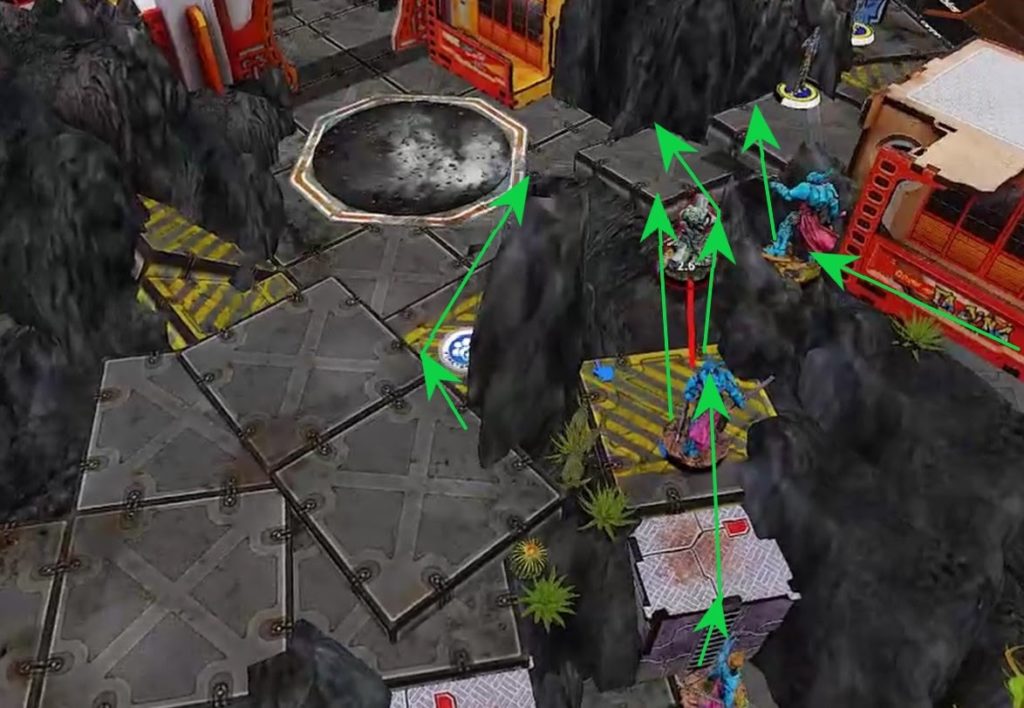
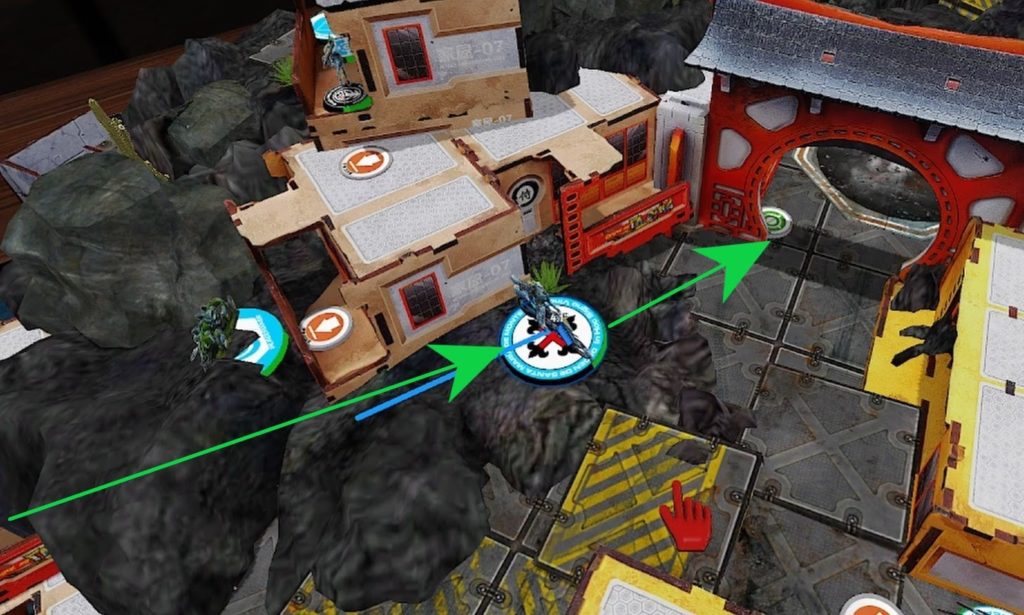
Seeing his opportunity to strike, the Orc Multi Rifle sprinted up my left flank towards the HVT. In the previous turn he had backed away getting a lucky shot off on the watching Fugazi. While advancing up the board the Orc made sure to just touch into the mountain terrain at the end of his order to get a speed boost for the next one. He quickly dashed up the board and gunned down both enemy HVTS.
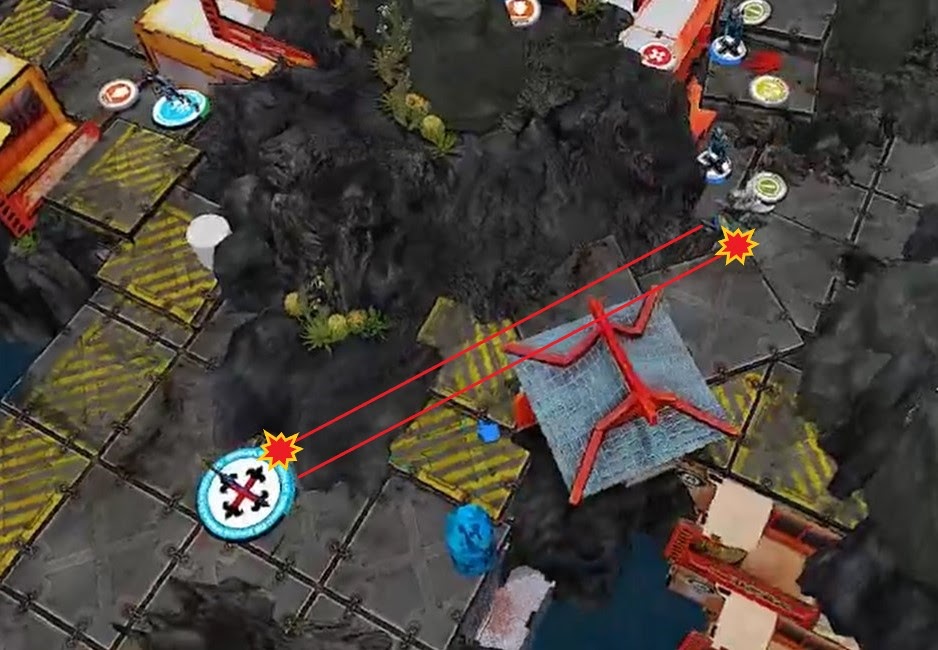
The Orc then darted across the gap and shot Joan. Despite hitting 3 times Joan passed all saves.
The remaining Montessa then remounted and zipped forward to engage the core team. After trading some ineffective shots he declared cc from out of line of sight to cause the knight to break suppression. The Montessa then reengaged…but was still ineffective.
Turn 3
Top of 3 – Military Orders: Hold the Line
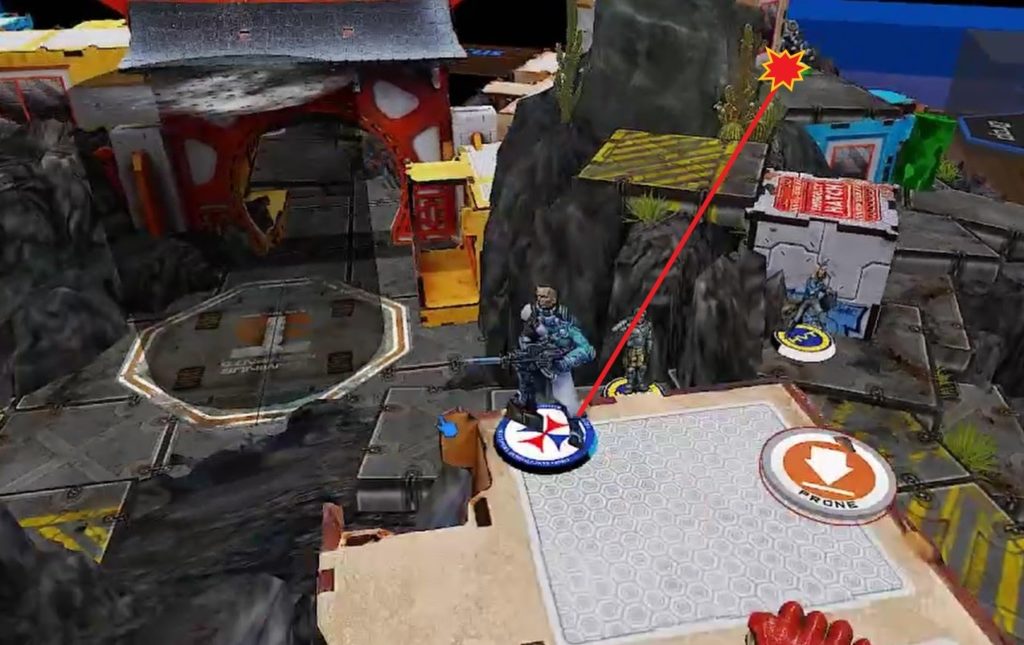
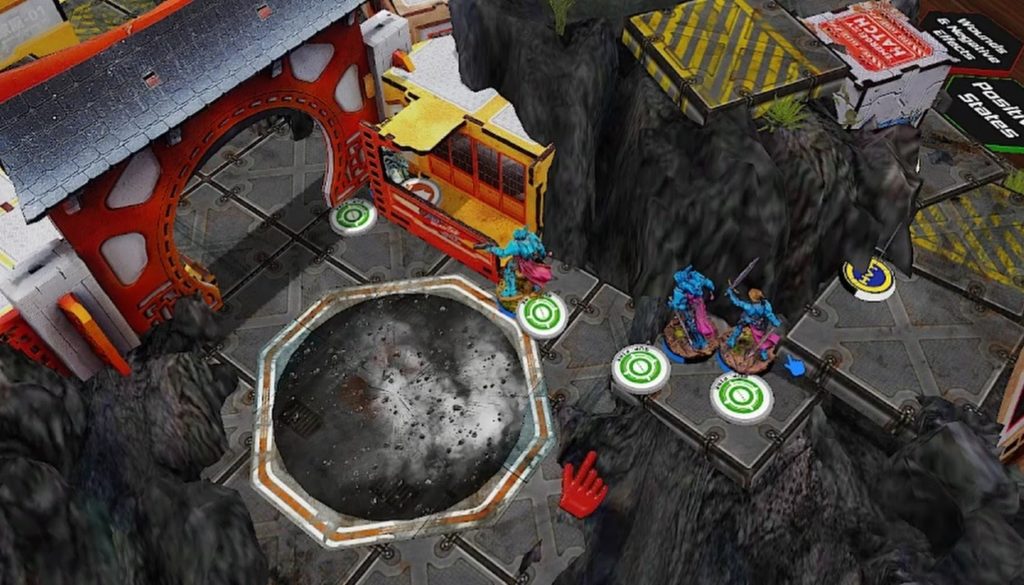
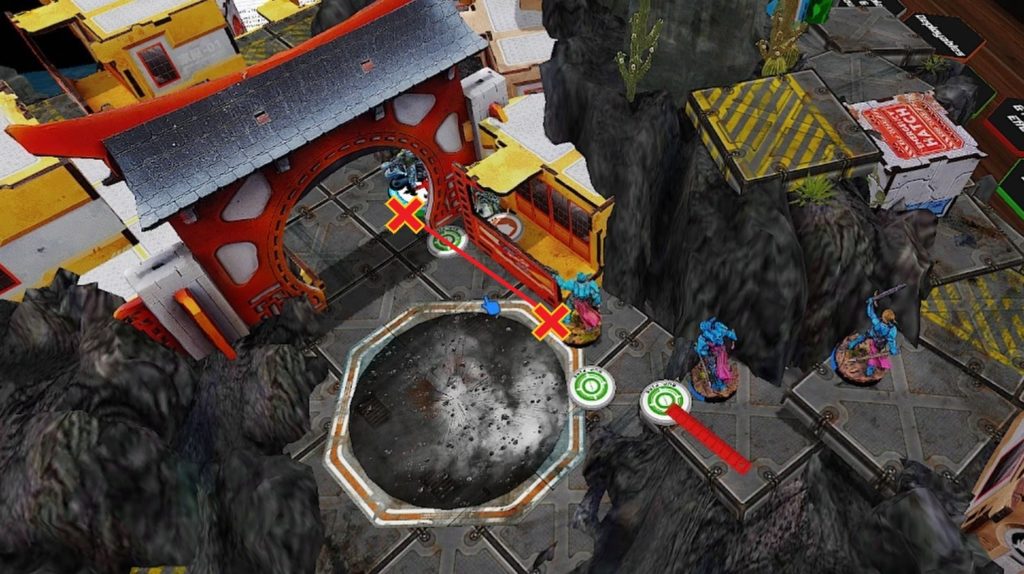
Joan started off by eliminating the Orc in cc (miraculously using two orders to do so). The other Knights then reformed their team and moved up on the Montessa that had pulled back. The Hospitalier and Santaigo moved to engage the Montessa on the same order, but the Montessa managed to win the roll and knock the Santiago unconscious.
The other doctor then moved up and healed the Santiago before retreating out of line of fire.
Bottom of 3 – Shock Army of Acontecimento: Safe Shots to Cement the Win
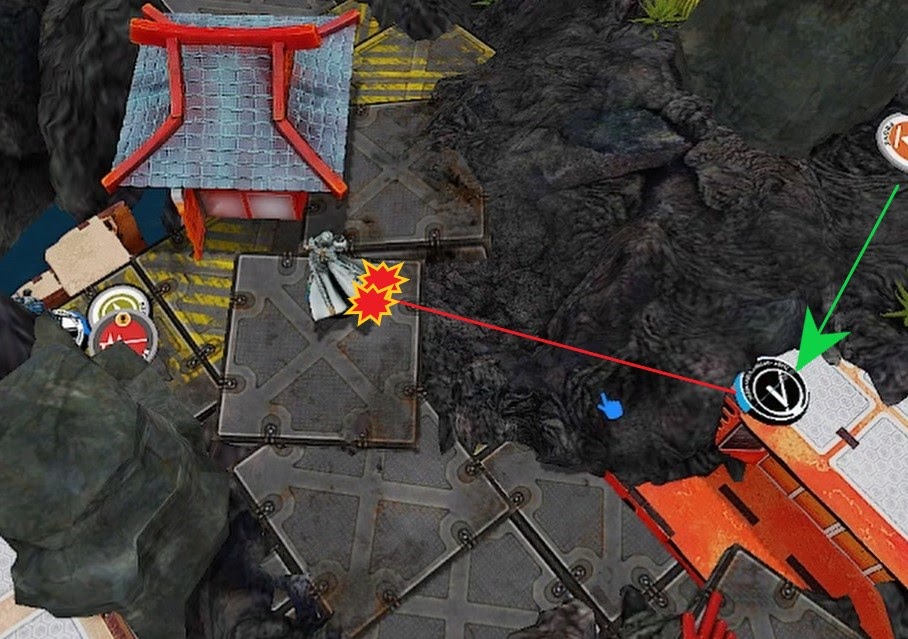
Estimating that points were close I didn’t want to risk too many things. The Bagh-Mari tried to take a shot at Joan, but after taking a hit she failed guts and went prone. Finally, the Peacemaker moved forward, while slowed by the terrain, and engaged the non-engaged Hospitalier. After successfully taking out the hospitalier I was comfortable that I had more army kills so ended the game.
Final Score
Shock Army of Acontecimento Victory (7-2)
Post-Game Analysis
Both the solo Bagh-Mari and solo Orc were key pieces in my victory. Their ability to quickly move around, unhampered by a fireteam, was essential for getting them in the right places at the right time. While an extra burst or some extra BS would have been nice, the ability to take advantage of their terrain skills was ultimately way more impactful.
I was a bit disappointed that I didn’t really get to use the Montessa to their fullest, thanks in large part to the lack of places to hide them in my DZ, and because the BSG went against heavy knights, which is not it’s best match-up. That being said, the ability to take cover definitely helped the red fury montessa last a lot longer, eating up a ton of orders and preventing my enemy from getting my second HVT.