Double Challenge Battle Report
By the Obyiscus
Overview
- Mission: Supplies
- Forces: O-12 vs Varuna Immediate Reaction Division (300)
- Deploy First: O-12
- First Turn: O-12
- Additional Challenge: While doing the Bromad Academy challenge I chose to also take on the Loss of Lieutenant 16-Inch Challenge (no guns with positive ranges over 16)
Lists:
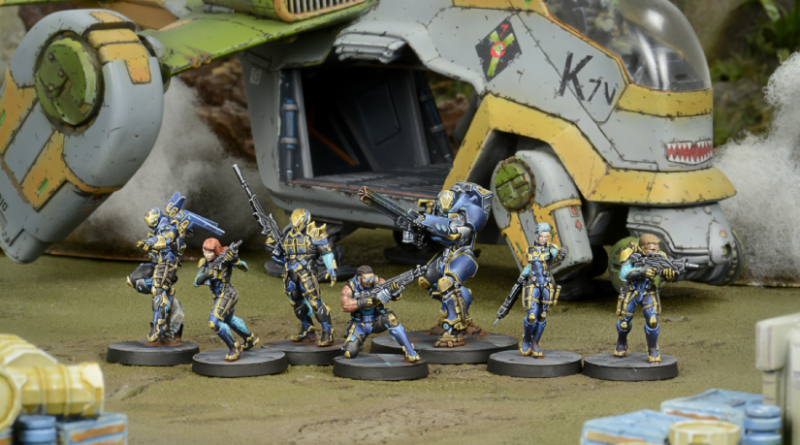
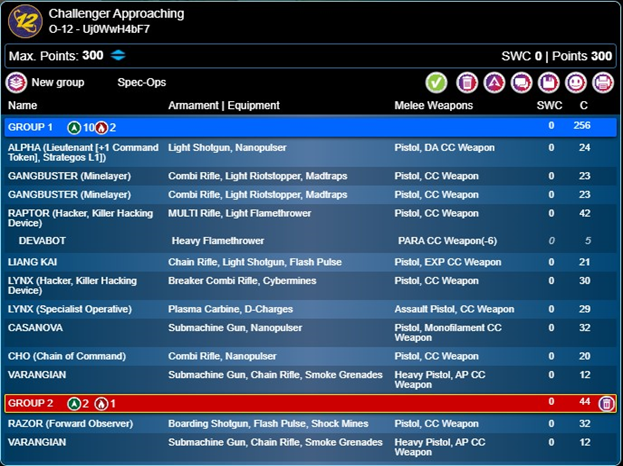
O-12 (Challenger Approaching):
Varuna Immediate Reaction Division (Snake eaters Supplies and Domination):

Deployment
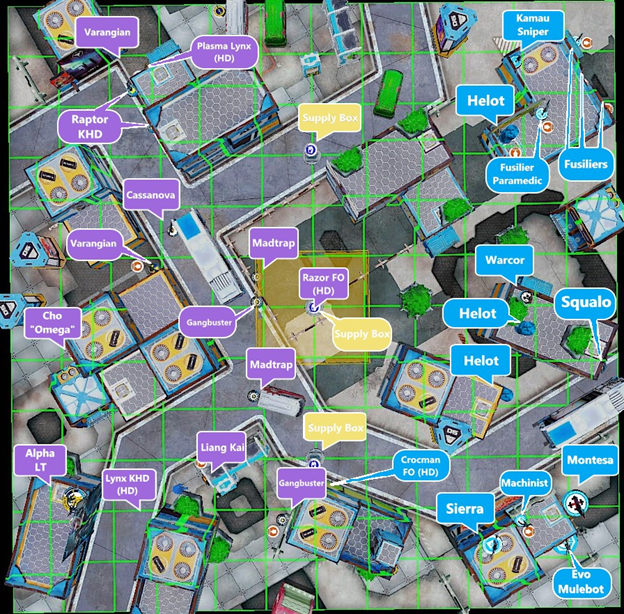
O-12 Deployment
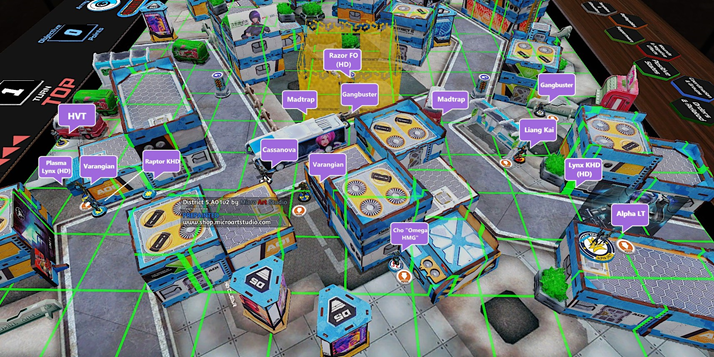
Knowing that I would be in for a severe range disadvantage as I had limited myself to weapons with a max positive range of 16” against a faction known for their powerful long range ARO sniper and annoying longer range neurocinetic fishmen, I made sure to set-up my models with as short of fire lanes as possible. With the objectives being in the middle and plenty of forward deployment/infiltration this was fairly easy to do. Wanting to counter deploy as much as possible I spent the bonus command token from the Alpha to hold an additional model back (still leaving 4 tokens for plenty of coordination). Coupled with Strategos, this allowed me to hold back 3 models (Casanova, Liang Kai, and the Raptor).
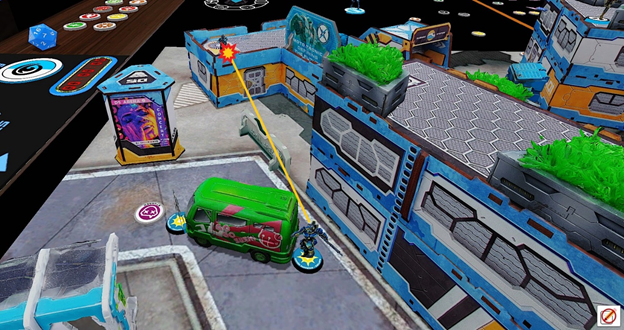
I started by setting up both gangbusters to defend the central and right supply boxes with the support of their deployed madtraps (with the intent of coordinating them and a mine carrying model in the first turn to further support the defence). Then central Gangbuster in particular had a good position, in cover just outside of the room with a clear line to the entire room should anyone enter. The 2 lynx were deployed on opposite side with the intent that they could run up and grab a box, or engage some threats. The Razor was deployed hidden just not touching the central box and in cover (with the goal of grabbing the box near the end of the game if the gangbuster adequately defended the room). The two varangian were deployed spread out to provide some smoke coverage to either flank. Cho was deployed as an Omega HMG back in my rear to make my opponent think I was holding back my big gun. The Alpha just hid at the back, hoping to hide and stay alive.
I deployed Casanova with about a 24” line past one side of the left supply box (near the kamau, but not where he would be able to easily move to), Liang Kai on the right flank to support the defence of the right hand box, and the raptor behind the large building on the left, preparing to advance up the board in impersonation state, maybe to take out the Kamau in close.
Varuna Deployment
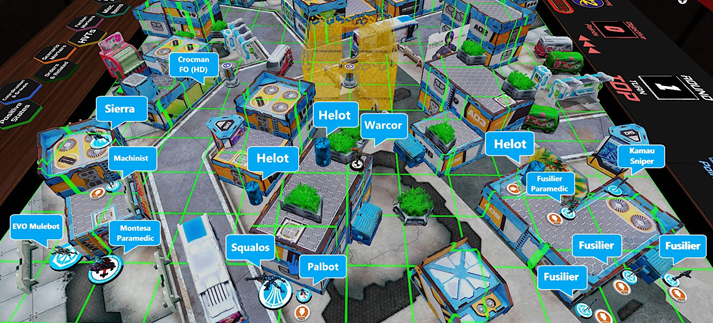
My opponent set-up his Sierra and Kamau led core team on opposing sides watching down the maps two long fire lanes (I expect intending to prevent me from easily grabbing the boxes). He then deployed his warcor and 3 helots watching various lanes, however, rather than watching the boxes these seemed to be deployed to protect against me moving in through the more crowded centre to kill his juicier targets. To support the Sierra’s flank he deployed a Montesa, ready to zip up his left to cause damage and grab the box. Also on the right flank he secretly hid a crocman FO just off of the box. Finally, he deployed his holdback, the Squalos. He seemed to be worried that I’d try a run at it in my first turn and deployed it hiding at the back.
Turn 1
Top of 1 – O-12: Set to Defend
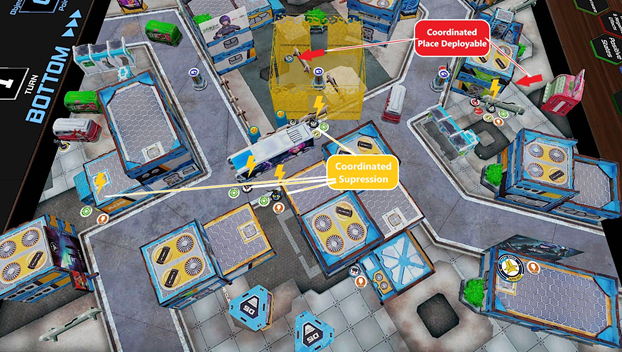
Turn 1 was relatively uneventful. The main event that happened was the Lynx KHD moved up to the corner of the building by the supply box intending to surprise shot the Sierra in its 0 range band. When it moved up the Crocman revealed itself to dodge while the Sierra discovered. The Lynx took its 3 shots in good range unopposed by the Sierra and missed every shot. Liang Kai activated and dealt with the Crocman. The Lynx activated again and engaged the Sierra, 3 shots on 13s vs 4 on 2s…and the Sierra crit. Starting to run low on orders and seeking to regroup, the O-12 forces began to position to defend. The Gangbusters and Liang Kai coordinated to reposition Liang Kai, and have the gangbusters place down their last madtraps on the second short skill. Next, the Raptor engaged his cybermask and then began proceeding up towards the middle. As a result of a delay, the Raptor was able to pass across the Kamau’s lane of fire. Finally, the 2nd group varangian suppressed (the far-left lightning bolt, incorrectly labeled as part of the coordinated order) followed by the Gangbusters, Casanova, and the other Varangian in a coordinated order.
O-12 ended their turn hoping that they had adequately set to defend.
Bottom of 1 – Varuna: The Cavalry Rides
On Varuna’s turn the Montesa rushed up the Varuna left flank and began to engage Liang Kai, the Gangbuster, and long-range suppression from the Varangian and Casanova. Miraculously the nobody dies in the engagement and only Liang Kai is wounded. The Montesa continued to drive by the O-12 forces with an eye on hunting the Alpha. After dismounting his bike out of line of fire of the O-12 force the Montesa climbed up the building where the Alpha was hiding. Rather than let the Montesa choose the engagement the Alpha dodge into cc with the Montesa as he dodged up the ladder. Unfortunately, the Montesa won the following close combat engagement and went down (secretly transferring leadership to Cho).
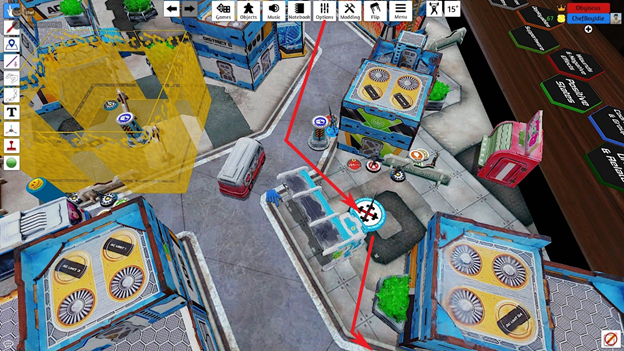
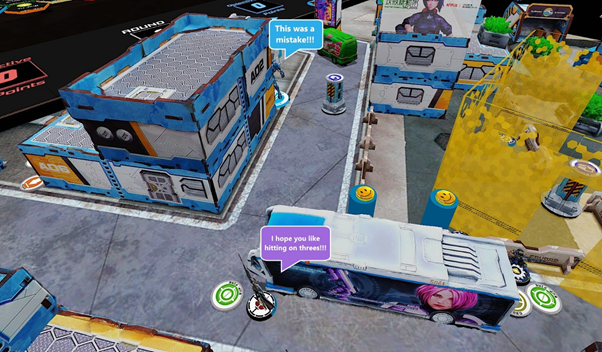
Varuna then engaged the Squalos. The Squalos moved across the Varuna rear and then up O-12’s left flank towards the supply box. Just before the supply box the Squalos cut across the street and engaged Casanova who was waiting in suppression. Very quickly the Squalos realized that it had made a mistake, as it engaged Casanova on -12s while he was sitting on 13s.
Finally, Varuna shuffled around some Helots and passed the turn.
Turn 2
Top of 2 – O-12: Not quite dead!
In this turn O-12 set about to remove the main threats, especially those long range AROs guarding the boxes on the flanks. First the right flank gangbuster moved up to engage the Sierra in close range (unfortunately it was just over 8”). Both models survived and O-12 changed focus to the other side of the board.
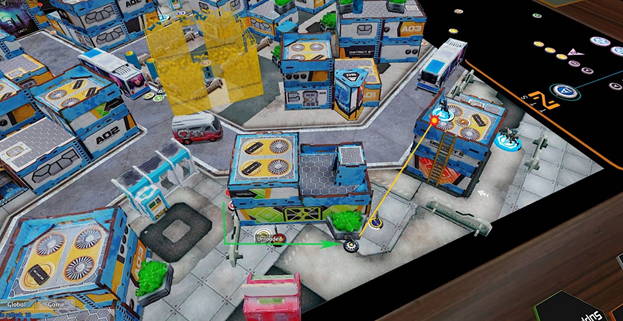
The Raptor and his Devabot than advanced down the road towards the Kamau, and past the Squalos. Varuna held, fearing a long-range shot, and the Raptor exploited this mistake. The Raptor advanced into the cover of the van Casanova had been watching. Now out of line of fire from the, and sent his bot forward. On the next order the bot ran forward as the Raptor swung out from cover to stare down the Kamau. The Kamau successfully dodged but was knocked unconscious from a round from the Raptor’s multi-rifle. The Raptor than called his bot back and turned his attention to the Squalos facing away from him. The Devabot pulled back to flame the Squalos (getting stunned in the process from a warcor), while the Raptor pumped the Squalos full of bullets. Between the AP rounds of the Raptor and the fire from the Devabot the Squalos went unconscious. The Raptor quickly ran up to coup de grace the unconscious TAG (completing O-12’s classified objective) before returning to the safety of the car.
Bottom of 2 – Varuna: I can do this all day!
Varuna started their second turn by activating the Fusilier paramedic prone near the Kamau revived the Kamau with a couple of medkits after a Helot failed to take out the Raptor in an active turn hail mary.
The Sierra now activated to take out the Gangbuster that had advanced on its position the previous turn. Luckily the Gangbuster returned the crit the Sierra had dealt to the Lynx earlier in the game and knocked the bot unconscious. The nearby machinist, hearing the Sierra go down, climbed up to its perch and revived it.
Not wanting to engage the Gangbuster again, Varuna switched focus and activated the Montesa. Over the course of a few orders the Montesa remounted his motorcycle and headed back towards the supply box. On his way, the Montesa took out Liang Kai, but failed again to take out the Gangbuster. The Montesa than moved into base to base with the unconscious Lynx and performed in extremis recovery (classified completed).
Turn 3
Top of 3 – O-12: Grab and Go
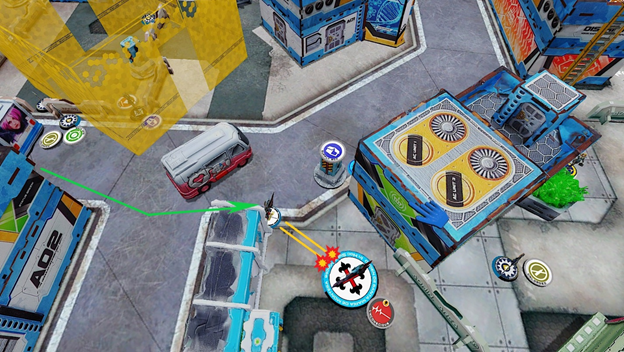
O-12 started by moving the group 2 Varangian and hidden Razor into group 1. The Raptor then activated and retreated behind the van, taking out the Kamau who returned fire but was taken out by a crit and then finished off with fire. The Raptor than retreated back up the street, grabbed the supply box and dove between two vans to hide out until the end of the game.
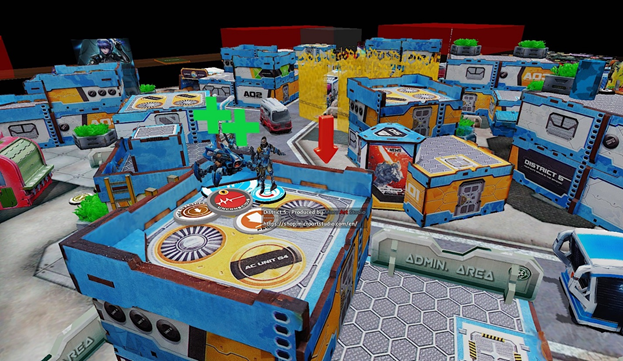
The razor then revealed itself, and grabbed the central box before retreating back slightly, staying prone behind cover.
The Gangbuster then retreated away from the reactivated Sierra and back towards the Montesa. With some luck the Gangbuster once again knocked the Sierra unconscious, clearing the way for Casanova to move on the Montesa. Casanova ran across the map to face down the Montesa in close range. Casanova won the engagement and knocked out the Montesa. Casanova then grabbed the final box and moved back into cover.
At the end of O-12’s turn 3 they held all 3 supply boxes and prepared for Varuna’s final push.
Bottom of 3 – Varuna: Last ditch efforts
The machinist once again repaired the Sierra, who then activated and took out the Razor hiding with the box in the objective room.
The Helot on the ground moved up to try and grab the box from inside the central room but was caught by the madtrap and immobilized. As a final last-ditch effort, the Sierra climbed down from its tower and rushed across the map, hoping to snatch the Razor’s box and take out Casanova. Unfortunately, by the time the Sierra was able to catch Casanova out of cover it was inside of 8”. Casanova took out the Sierra in reaction and Varuna conceded the game.
Final Score
O-12 Victory (9-1)
Post-Game Analysis
Overall, I think the game went very well. The pieces that had to go down went down, and the pieces I needed to survive survived (minus the Razor). Building the list with a mind towards coordinated orders worked very well for both O-12 and supplies. By focusing on troops with visibility mods, deployable and deployment skills, I was able to effectively set-up a strong short-range defense of the objectives on my first turn. This in turn led my opponent to take sub-optimal engagements (i.e. the Squalo) or to over extend into my back line in order to get around my suppressive line.
The Raptor continued to prove itself to be an amazing and versatile piece. In particular, the ability to cybermask allows you to get it up the board where you need it (which was crucial given my self-imposed 16” restriction). Casanova also proved himself to me as a very good tool, providing a solid close in gunfighter, cc threat, and specialist. I don’t know if I’d use him often in Vanilla O-12, but his midfield capabilities may prove very useful in Starmada. Bringing Cho was crucial and saved me from loss of lieutenant when my obvious lieutenant died.
Having a variety of annoying to shift suppressors, as well as solid selection of models to place deployables (unfortunately the KHD Lynx never had the chance to place her Cybermine) allowed me to efficiently set-up a solid defence in my first turn against any attempt to grab the boxes. While I was at a significant range disadvantage (having limited myself to 16-inch guns), by just focussing on the mission and trying to efficiently set-up a close-in defence with coordinated orders, I was able to force my opponent to come to me, or to avoid getting the objective all together.
Pingback: Reporte De Batalla Infinity N4: Doble Desafío O-12 Vs Varuna (Batrep) • WARGARAGE