Three the Tohaa!!!
By the Obyiscus
Overview
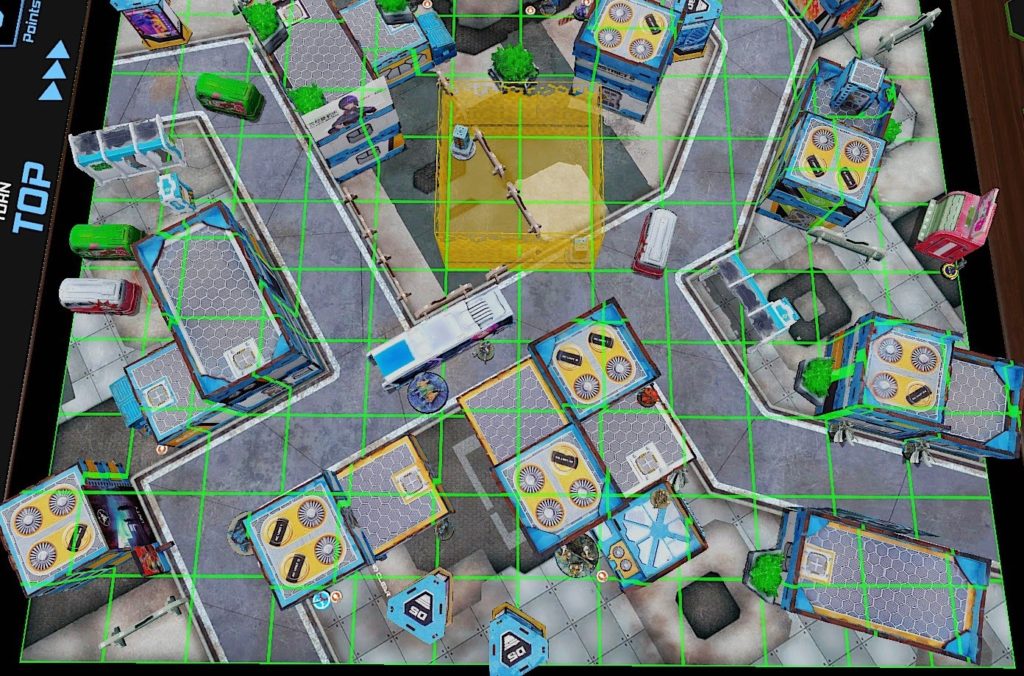
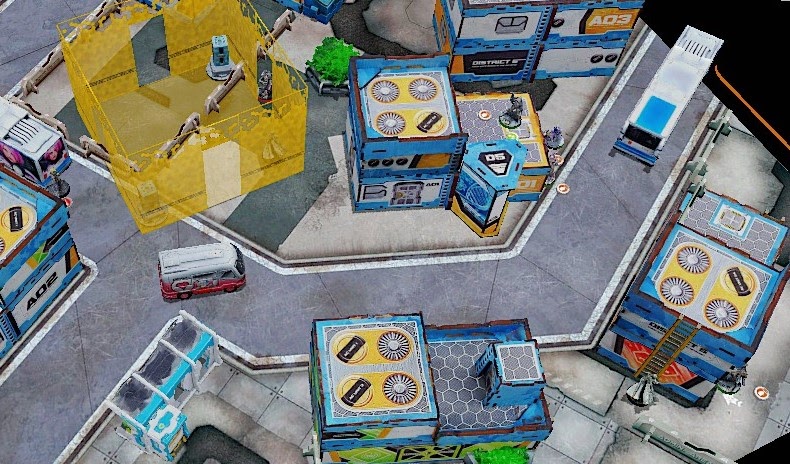
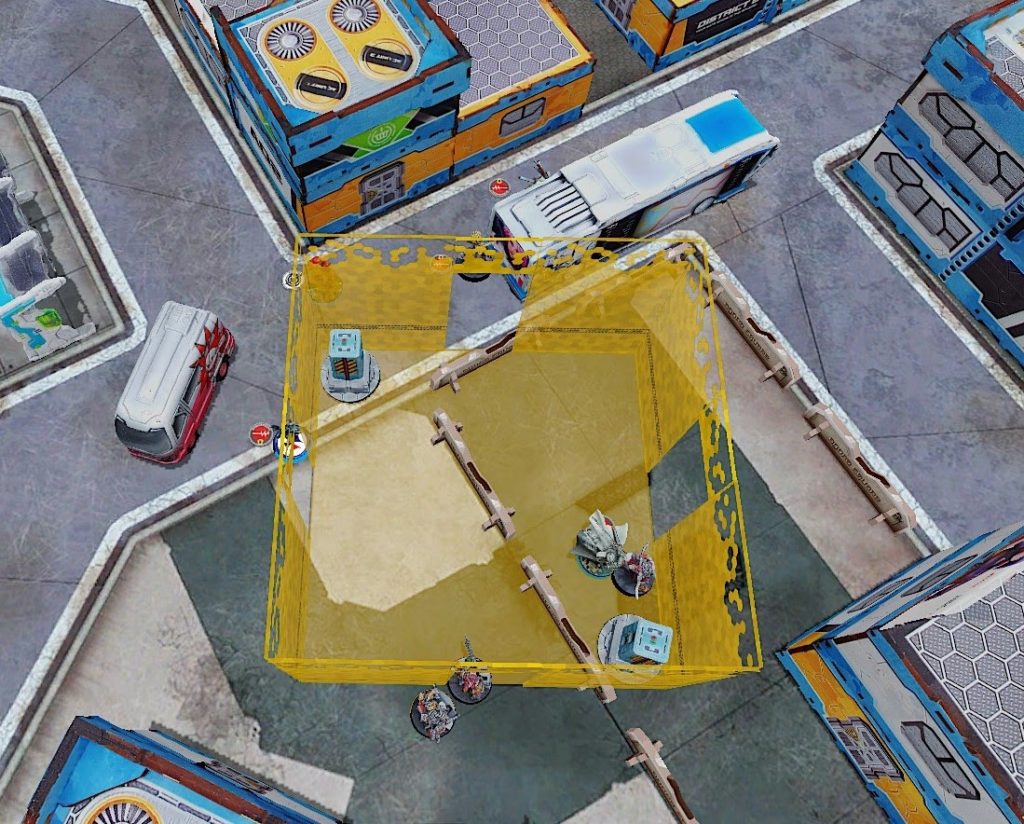
- Mission: The Armory
- Forces: Tohaa vs Military Orders
- Deploy First: Military Orders
- First Turn: Tohaa
Video Link: https://www.youtube.com/watch?v=KLFY-sgOpOY
Lists:
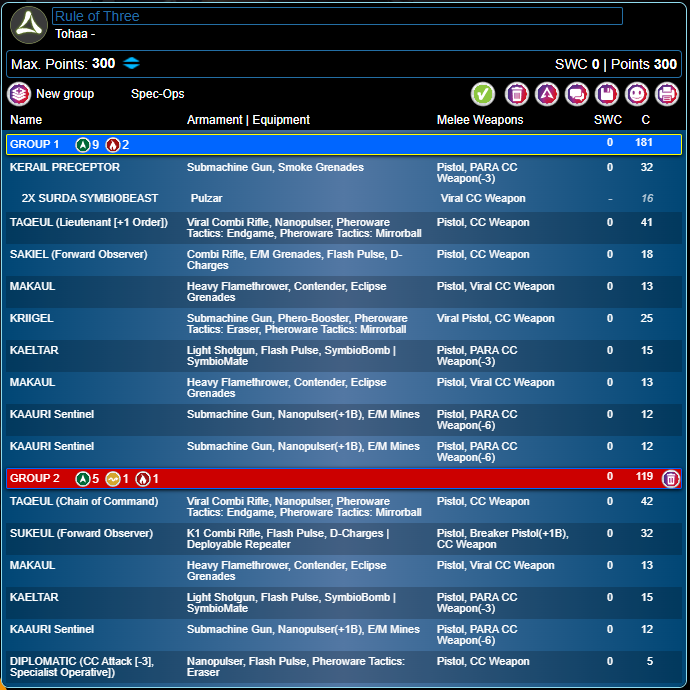
Tohaa (Rule of Three):
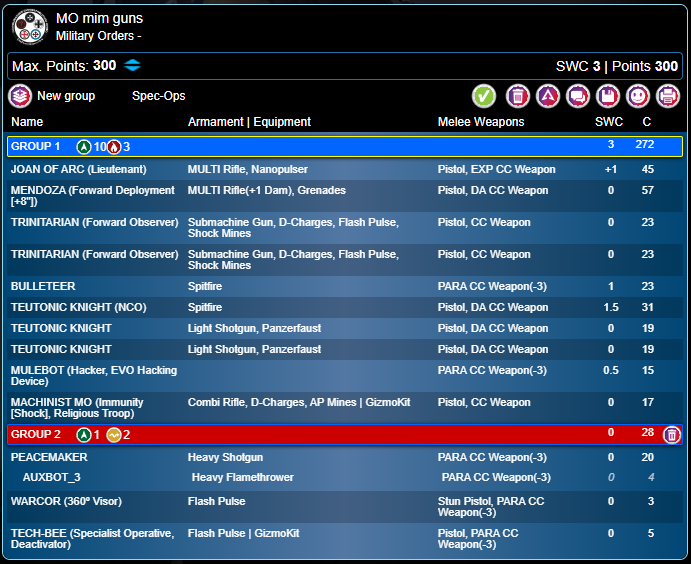
Military Orders (MO mim guns):
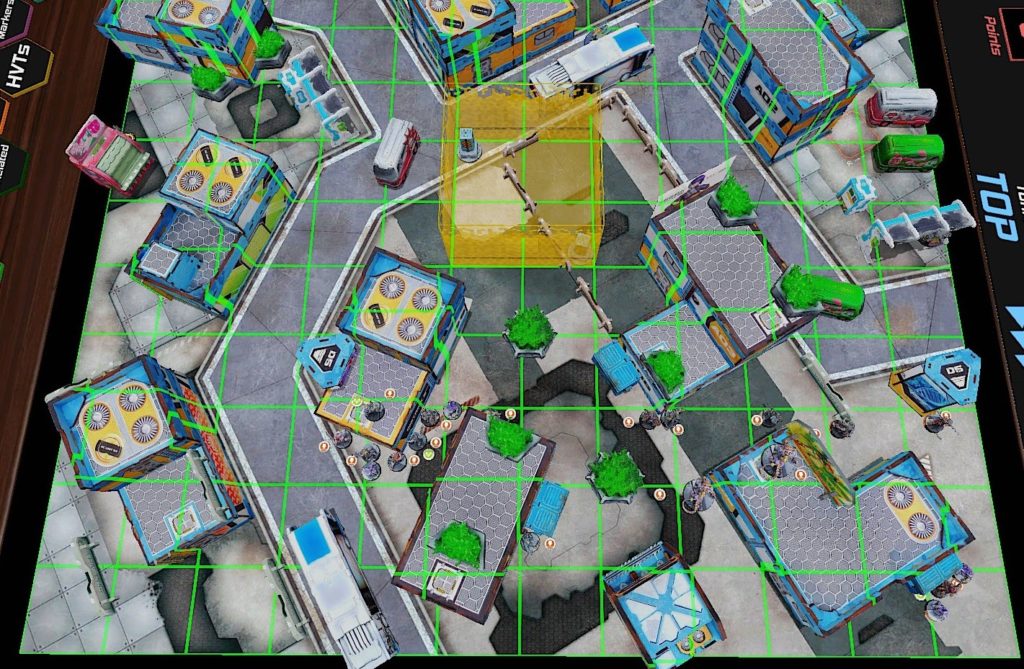
Deployment
Military Orders Deployment:
My opponent won the Lt roll and chose to go second giving me first turn and second deployment. He deployed his Peacemaker and bot up towards the room behind a central bus (but would later come to regret not facing the peacemaker across the bus). Joan was deployed tucked behind a dumpster on my opponent’s left flank with the Bulleteer on the nearby corner.
My opponent deployed his tech-bee and engineer hiding behind the building that the Peacemaker and Bulleteer were on either side of. The Evo Hacker was deployed near to the engineers waiting for the first turn to apply fairy dust to the HI to hinder my pheroware or to put marksmanship on the Bulleteer. On the nearby building my opponent deployed his Warcor on ARO duty, and his holdback (Mendoza).
The final visible models were his 3 Teutons who were deployed on his right flank, hidden. For some reason he chose not to fireteam them. He wanted to impetuous them first turn, but in my mind you may as well start them in a fireteam in case they have an aro engagement that would justify shooting.
Finally, he deployed two Trinitarians in hidden deployment, one along the bus, and one at the bottom of the ladder Mendoza was on top of.
Tohaa Deployment
I began by deploying my Kaauris (although I regretted upgrading all my Chaksa when I realized sensor would have been nice with his obvious missing points). One was deployed on my far left behind the tall building one was deployed centrally to move up and mine the room, and one was deployed more towards the right flank to possibly make a run at E/Ming Joan.
My first Triad of Taquel Lt, Sakiel, and Makaul was deployed on the corner of the forward building in my DZ with an aim to move towards and into the room. The second group 1 teams was deployed on the same corner with the Kriigel prone on the roof. My Diplomatic Delegate was deployed centrally in a position invisible to the other side of the table with the plan to use her irregular order to move up and cover the room with her pheroware (possibly spending an order form group 2 to open the room).
My group 2 Triad was deployed on my right flank with the K1 Sukeul further back as the K1 and Mimetism was the scariest gun I had.
My holdback was the Preceptor who deployed on my right flank considering a push up the flank with one Surda on the roof ready to Super-Jump down.
My Lt and Sukeul got a mate, the Sukeul got a bomb, and the Sakiel got a bomb.
Turn 1
Top of 1 – Tohaa: Release the Hounds!
Rather than strip orders my opponent chose to suppress with Mendoza seeing that I didn’t have a gun with a good range better than 16 and nothing with MSV 2. I began by moving the Delegate up to the room as I had planned.
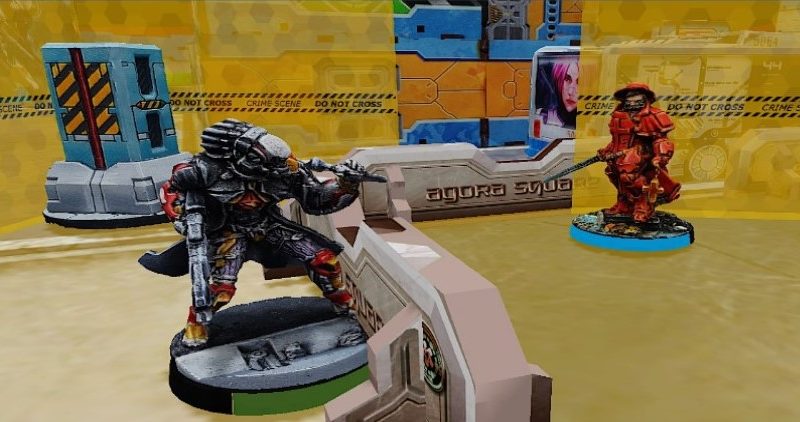
I then began what would be the bulk of my turn, a heavy push with the Preceptor. I realized that I would have a hard time defending the room itself so decided to do my best to cripple my opponent (I initially didn’t even plan to open the doors turn 1). My Preceptor quickly dashed up the right flank uncontested. First one of his Preceptors saw the Bulleteer and took it out with a Pulsar with the Bulleteer missing it’s return shot. This was where my opponent and I realized that the Peacemaker had his back to my approach. I pushed to shoot it in the back with the beast pack but unfortunately it and the flamerbot survived and turned to stare at the team. I then realized that the HSG on the Peacemaker was a big problem (I was forgetting how well Surdas dodge).
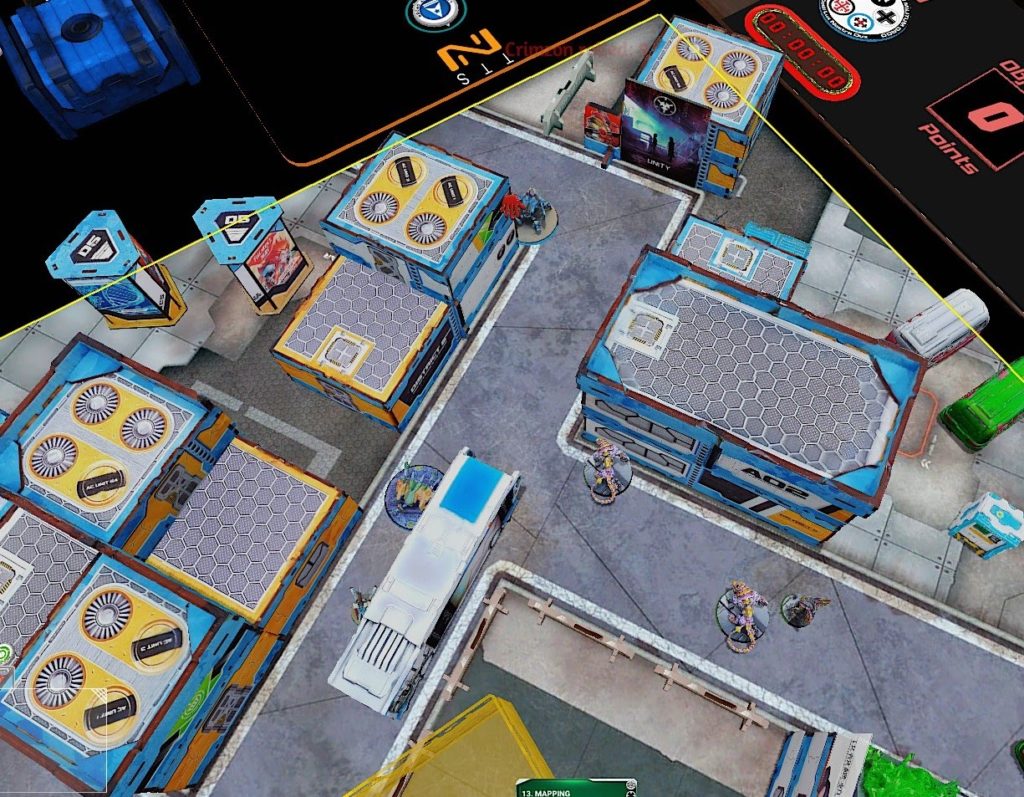
Recognizing the value of the Preceptor’s push I decided to try and trade the Delegate in it’s place. To that end I had the Delegate open the Armory door and move up through to the other side. On the way I took the chance to Eraser Mendoza, and succeeded first try (my opponent chose to trust his BTS and remain in suppression). The Delegate moved up and nanopulsared the Peacemaker team, but ended up dying only taking out the flamerbot.
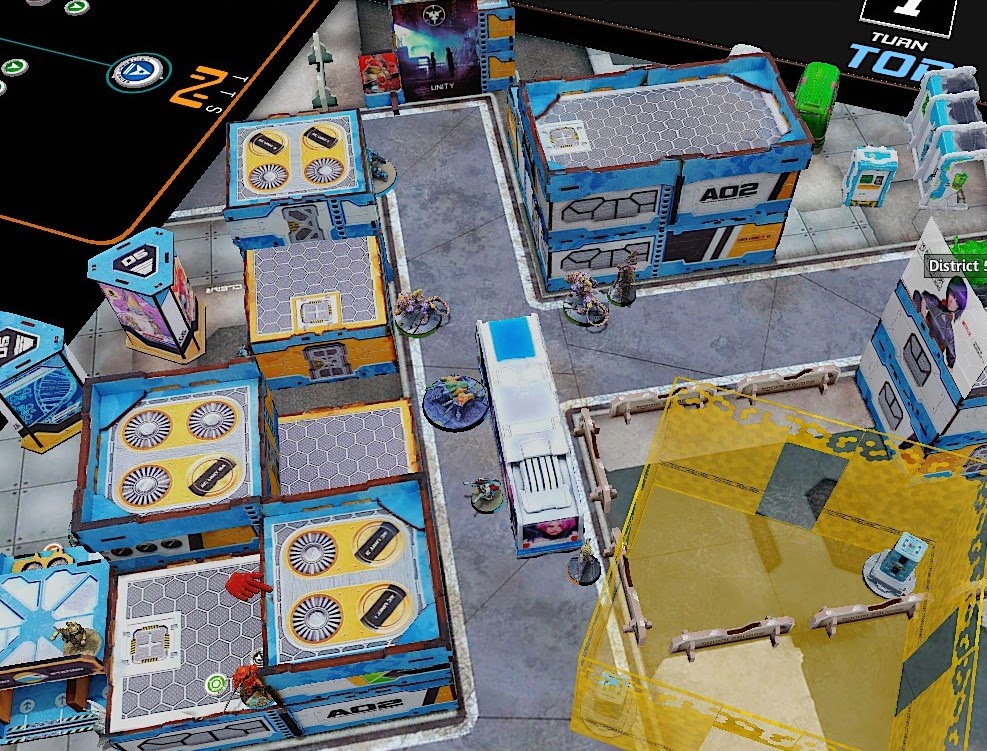
I went back to the Preceptor team and moved up again, my opponent templated all 3 members of the team, at which point I remembered how good I was at dodging. Between successful dodges and passed saves the whole team made it through unscathed and the Peacemaker ended up engaged. With the Peacemaker gone the hounds were released and over the rest of the order pool pushed up and took out the Tech-Bee, Evohacker, Machinist, and Warcor. In return only one Surda beast went unconscious.
Since the door was open, I chose to spend my Lt orders moving the Taquel up and into the room. I left him prone behind a barrier within a 2” dodge or guts to get out of the room.
Bottom of 1 – Military Orders: Trying to Hitback
My opponent began his turn down 7 orders, plus the 2 in hidden deployment. He used the impetuous on the Spitfire Teuton and one LSG Teuton to move up toward the room and my forces. On the way the Spitfire took shots at my Taquel in the room. The Taquel tried to mirrorball but failed, lost his mate and failed guts to leave the room. Continuing up the board, including using Joan’s coordinated order the LSG Teuton headed towards the room while the Spitfire moved up to put fire across into my fireteam. Luckily for me on his way to attack the bulk of my forces the Spitfire was stunned. Meanwhile the LSG moved up into the room and engaged Taquel who unfortunately failed the Endgame on the way in.
Meanwhile the third Teuton has been moving back towards my Preceptor (he used some coordinated orders). The Preceptor and Teuton danced around each other and in the end the Teuton took a wound and I lost a Surda. I would later learn this got him one of his Predator kills. The other Teuton then activated on his last order to try and kill my Lt (and get another predator kill). Expecting my Taquel to be dead either way I shot into the combat with my two Makaul. In a hilarious turn of events my Taquel tanked every save from the Teuton’s sword but was killed by friendly fire when all 3 shots fired by the Makauls missed and hit him. We later forgot that I hadn’t died in cc and thought my opponent had succeeded on Predator, unfortunately the Makauls did the killing.
At the end of the turn my opponent scored for holding the room.
Turn 2
Top of 2 – Tohaa: Nothing too exciting…
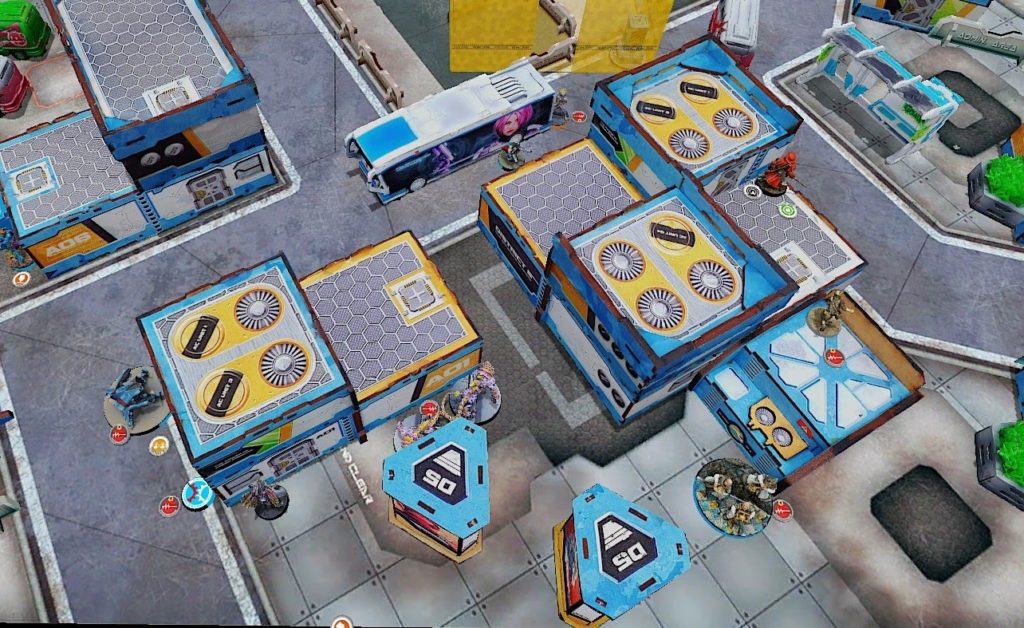
To start I moved my group two fireteam up and into the room, after gunning down the Teutonic Knight standing in the doorway (and having my left flank Kaauri gun down the Spitfire Teuton). With my last couple of Group 2 orders I had my team try and grab some items from the Panoply (hoping to maybe get a bigger gun). The only model that succeded at grabbing an item was the Taquel who rolled Mim-6.
The rest of my turn was the Preceptor dancing around trying to kill the last Teuton. I foolishly moved toward Mendoza expecting to easily kill the Teuton, but with some high dodges and terrible shooting on my part I ended up getting the Preceptor killed without doing any further damage.
Bottom of 2 – Military Orders: Send in the second wave!
My opponent decided to try and push forward to get me out of the room for a second turn in a row. He threw his Teuton up towards the room and dodged to get a view on my Sukeul, Taquel, and Makaul. He then activated a hidden Trinitarian who moved up to try and pincer my Triad. He then coordinated with the Teuton and Trinitarian forcing me to decide where to hold and where to shoot. With my Taquel hidden from the trinitarian and able to tank a single wound from a LSG template I chose to hold with him against the camo marker (Trinitarian) while the Makaul flamed the Teuton and the Sakiel also held against the Trinitarian. The Teuton shot the Sakiel and Taquel (stripping only the mate off the Sakiel but no wounds on either). Unfortunately I was equally unsuccessful, and the two endgames into the trinitarian and 2 flamethrowers (because pheroware is BS attack for some reason so didn’t break the Triad when the Makaul shot and the others used pheroware [in hindsight symbiobomb is actually it’s own skill so would have broke the team]) into the Teuton did nothing.
Hungry for Predator (thinking he already had 2 kills because of the weird death of the first Taquel) at this point and was going for the 3rd for a bonus point the, Teuton moved into engagement with the Makaul. The Makaul happy for cc attacked with his viral CCW while the other team members broke out of the team and dodged. The Teuton quickly realized his mistake and was sliced down by the CC monster that is the Makaul. Looking to salvage something the Trinitarian again activated and tried to fight the Sakiel. The shootout was inconclusive with nor harm done, but by breaking stealth the Trinitarian triggered the Taquel’s endgame and had his brain exploded. My opponent then moved Mendoza up towards the room, hoping to get him in turn 3 or sooner with dodges.
At the end of the turn I held the room.
Turn 3
Top of 3 – Tohaa: Bring it Home!
My turn was essentially spent trying to deal with Mendoza. I kept failing to kill with Endgame as he dodged closer. I then had to bring up a reserve Makaul to smoke out the room to prevent a flaming grenade killing everyone in the room. Eventually after stink bombs (pheroware) had failed I was able to finally take Mendoza out on the final order of my turn by engaging him with a Makaul after allowing Mendoza to dodge into my Taquel who was out of orders.
Bottom of 3 – Military Orders: Accepting Defeat
With only Joan left alive and a hidden Trinitarian left my opponent chose to concede (retreat and 0 remaining command tokens left him nothing to do.
Final Score
Tohaa Victory (7-2)
Post-Game Analysis
I really enjoyed being limited by SWC and burst. It forced me to really think about how to approach encounters and gave me a good excuse to try out the Preceptor, which I’ve meant to try for awhile. Tohaa overall is pretty well equipped for this challenge given their abundant fireteams for that 4th burst, and love of solid 0 swc weapons like K1 combis, viral combis, and pheroware. This is further helped by the abundance of eclipse smoke provided by the amazing Makauls and pheroware.
I did luck out that we randomly rolled The Armory as out mission as it force my opponent to get in close, but even without the mission I was able to easily close the distance with the Preceptor (it is shockingly fast and dodges extremely wells). I will definitely have to paint up my Preceptor and get him on the table more often.
Pingback: Mission 040 Report: Rule of Threes – Bromad Academy