New Fireteams Battle Report
By Obyiscus
Overview
- Mission: Annihilation
- Forces: StarCo vs Military Orders (300)
- Deploy First: Military Orders
- First Turn: Military Orders
Lists
Deployment
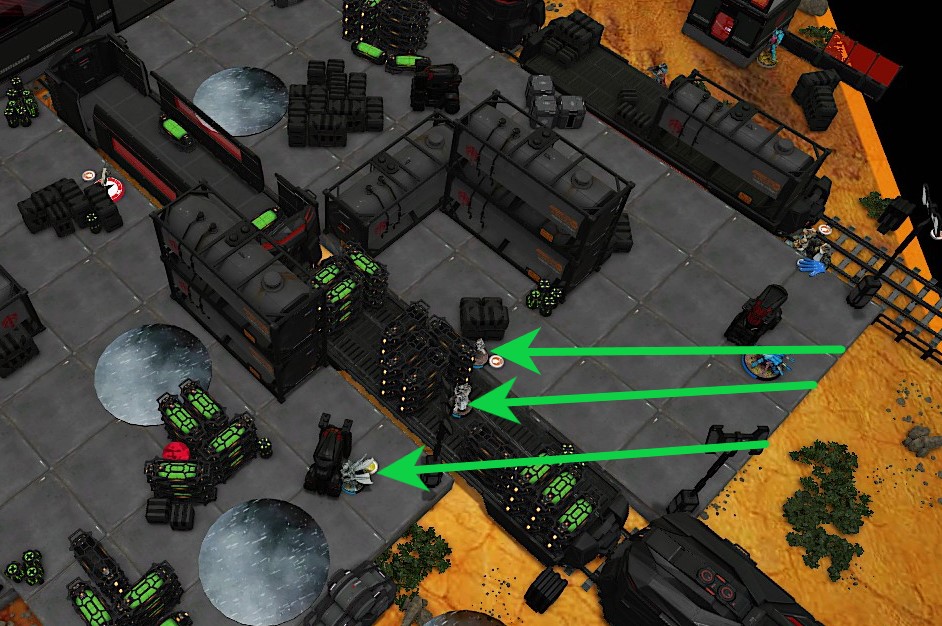
Military Orders Deployment
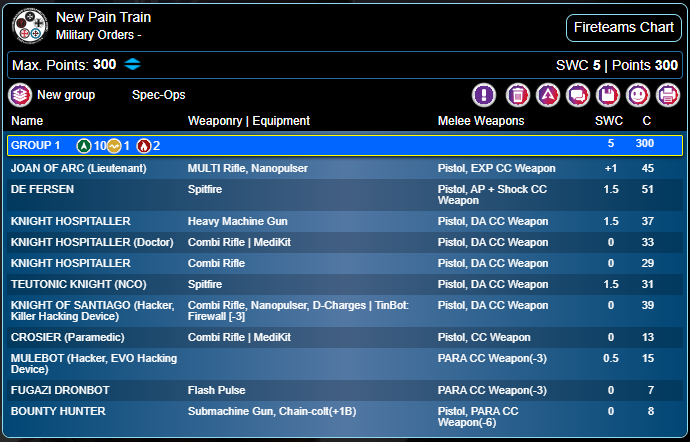
My opponent deployed his “pain train” on his right flank largely hidden, although I had a few shots I could set-up if I dared. His EVO was set-up hidden at the back where it could hide all game with the fugazi nearby providing some ARO. Finally he deployed his harris of Teuton NCO Spitfire, Santiago KHD, and Crozier paramedic ready to move up his left flank. His holdback was his MBH that was deployed on his right behind a wall.
This list was definitely a product of the fireteam changes. Prior to the changes the Santiago would be in the Core team in order to provide a tinbot and KHD (my opponent did usually run De Fersen before). He chose to continue with the pain train, now with De Fersen figuring that with the relative max number of others going down, having a team with BS 17/18 would be able to power through. The EVO was included to get that firewall back. The Harris took advantage of the new ability to combine Croziers and Teutons to cheapen the team, and to get that Santiago into the list (to join the Core should the need arise). My opponent was disappointed to not have his normal 3 teuton harris, but I was happy as coordinating the spitfire and 2 panzerfausts has made me suffer on numerous occasions.

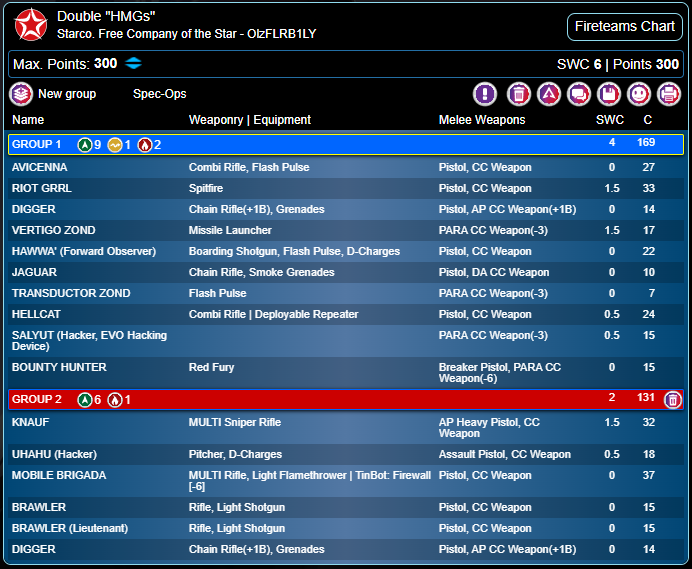
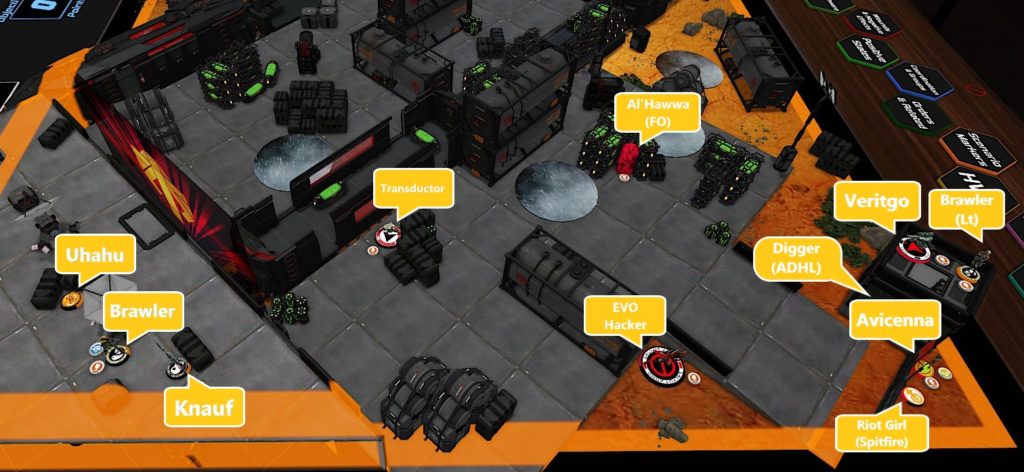
StarCo Deployment
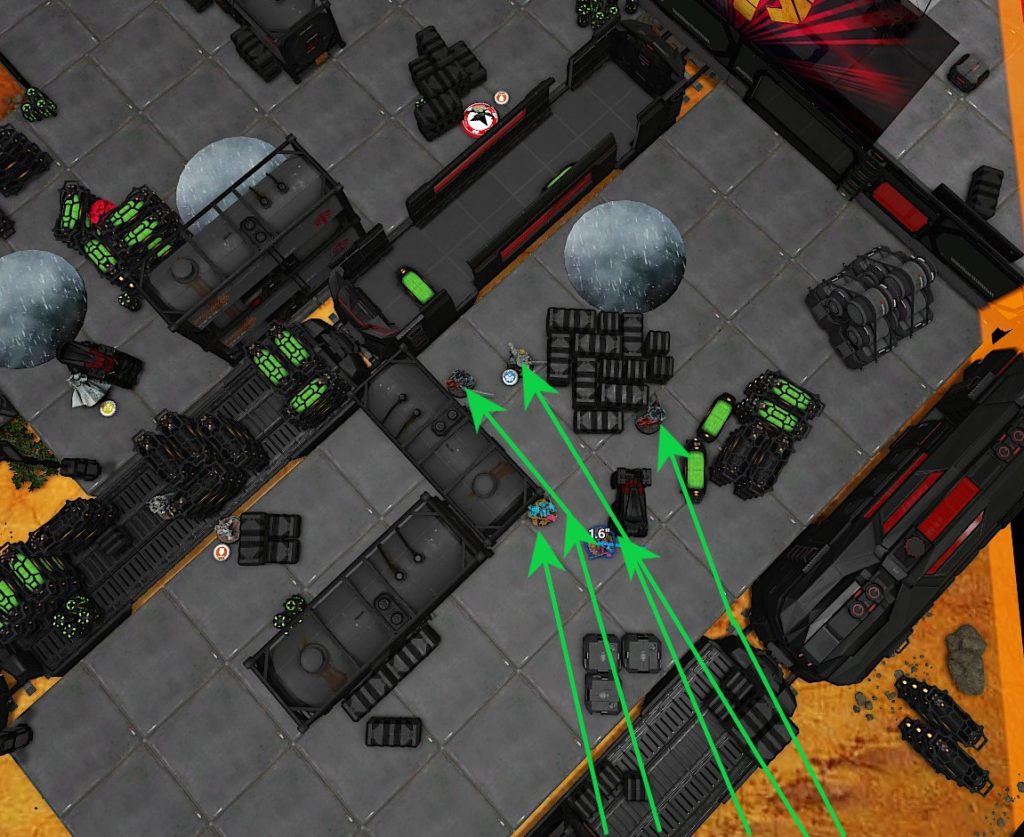
I responded by deploying my Core and Harris to try and draw my opponent into a “killbox” (the area on my left beyond the train and visible from the left of the poster, the doorway below, and the train). I thought about deploying Knauf to see the Hospitalier Dr who was not quite hidden enough, but I didn’t want to get in a reactive fight with him if possible given his sweet burst 4 in active (something I wanted to get to try). So I deployed the core largely defensive with the Knauf, Brawler (fake lt), and Uhahu hidden on the roof (Knauf could see a longer line past the train to watch the Teuton’s advance). The digger and Mobile Brigada were deployed below where they could provide some support should my opponent advance through the building. To provide further support I put the Jaguar down below, and hid my MBH behind the wall (the only place she could really hide). I then deployed my EVO hacker hiding around the middle, and placed my Flashbot forward to provide a hacking zone over part of the “killbox”. My harris was place on my right flank with the Riot Girl watching part of where the Teuton could advance, as well as the train door the pain train could use to leave the “killbox”. Avicenna deployed prone near the riot girl ready to heal her up, with the attached digger hiding in the nearby building. Finally, my missile bot and Lt hid on top of the roof of the small building the digger was hiding in.
My list was very much inspired by the cool new changes to StarCo, and certain podcasters hating on StarCo post changes. The first thing I wanted to try was a linked Knauf. With the changes I believe Knauf remains an active piece that doesn’t want to be tied down to a core team. That being said there is nothing wrong with starting him in a team to get the extra BS and sixth sense (just be prepared and willing to drop him out as he goes). Knowing I was going to start him in a core I knew I wanted Uhahu to join him. The question then became how to fill it out. Seeing how my pts were going elsewhere I realized I could get a tinbot brigade into the team to support Uhahu (eventually settling in the Multi Rifle for his ability to do some active shooting in the 8-16 band, Knauf’s 1 not good band). The brawler and digger were perfect cheap fillers for the team, providing a decoy lt and a cheap trading troop that would be happy to go on his own should Knauf advance away with Uhahu and the Brigada in tow. The other team, Avicenna + Riot Girl Spitfire + Digger began as nice compact duo of Avicenna and Riot Girl (I believe I stole it from Kevin). Then as my list evolved I realized I could just throw a cheap wildcard digger into the team to get the extra burst (and again a troop happy to run off on his own and trade should the need arise). The ability to wildcard two diggers is a super handy addition to StarCo’s fireteams.
Turn 1
Top of 1 – Military Orders: Advancing the Knights
My opponent’s turn was very much spent moving up and trying to position for his turn 2. He began by moving up the Teuton’s harris using the Lt order, just to have it position better for following turns (I believe he was afraid to push more because he didn’t want to engage Knauf with link bonuses at long range).
He then threw up fairydust to help protect his pain train, and began to move them up the board. As I expected he advanced them right into the “killbox”. He even moved into the repeater range of the flahsbot on a second move with De Fersen, but sadly Uhahu failed to isolate him.
My opponent then spent the rest of hid orders engaging Uhahu in a hack-off. Both De Fersen and Uhahu were looking for 11s, 3 vs 1 dice. Despite winning the fight once or twice, Uhahu failed to isolate De Fersen. In return, Uhahu was able to save against De Fersen’s attacks in the end only taking one wound. On the last order Uhahu changed her tactics and tried to spotlight De Fersen, but sadly failed.
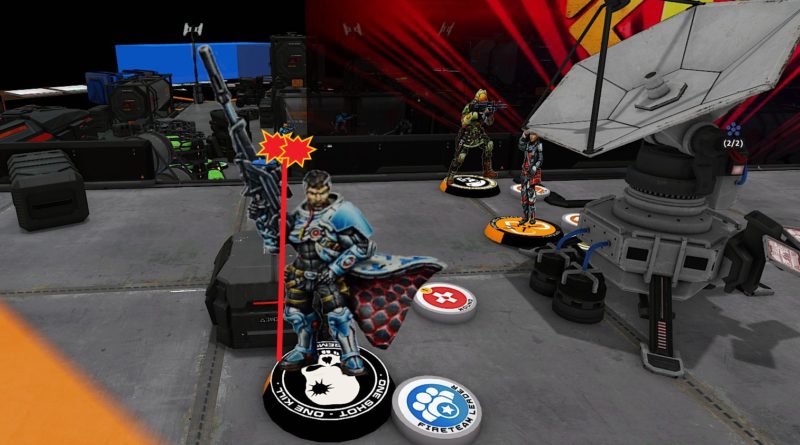
Bottom of 1 – StarCo: You’ve just activated my trap card!
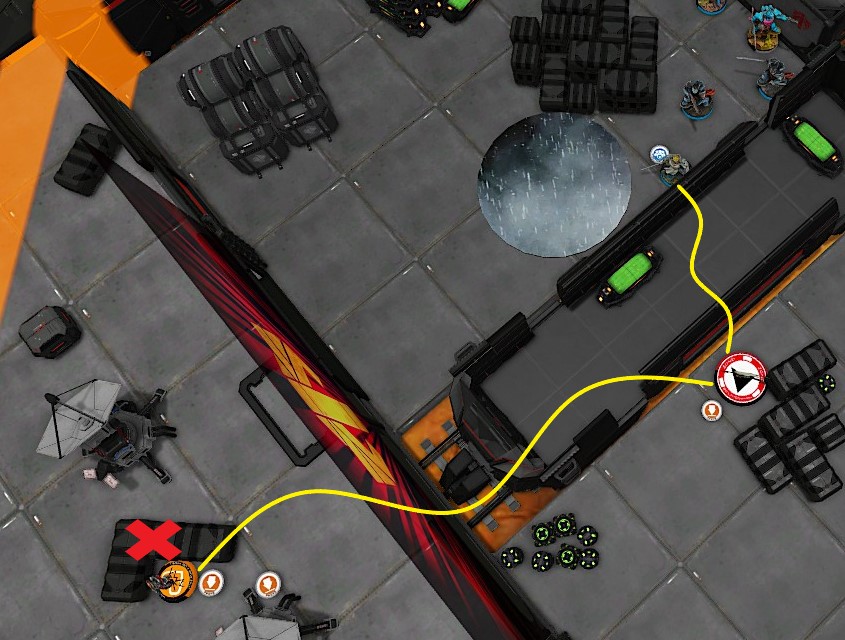
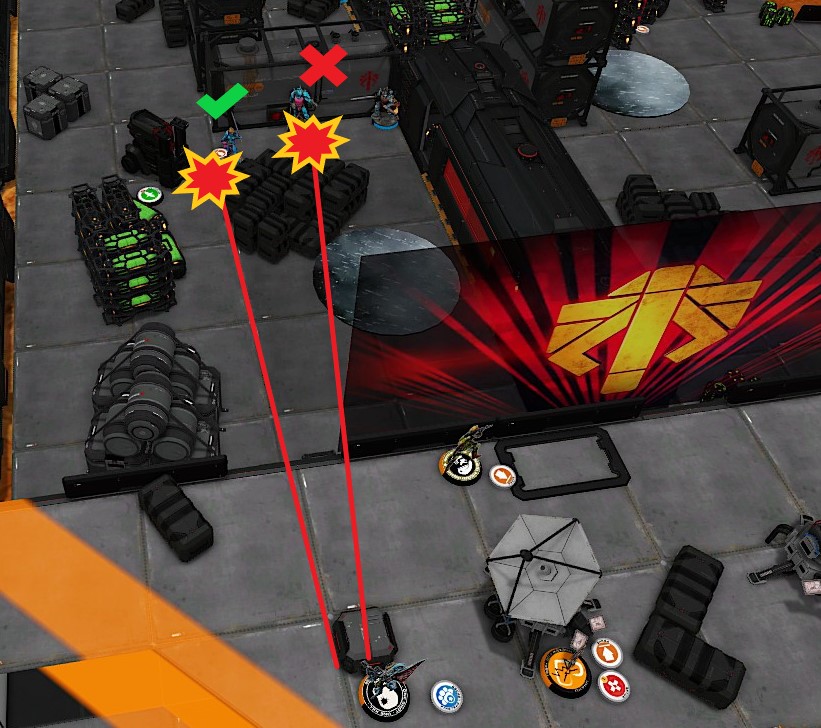
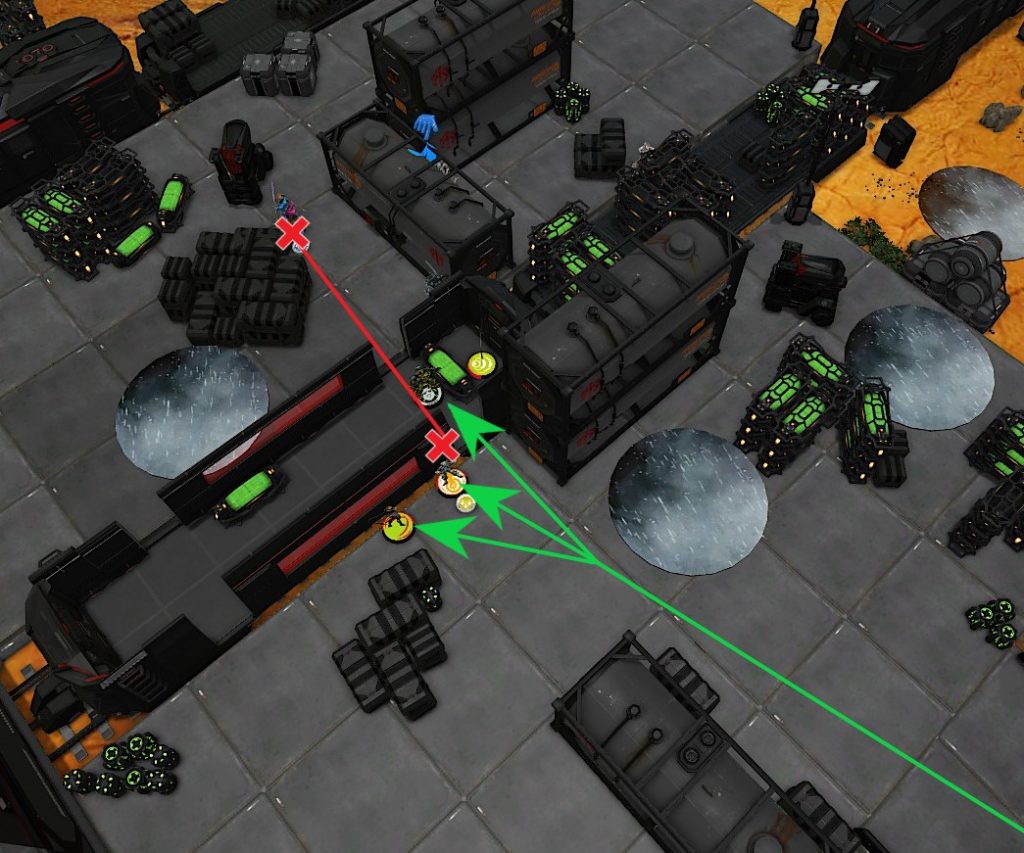
With De Fersen in my repeater range I realized I couldn’t really move the fire team as I didn’t want to risk the hack-off, especially while De Fersen still had a firewall. So I decided to drop my hellcat to try and kill his EVO hacker. At this point I realized that I should have put supportware up as an ARO while De Fersen fought Uhahu as now putting it up would cause De Fersen to take out my EVO. To get around this I ended up spending two orders to run my flashbot over to fight Joan to try and die.
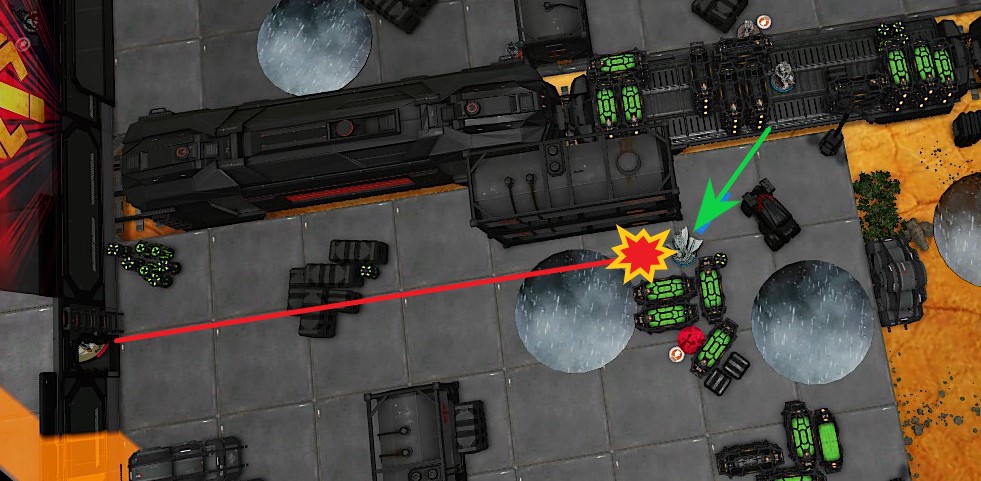
After I got my flashbot killed I activated support jump, and brought in my Hellcat. Despite my opponent dropping fairydust to try and interrupt my jump I still landed (although at that point he had already done his job). Regardless, and wanting to clear my opponent’s fugazi for Knauf (I didn’t want to risk Knauf being shutdown by a lucky flash pulse), I activated the Hellcat and shot at the Fugazi and EVObot. Ultimately, I removed the Fugazi, but the EVO survived.
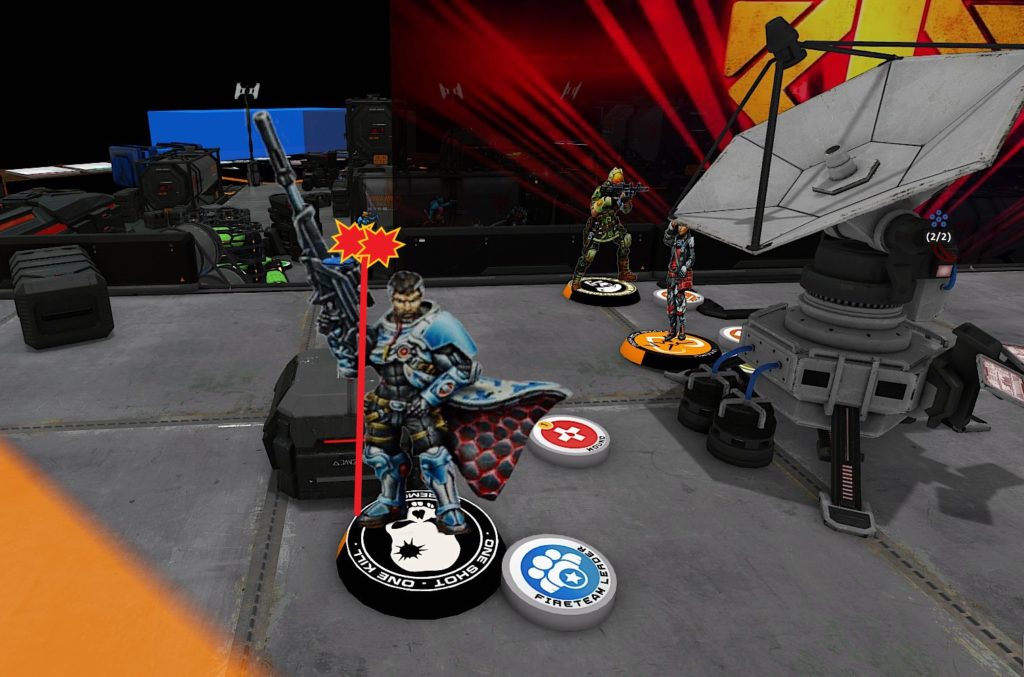
Now it was time to try the first of my 2 fake HMGs, Knauf’s burst 4 MSR (the other being the Riot Girl’s DMG 15 Spitfire). I began moving the core team over to unload into Joan, knowing that if I put him into loss of lieutenant his 2nd turn would be very blunted. Despite winning multiple times, and forcing and insane number of saves (one order alone generated 7), Knauf was unable to remove Joan.
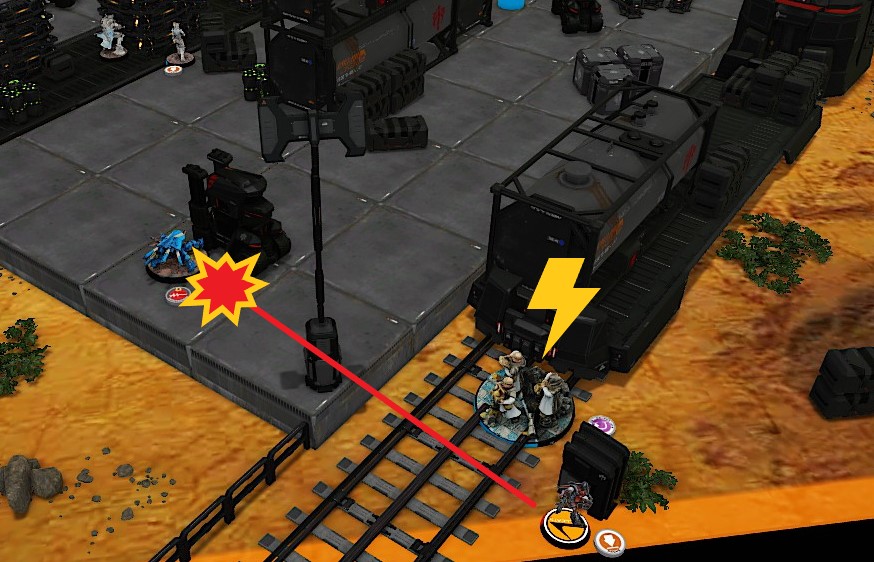
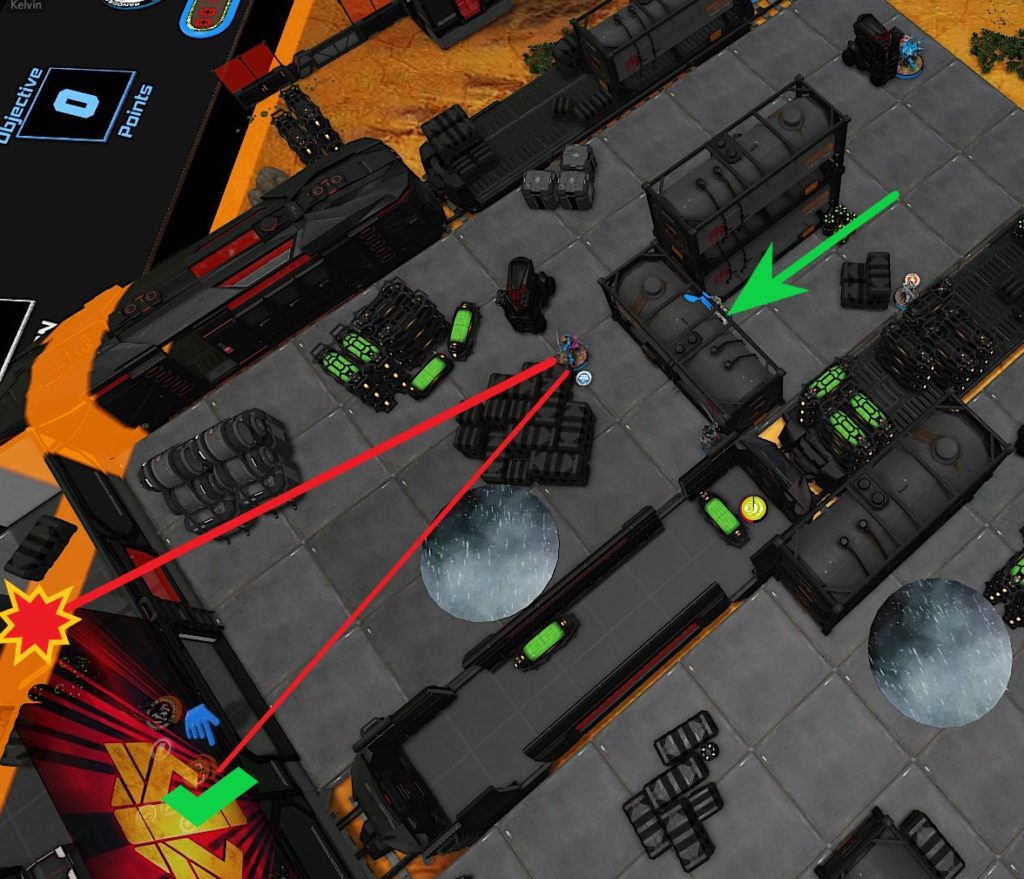
At this point I decided to shift gears and try to take out the fireteam by removing the leader. Uhahu activated as the leader and launched pitchers down near the team (luckily outside of De Fersen’s range). She then activated again and spotlighted the Hospitalier HMG. The first guided missile came down, but the HMG passed all of his saves. Unfortunately for my opponent, De Fersen had moved into range of the blast on his last order and was taken out. After 1 or 2 more missiles the HMG was also removed.
Knauf again struck at Joan, but again she remained unwounded. However, without the support from her fireteam she chose to drop prone. With Joan down, Knauf too the chance to take out the plain Hospitalier who he caught out of cover in the “killbox”. I ended my turn by moving the MBH to the door closer to my side in order to provide a throwaway aro against the teuton.
Turn 2
Top of 2 – Military Orders: Fighting their way out…
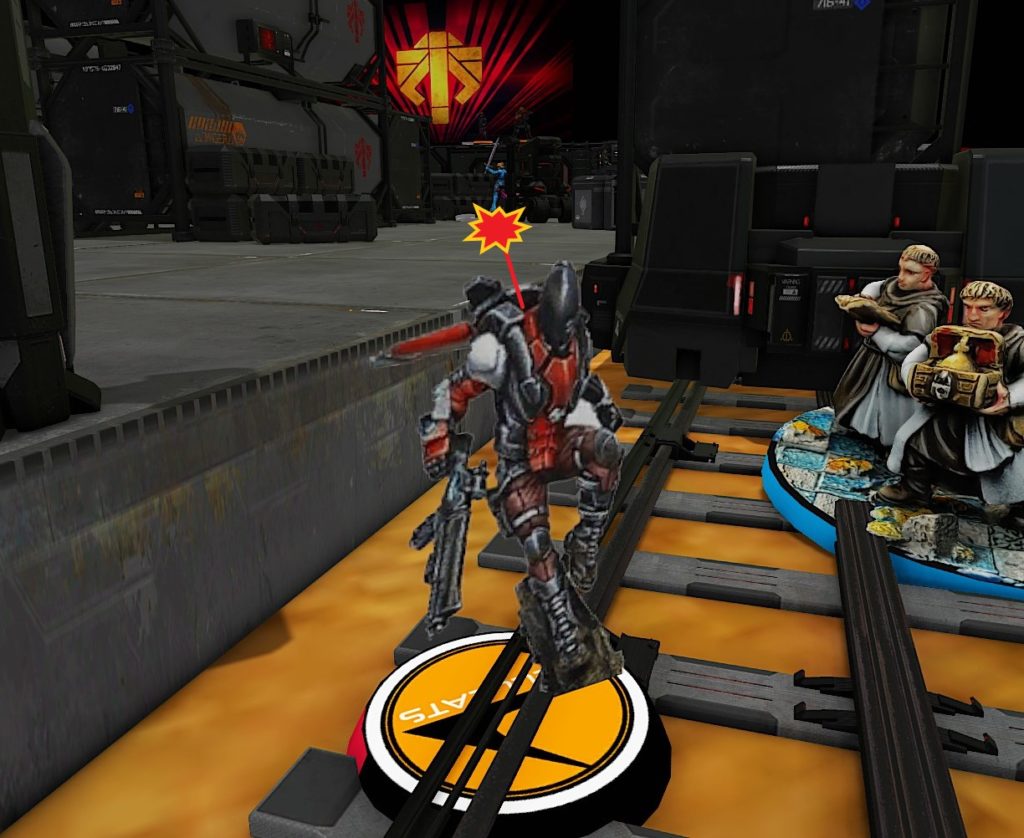
My opponent began his turn by breaking the harris and using the Teuton’s impetuous to dart up the board. He came into line with my MBH and dodged, but my MBH was faster and landed a wound with her red fury.
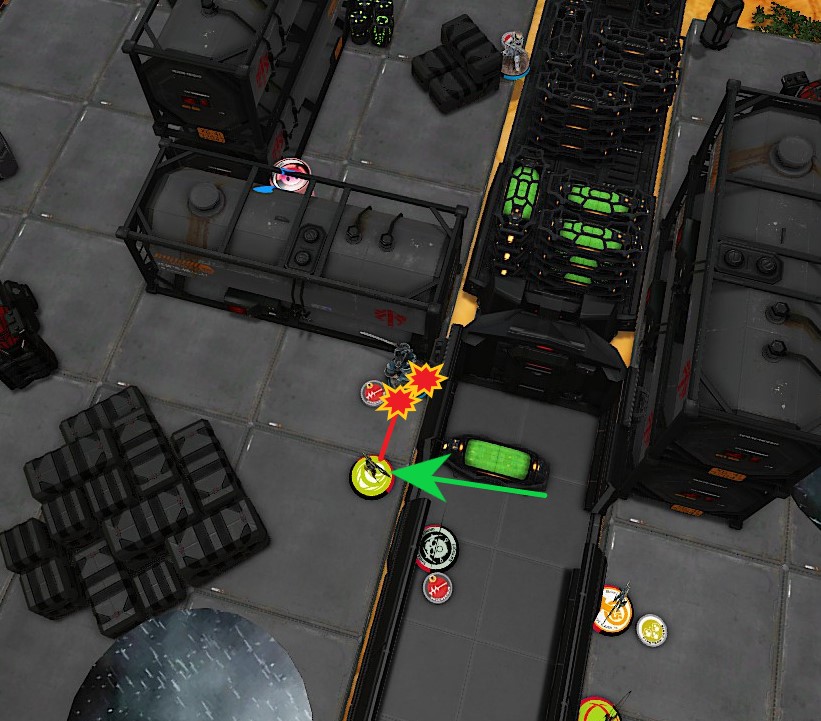
Recognizing the danger posed by the repeaters (he correctly guessed that I would happily have Uhahu drop from the team to hack while Knauf shot), he moved his MBH forward to take out the repeater that had landed. He succeeded, but in the process Knauf blew the head off of the biker. Joan then reformed her fireteam, this time with Dcotor and the Santiago who had moved back in order to link through the wall. She began to fight with Knauf, and after a couple orders where nothing happened (Knauf won but Joan made her saves) Joan crit and took Knauf out.
My opponent tried to advance his teuton up, hoping to make a push on my now weakened base. However, this time he exposed himself to the Riot Girl and MBH. Together they were able to take the Teuton out for good. With few orders and pieces left, Joan tried to take an opportunity shot again the digger who had stuck a bit too far out. Luckily, he successfully dodged back out of line of sight.
Bottom of 2 – StarCo: The “Killbox”
I started my turn in a good position, my opponent was quickly running out of pieces and orders. But I knew that Joan alone could do a lot of damage. With my second pool I moved the Brigada up to act as point for the core, and engaged Joan. Again my attempts were unsuccessful, but I ended with the Brigada also watching Joan.
Without repeaters my ability to missile her was limited, but I also wanted to avoid a shootout. This is where I made a mistake. Having played more Dashat than StarCo I forgot I had an Al Hawwa FO not a Hunzakut with deployable repeater. I moved the camo marker towards Joan, with the intent to place a repeater I didn’t have. Joan chose to discover after my first short skill, and I foolishly moved again to get out of LoF to place a repeater. I then realized I one, didn’t have a repeater, and two should have just taken an unopposed FO to target her and drop missiles from space. I tried to FO her after being revealed, but ended up doing nothing and gave up on this plan (luckily he survived the shot he took for his efforts).
I decided it was time for fake HMG #2. I moved up the Harris and engaged Joan to no avail. On my second attempt I moved the Digger up into the train car. My goal was to see if Joan would split her shots, giving the Riot Girl a better chance, and to get the digger in position to put more AROs on Joan in her fats approaching active turn.
With my last order in that pool I had the Hellcat take out the Crozier paramedic (and again fail to kill the EVObot.
I ended my turn with Joan in the “killbox” with the linked Brigada, Riot Girl, and Digger watching her. The Hellcat could also see her but we wouldn’t realize that until a couple orders into my opponent’s turn.

Turn 3
Top of 3 – Military Orders: The Final Gasp
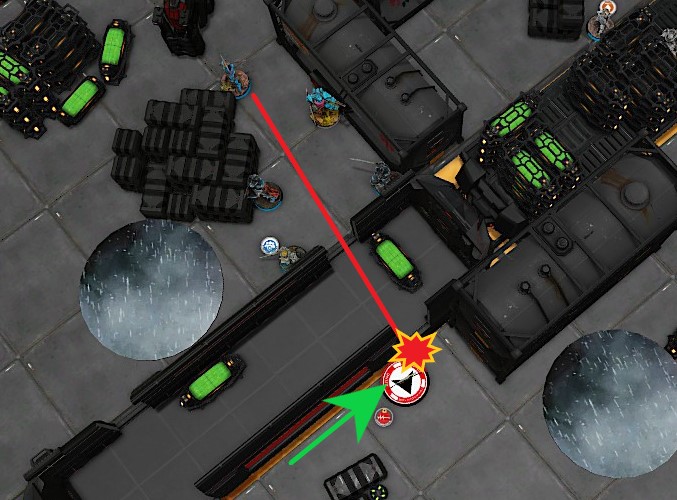
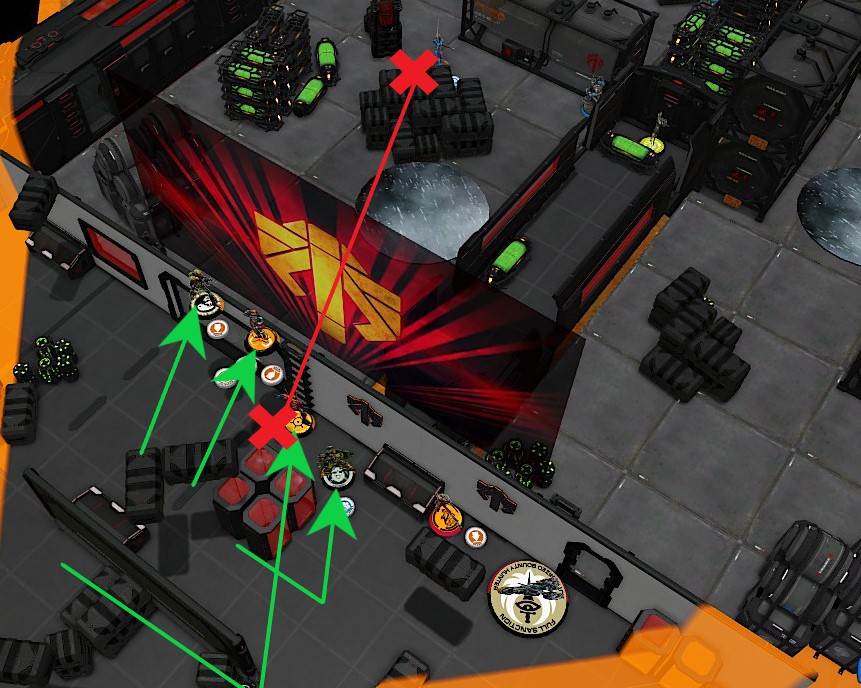
Completely surrounded, and down on points, my opponent’s only option was to try and shoot his way out of it (the PanO special). After a few rounds of splitting burst the Digger was left unconscious, the Riot Girl had retreated after tanking a hit but failing guts, but Joan was dead. It was the linked chain rifles that stripped the bulk of her wounds, but in the end the killing blow came from a long range shot from the Hellcat in Joan’s back.
Bottom of 3 – StarCo: Bloodlust over points…
With the game won, we chose to play out my last turn just to see if I could maximize points. I began by recamoing the Al Hawwa, who then ran past the doctor. Rather than delay my opponent chose to dodge, which I greeted with two BSG shots in hit mode. The Doctor failed his dodge, and both BSG saves, going down.
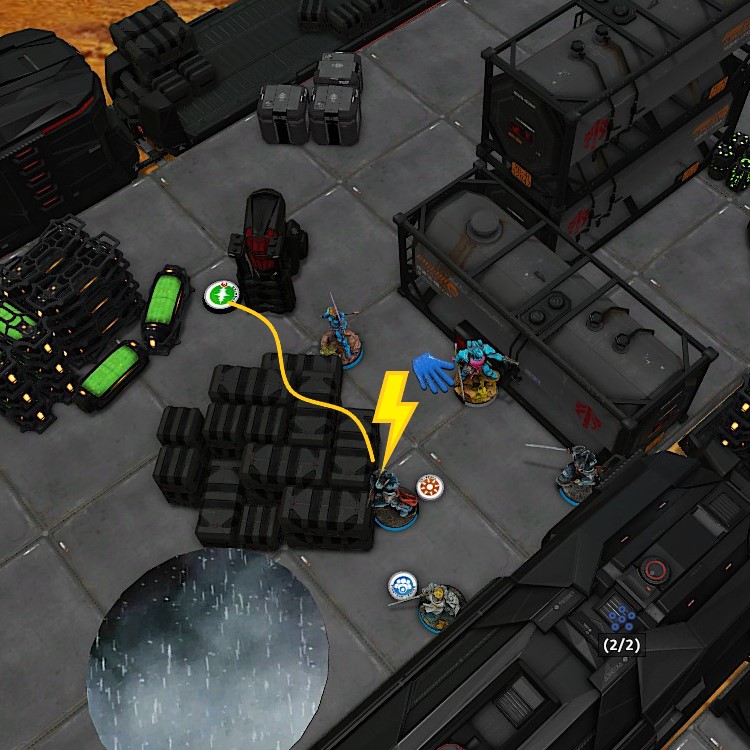
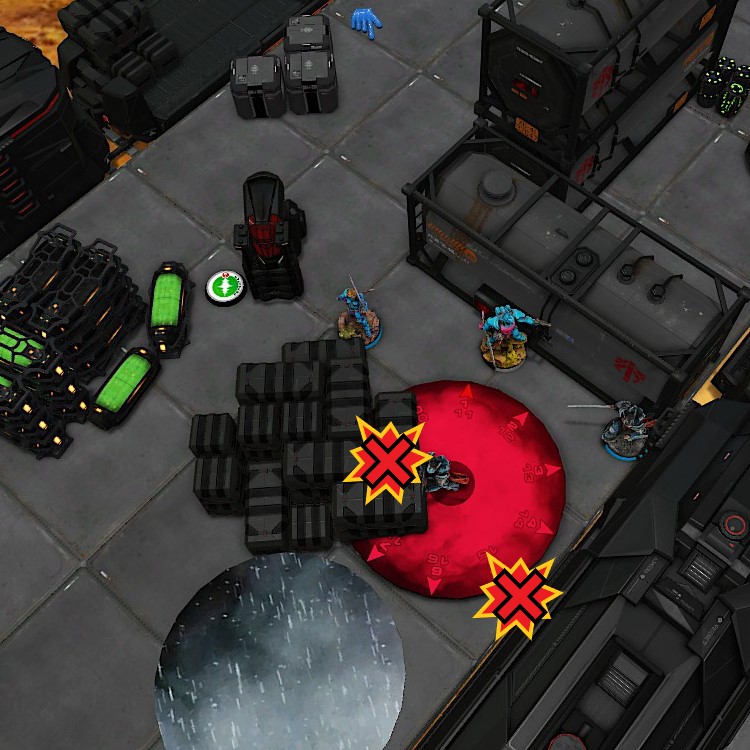
At this point I just had to kill his EVO and heal my digger in order to maximize point, however I wasn’t really thinking and instead went for the style kill on the Santiago who had cybermasked. I ran the Hellcat up, shooting at the EVO as I went (who somehow survived). I placed a repeater, and then revealed the Santiago. Uhahu spotlighted the Santiago and I launched a guided missile with my last order in that pool. Sadly the Santiago survived.
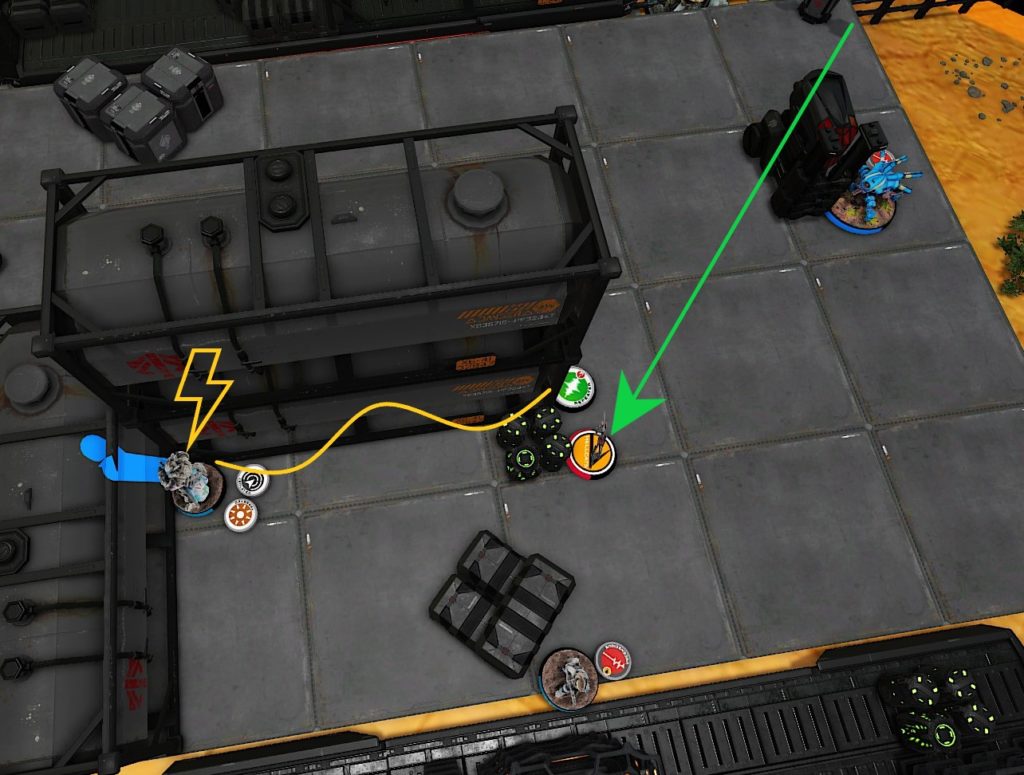
With nothing else to do Uhahu decided to put all the tokens on the Santiago for fun and we ended the game.
Final Score:
StarCo Victory (8-0)
Post-Game Analysis
If I had taken the time to think about scoring before playing out my last turn I could have easily gotten a 10-0. Healing the Digger with Avicenna was a safe bet that would have put me at 261 pts remaining rather than 247. Likewise, if I had just ignored the Santiago and killed the Hospitalier and EVO I would have killed 261 pts. But sometimes, especially in casual games, you just get the bloodlust.
Overall I really liked the StarCo list that I brought, especially the fireteams. Both teams had a ton of utility between their solid gunfighters, excellent specialists, and disposable Diggers. While neither were pure, the flexibility in fireteam construction was a major boon. I really like the power piece that Knauf is while in a core team. That BS 14 vs 13 is still important, and really makes him a nasty active threat. However, as I said before, I think the key is being okay with having him run off with two other members to do their own thing. If you do that you can start with the power of the BS 14, and then as the game progresses take advantage of his flexibility and power while advancing to do objectives. I equally enjoyed the harris team. I think the Avicenna + Riot Girl duo is very solid, probably one of the best duos in the game. That being said, being able to add in a cheap Digger for that burst bonus is definitely worth it. With StarCo you are probably looking to throw in a cheap 10-15pt unit near the end anyways, and adding a Digger as a third team member may be one of the best ways to spend those points. Again it is important to remember that you can slingshot the Digger away to trade or go back to being an annoying warband should the need arise. Until then your spitfire will just do that much more damage.
After speaking with my opponent about his teams, we both agreed that there is some merit to the pain train, but that his list didn’t really need Joan. Aside from the bike she wasn’t converting orders, and De Fersen would have been able to be about as good of an lt. In return switching Joan to a hospitalier would have allowed him to make his harris his standard Teuton team, which is a much faster and effective squad than his teuton + crosier + Santiago. With that faster harris he very well may have been able to push with it turn 1 instead of the core and gone after my weaker right flank instead of my entrenched left.