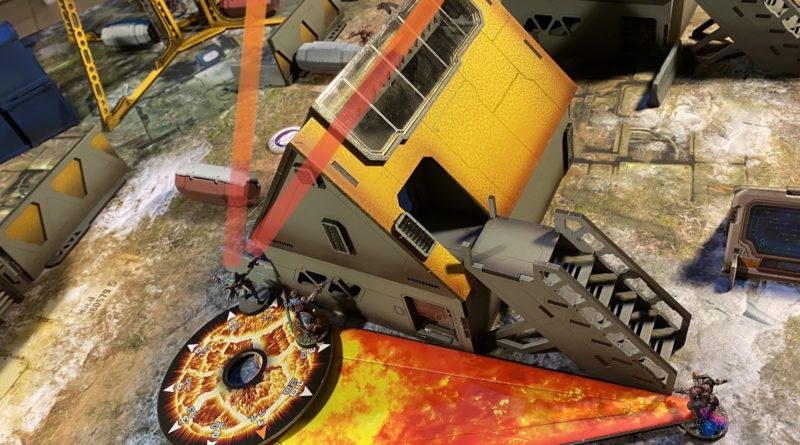
On the Razor’s Edge
By Jo (TheMightyJob)
Overview
- Mission: Supplies
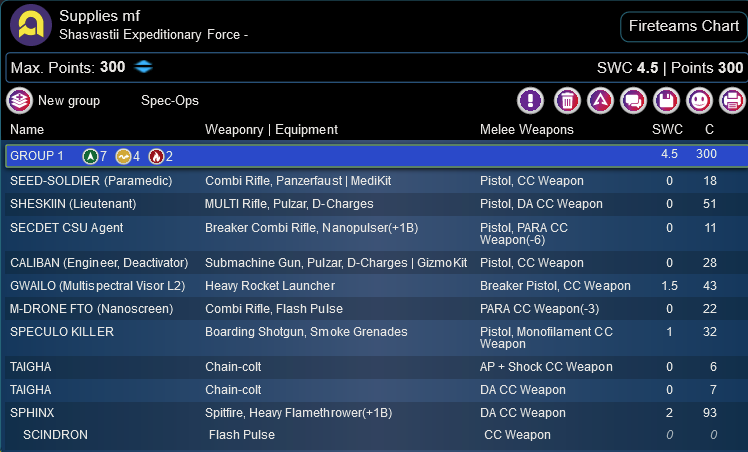
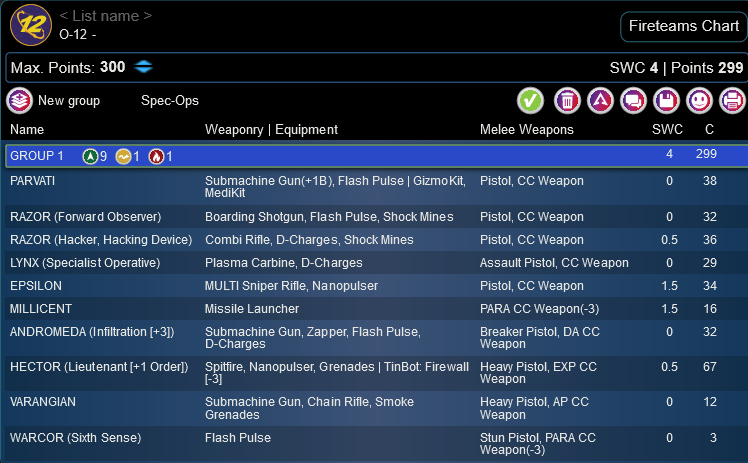
- Forces: Jo’s Shasvasti versus David’s O12 (300 1 combat group)
- Deploy First: Shasvasti
- First Turn: Shasvasti
Vs
Deployment
I had first turn so I set up a taiga on their starting blocks on both flanks intending to let them be first turn attacking pieces. My caliban engineer was in camo by the middle tech coffin I hoped to dominate with my Harris from the right flank then zip to the tower. My seed soldier paramedic was to take the left flank tech coffin. The Sphinx was in hidden deployment with a nice view down the road fire lane (in my mind fairly secure for late game).
O12 set up in a null deploy with most things in total cover and his epsilon and warcor out on ARO duty. Hoping to weather any alpha strike.
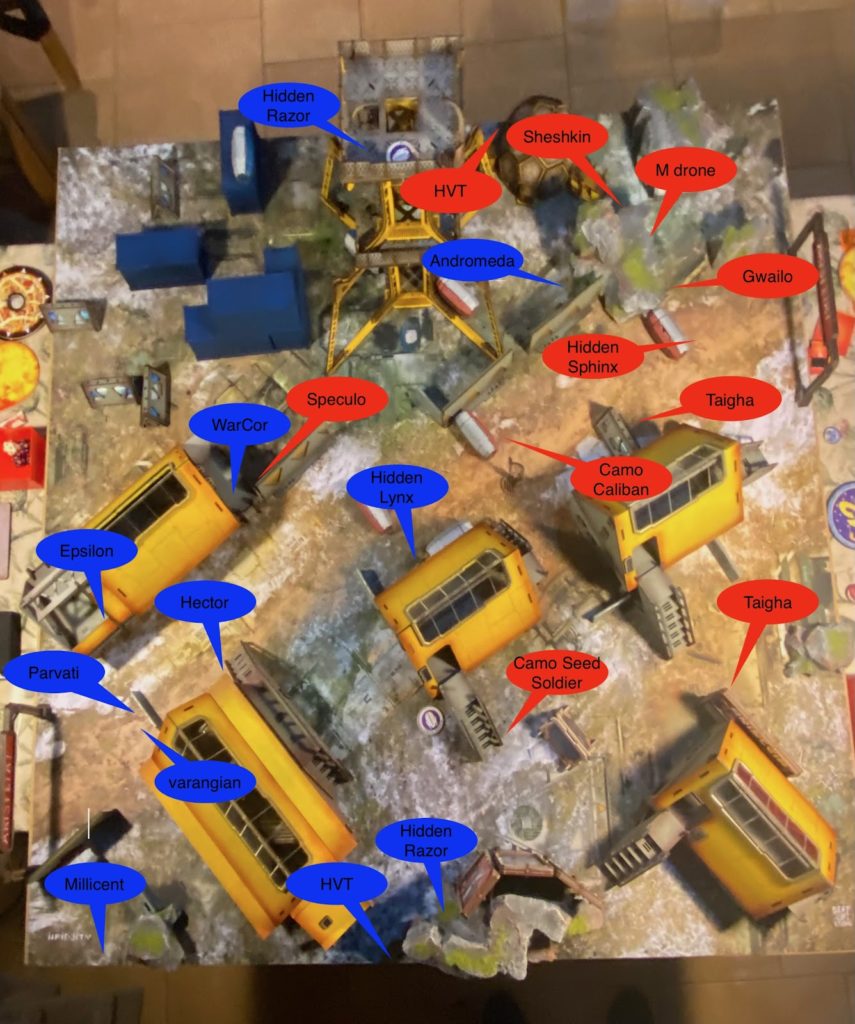
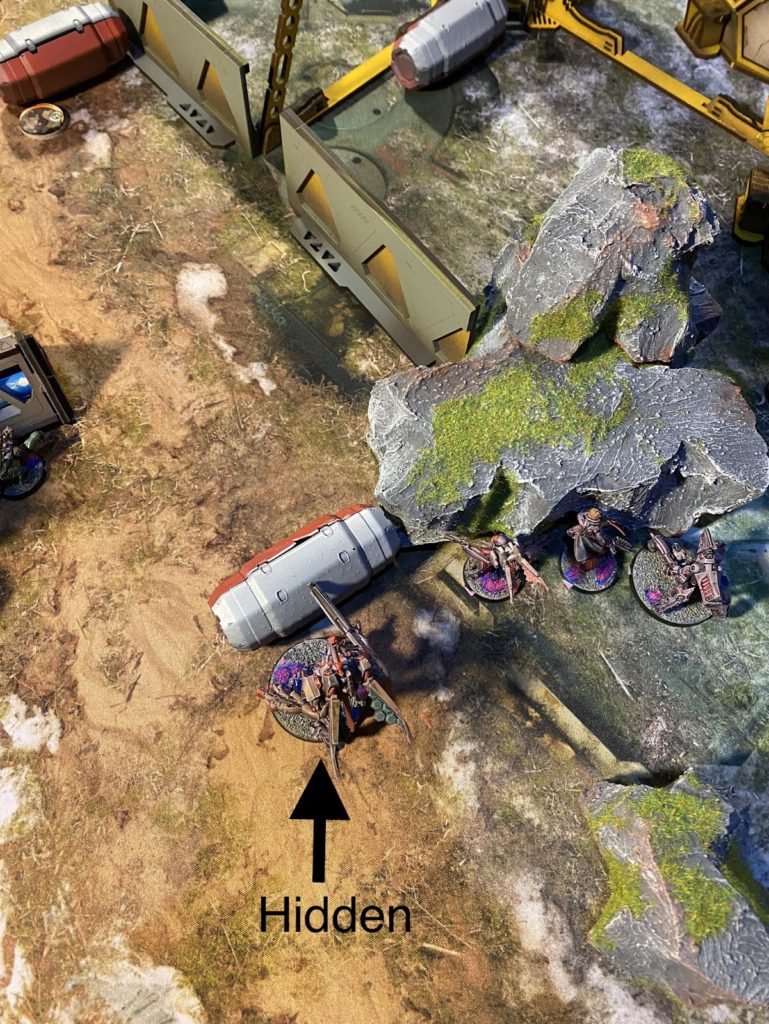
My reserve was a speculo I put hidden behind a wall just out of his deployment as a good threat to his epsilon and Parvati. In hindsight,I wish I had just put him in the opening to attack Hector as he did nothing all game.
David’s reserve was Andromeda he infiltrated outside my DZ to threaten my Harris.
Turn 1
Top of 1 – Shas
Both Taigha spent their impetuous orders moving and dodging shots from the epsilon and war cor. The Gwailo poked his head out and blasted the the epsilon with a burst 3 MSV Albedo rocket launcher. It went down dead in one order. I think David didn’t realise the Gwailo had Albedo and MSV. Next Sheshkin and the link moved up and Sheshkin move dodged so she could see part of Andromeda’s base staying outside her 8” guard zone and spent 2 orders putting her down. She was too dangerous to leave there. The Taigha’s spent their irregular orders advancing then the Harris tried to tuck in under the tower.
Bottom of 1 – O12
The Varangian vaulted cover and impetuous moved down the road dodging a combi rifle ARO from the M drone. The Razor FO revealed and forward observed the M Drone. The Millicent guided the M Drone to death in one order. Luckily the rest of the fire team were prone behind a tower support and protected from the blast.

Hector moved up to cover near the central building. The Taigha tried to dodge toward hector but died in a hail of spitfire rounds. The warcor stood up for ARO. The FO re camo’d.
Turn 2
Top of 2 – Shas
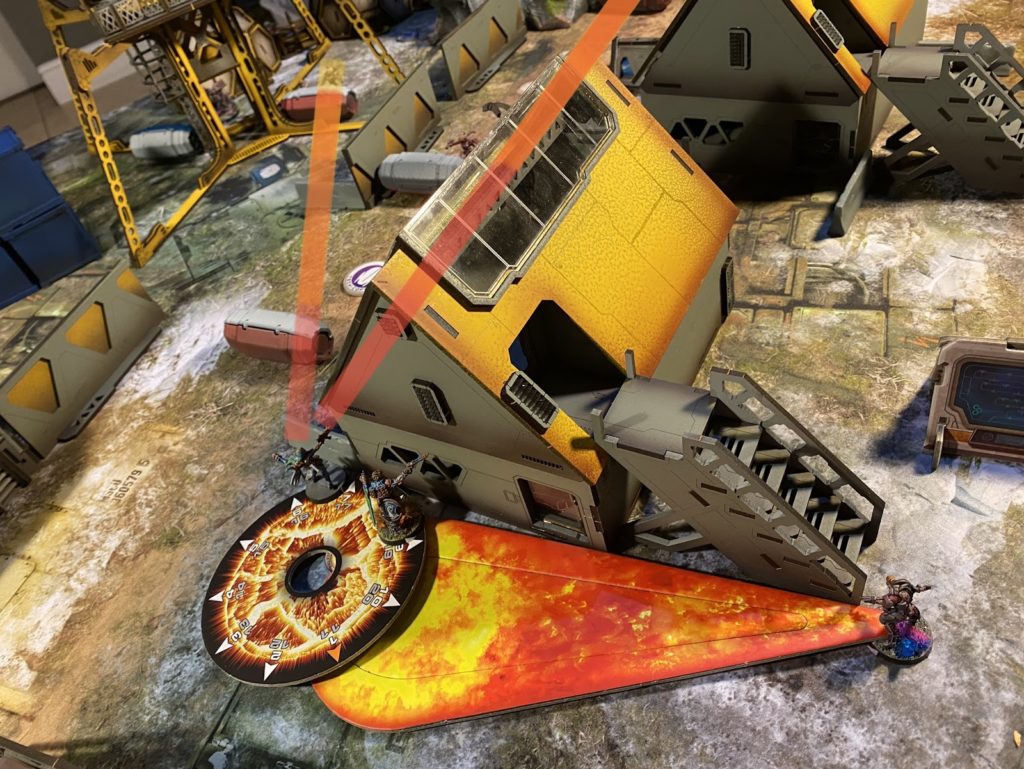
As we had forgotten to command token strip orders, we did that this turn. I was left with four orders and I decided to really try to strip more orders for turn 3. I think I didn’t realise how much was in hidden deployment so I really had a false idea David was on the ropes with very few orders to play with. My Gwailo stood up and split burst with the Varangian and the WarCor. After I realised he was BTS 9 and out of SMG range, I focused on one at a time and they went down in. I used the last order to coordinate an order with the Gwailo, seed soldier and revealing the Sphinx. They all attacked Parvati hoping to catch Hector in the splash damage. Parvati succumbed to the Gwailo’s Rocket but Hector was pretty unscathed. (I think I got all aspects of this horribly wrong but I have learned from it) Hector killed the seed soldier with his unopposed spitfire ARO. The Razor revealed for an attack on the Sphinx which tanked it. Finally Sheshkin used her lieutenant order to put her and the Gwailo prone.
Bottom of 2 – PlayerB
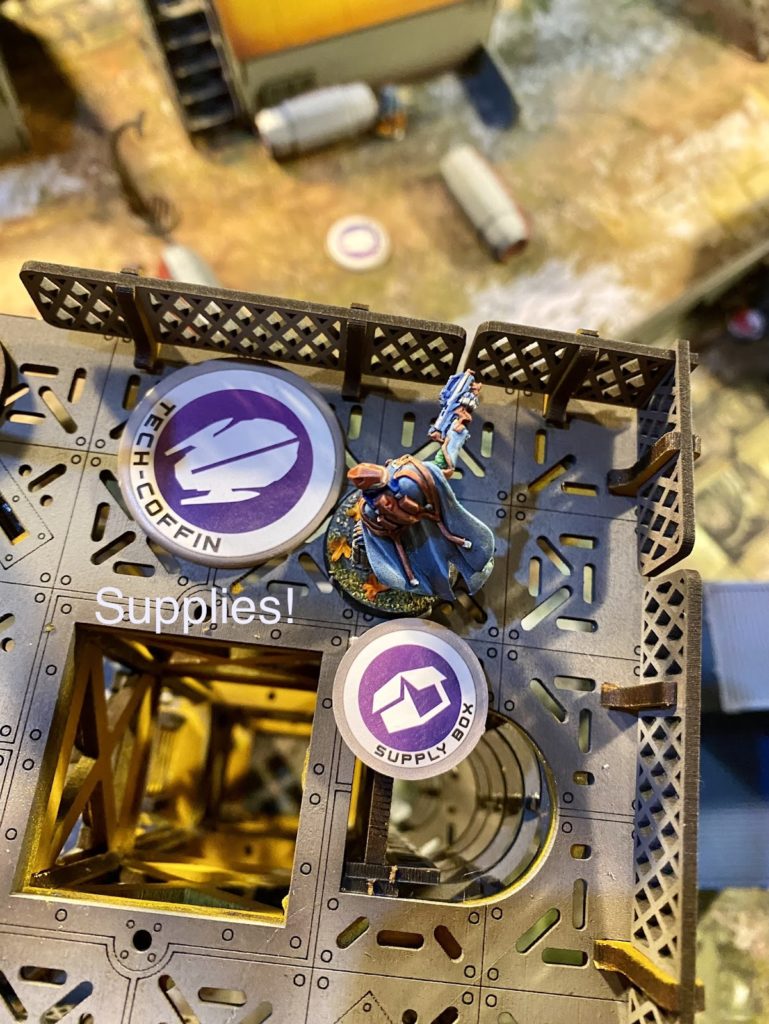
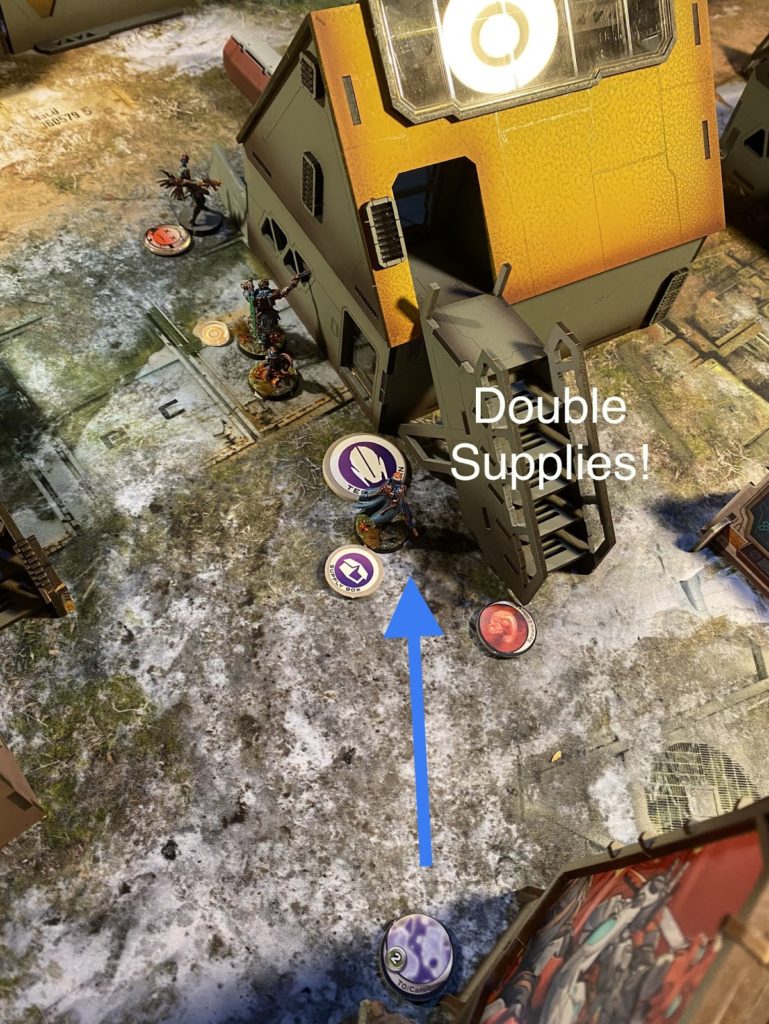
The plasma Lynx on the tower revealed and grabbed a supplies box. I think it took a couple of orders to pass the WIP roll. Parvati came freely forward into cover next to Hector as most of my team’s heads were down. Then a co’ordinated order put Parvati, Hector and the plasma Lynx into suppressive fire.
Turn 3
Top of 3 – Shas
The Sphinx killed the Razor FO who remained out of camo. Whilst he was hard to hit he was also shooting back against the sphinx’s min-6. This allowed the caliban engineer to run forward and spend a couple of orders getting a supply box. He then retreated to cover from hector but was very exposed to plasma fire from the lynx in the tower next turn. Sheshkin used her lieutenant order to dodge up in view of Hector and the Gwailo stood up to try to protect the Caliban from Hector next turn.
Bottom of 3 – O12
“You’re not going to like this.” heralded the reveal of a final Razor Hacker who took a couple of orders to steal the final supply box. Massive self restraint not revealing him during the coordinated order and clearly lying in wait for my Sphinx if it tried to go up that flank. David decided to stop there rather than risking his lynx and a draw, trying to take the last supply box for extra points.
Post Game Analysis
David’s O12 won 5-2. I think his last turn hidden deployment specialist strategy was really effective. I think I probably wasted my speculo and could’ve been more disruptive to his plans if I had just deployed it in front of a good target. David said he thought if the Sphinx was on the left flank it could have really covered that tech coffin but didn’t add much where it was. It would’ve been a great target for his Razor hacker though. In retrospect infiltrating units were great in this mission as they could deploy on the tower. Overall I really enjoyed this game as there were some exciting twists and it seemed quite close while playing. We both are quite new to the game and it seemed like a fun competitive game. I think winning against David’s strategy would be difficult but not impossible with this list. I was very impressed at his restraint saving his Razor Hacker for turn 3 despite the seed solider revealing relight next to it. The Gwailo, Mdrone, Sheshkin Haris was amazing with constant cover, all the range bands, sensor, MSV, tac awareness and albedo!