Mission 007 Update: Rough and Tough and Strong and Mean
At the start of the month, we sent you all on Mission 007: It’s Raining Men to use your AD troops in any of the Nomad sectorials, StarCo included. We briefly covered the specifics of each of the AD troopers available to Nomads, but didn’t discuss more general Airborne Deployment tactics.
So, for our mid-mission update, we’re going to talk about two main considerations: positioning and timing. They definitely go hand in hand, so we’ll use some examples to illustrate what we mean. Things will make more sense if you read the battle report before getting into the discussion.
Example 1
- Battle Report: Today’s Forecast: Hellcats and Grenades
- Mission: Supplies
- Forces: Nomads versus Corregidor (300)
In this game, my Corregidor opponent brought four Hellcats and a three HMG Alguacil link. He dropped in three Hellcats on turn one, and basically didn’t have the orders to really push them through my deployment zone. So, let’s talk about timing and positioning.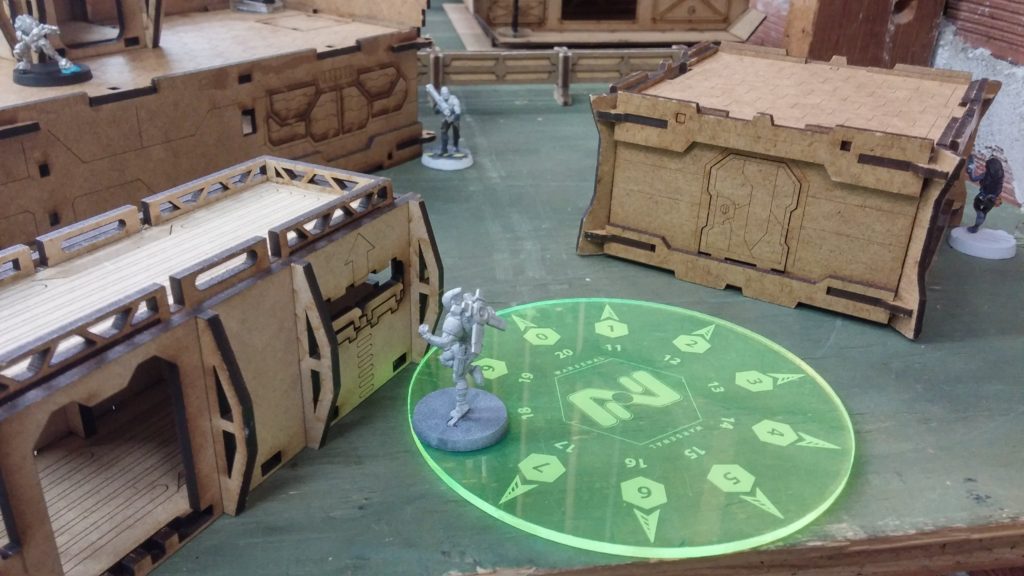 Positioning was difficult for him on turn 1. My troop density was high, because everything aside from my infiltrators started in my deployment zone, and I did an okay job of deploying against AD, so the ARO density is reasonably high as well. He did a good job of exploiting what positional advantage he had (and this was hard because this was pre-ITS X AD rules), and then made my positioning a bit of a nightmare on my first turn. With three Hellcats in my deployment zone, I’d now have to carefully extricate myself from the mess and trigger as few AROs as possible.
In other words, I didn’t really have a positional advantage for him to exploit since I hadn’t had a turn to over-extend anything and create a vulnerability. I had a few things pointed the wrong way, but in general he was taking AROs to his each of his landings. However, in putting Hellcats where it was inconvenient for me, he created a positional disadvantage for me.
As far as timing is concerned, his timing was reasonable. He put down three Hellcats on his first active turn and then put me on the back foot for my first turn. There’s something to be said for patience when wielding AD and HD troops, but being aggressive can be good too. In this case, he didn’t have a deep order pool to exploit the timing, and was therefore forced to put me at a positional disadvantage at the bottom of 1.
As an aside, it’s worth discussing the number of Hellcats he brought. By bringing 4, and all in the same combat group, that effectively forces the strategy of dropping a bunch in as early as possible and forcing me to fight my way out of their AROs and out of my deployment zone. I think this is a reasonable strategy, especially if you can do it out of LoF and simply throw them all into suppression, but is a more passive strategy than using AD to put a gun exactly where you need it and attack. It depends heavily on the makeup of the rest of your list as well as your playstyle. To me, it seems a little inefficient.
In contrast, on my first turn, he had created a positional disadvantage for me to exploit, and the timing window was good. He was expecting me to be trapped in my deployment zone, and thus had advanced his Intruder and his Bandit up near his Moran to further box me in. I dropped in a Hellcat HMG behind them all, and KO his Intruder LT, a Moran, and force a Bandit to fail guts prone. I think this is a more efficient use of resources. I remove two important pieces from his list, his Lt and a Moran guarding the boxes, and then still have the ability to shape his positioning by throwing the Hellcat into suppression. I also did a lot of damage to his link team with a Prowler’s grenades, exploiting a positional disadvantage, but that’s not the subject of this mission. I also created a positional disadvantage for myself as well–after three Hellcats, I didn’t expect a fourth, and dismantled my ARO net in my deployment zone by moving things around and throwing them into suppression facing the wrong way.
The fourth Hellcat comes in, but I’ve created a timing disadvantage for him by putting him into Loss of Lieutenant. The Hellcat didn’t have any orders to do anything. He spends a lot of orders and command tokens extricating his link from trouble and doing some relatively minor damage to pieces that I had already written off. Had he waited till turn 3 to drop in the Hellcat, when he wasn’t in LoL I think the situation would’ve been much different. In any case, I think this game went my way because I had better timing and positioning windows to exploit, and was able to use deeper order pools to do so.
Example 2
- Battle Report: Hellcat Variety Pack
- Mission: Frontline
- Forces: Nomads versus USARF
This game occurred right after the one in Example 1. I basically wanted to try this quadruple Hellcat nonsense, and brought two Tomcats for good measure. I chickened out and put the Tomcats on the table during deployment, but that’s just me. After weathering the alpha strike and having a hero Moderator take out a Devil Dog, it was my turn to rain some men down!
In this case my opponent had not really prepped for AD troops, much less four of them. I had some positional disadvantages to exploit and just deep enough of an order pool to do so. The timing was good too, because he had some pieces out of position and overextended. His grunt link was in a line… and after my Hellcat BSG came in and fired one shot, this happened:
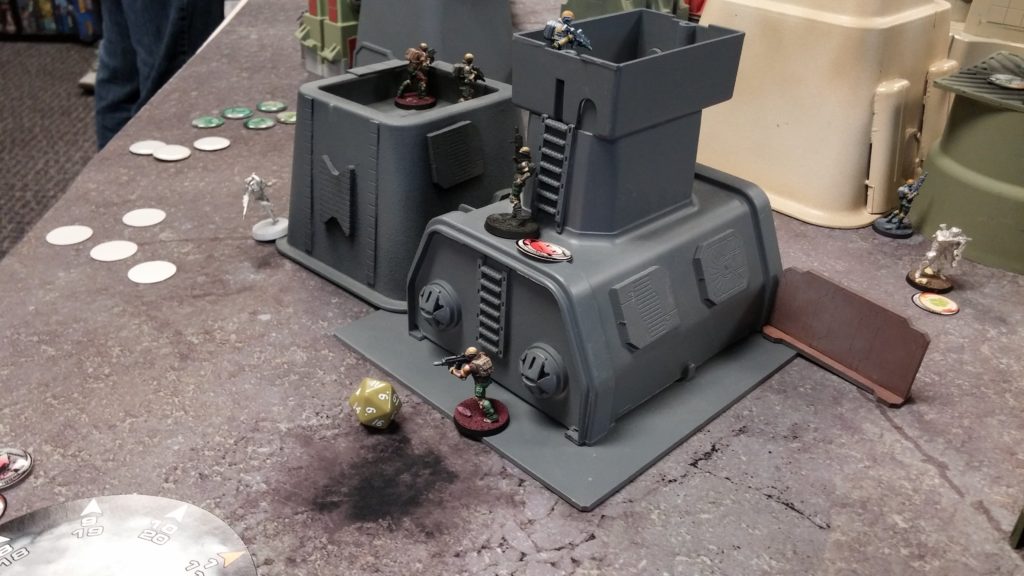 I do some damage to the Marauder Haris as well with an HMG Hellcat, by dropping in behind them and spraying them with bullets. My opponent had created a positioning disadvantage for me to exploit here.
 The rest of the game isn’t particularly instructive–I drop in two more Hellcats to control zones and use the rest of my forces to make things difficult for my opponent. Still, it was closer than one might think. Frontline forces you to advance things and overextend things, but again, four Hellcats meant that I didn’t have enough orders to really exploit everything to the fullest extent.
In this case, the positioning that I could exploit was severe enough for a big payoff for me, in spite of only having two orders for each Hellcat in my first turn. I then didn’t push it too far by having the other Hellcats drop in till later, making good use of timing windows. I should try that list again, it was pretty fun!
Example 3
- Battle Report: Raoul, Hunter or Hunted?
- Mission: Acquisition
- Forces: FRRM versus Tunguska (300)
This is a game where I played French, but we can still get some good lessons out of it, especially since my opponent fielded Raoul. Let’s look at my opponent’s positioning during deployment.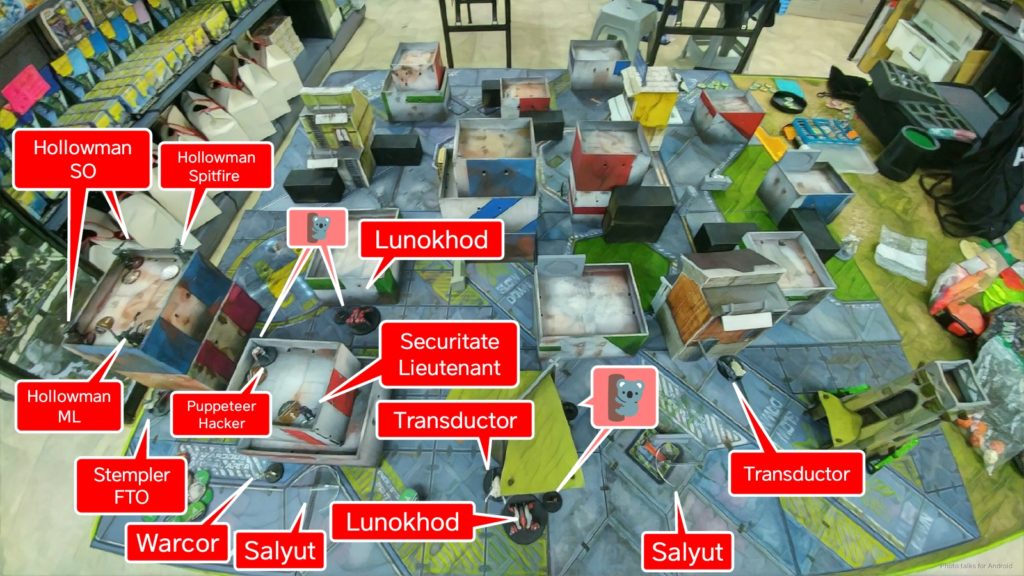 He’s doing a great job of castling up on his left. Two Lunokhods covering all his important things, Lieutenant on the roof, link on the roof, etc. The thing to exploit here is the weak REMs on the right. There just isn’t anything over there to really prevent me from walking something on, getting into position, and getting essentially a free shot against two pretty much defenseless ‘bots (flash pulse counts, but not against a chain rifle). So that’s exactly what happened.
 I could’ve spent more orders rampaging Duroc through my opponent’s backfield, but I opted instead to bring on Margot and go for the Lt kill. I failed, but I think that was the stronger play.
In any case, this created a positional advantage for me. Duroc is a threat that my opponent could not ignore. If he left Duroc over there, next turn I would super jump my way through his lines, throwing chain rifles and grenades at everything I could see. I was hoping to have my opponent over-extend something out of his castle to go after Duroc, which would let me exploit the hole with a Chasseur or some other attack piece. What he did instead was drop in Raoul.
This let him retain his defense in depth around his link team and his other order generators, and basically only over-extend Raoul. Raoul comes in and takes out Duroc in close combat, no easy feat. Once that was done, my opponent has created a positional disadvantage for me. Raoul is now on my left side, where I’m relatively weak. I had hoped Duroc would anchor it, but he’s gone now, so I’ve now got to fight on two fronts–Raoul on the left and the Hollow Men on the right.
I barely manage to pull it off, finishing off Raoul with a Metro’s rifle outside of 16″, of all things, and then my Loup Garou barely manage to fight the Hollow Men into a draw. To sum it up, I started the game with a good envelopment on my opponent’s castle on my right (his left). I drop in Duroc to exploit this positional advantage, not expecting Raoul. Raoul’s elimination of Duroc weakens my contain and creates a threat I cannot ignore on my left, thus splitting my resources between the Hollow Men and Raoul. Because I’m forced to split my attention and resources, I cannot adequately deal with either threat, and this forces a Draw.
Example 4
- Battle Report: Ikari Pincer Movement
- Mission: Engineering Deck
- Forces: Ikari versus CHA (300)
Okay, so neither of these factions are Nomads, but the lessons are translatable. This game is a great example of timing and positioning, so I wanted to include it in our discussion.
I’ve got a Cube Jager and a Bashi Bazouk with E/Mauler off the table. Bashi’s are AD:1, which isn’t something Nomads have to deal with, but it’s worth pretending like it’s an issue we have. What do I mean by that? By thinking about AD at the beginning of the game, you can train yourself to more consistently find those positional and timing advantages to exploit.
What do I mean? Well, let’s look at the deployment.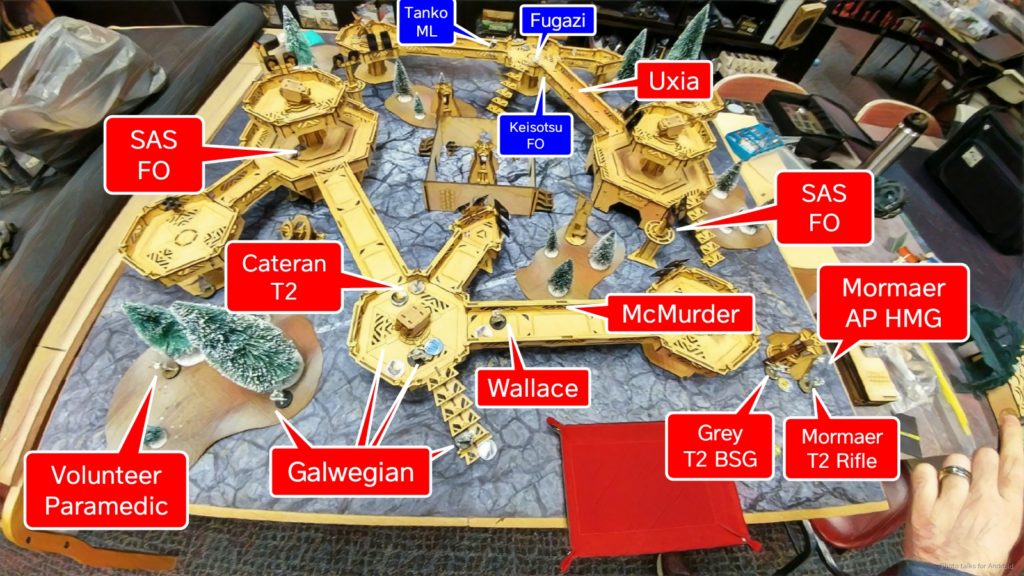 I take one look at the deployment and see three heavy infantry on my opponent’s right in a Haris. Looking at the weapon composition in the Haris and the fact that there’s an infinite height objective room on the table, I know that the Haris will want to advance to get that AP HMG in LoF of one of my things. Once they’re advanced, to stay in coherency they will also likely stay under an E/Mauler template. I don’t know where they will end up, but I can guess, looking at the various bits of cover on that side.
I see that they’ll have to advance pretty far before I have a safe insertion point for my Bashi, but that’s okay. I know I have to be patient. I’m waiting for two things to happen: for them to be pushed up and in a line, and to be pushed up far enough that I can safely walk on my Bashi without taking a shotgun ARO that will negate my Holo2 benefits. So I know what positioning advantage I want, now I just need to find the timing window during the game.
As for the Cube Jager, there’s a lot of stuff on my opponent’s left side. I don’t think there’s a good opportunity early on for me to get there, so I content myself to wait for a hole to open up. Either I can use an S2 model to body-block LoF to the Galwegians, or I can bait smoke out of one of them to come on my opponent’s left. With AD:2, I don’t need to choose, but I see an easy path to getting the objective near my opponent’s DZ there if I can just find the hole.
At the bottom of 2, I find my hole for my Bashi. My opponent has tried to clear my Tanko ML with his AP HMG (and lost the AP HMG). However, to keep the other members of his Haris from getting covered by the missile template, he’s had to keep them off to the side and relatively close together. My Bashi comes on and gets an E/Mauler in position.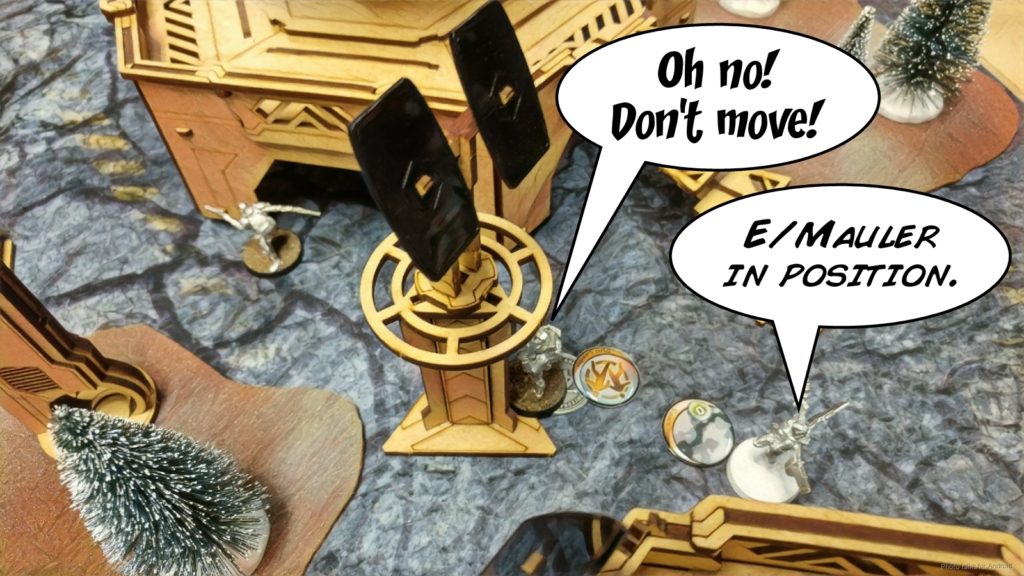 The bottom of 2 is also when I have the opportunity to bring in the Cube Jager. My opponent advanced his Volunteer Paramedic and his Galwegians, opening up a hole on my right. This lets me remove the Paramedic with the Jager’s SMG and then I can get to the objective safely.
In summary, I knew my opponent would have to advance out of his deployment zone to get to the objective room. I waited patiently for this advancement to create a positional disadvantage, and then exploited it by walking on the right tool behind his forces and taking them out. My Tanko ML wrecking everything helped too.
Example 5
- Battle Report: EVO Phone Home
- Mission: Supplies
- Forces: Haqqislam versus TAK (300)
Another non-Nomad game, but we have similar tools to pull off this trick. Long story short, I was rocking a Hakim with Nasmat A2, but Nomad players can do this with a Tomcat + Zondcat. I used the ‘bot to threaten Electric Pulse on the Vet Kazak so I could get a free shot with my SMG.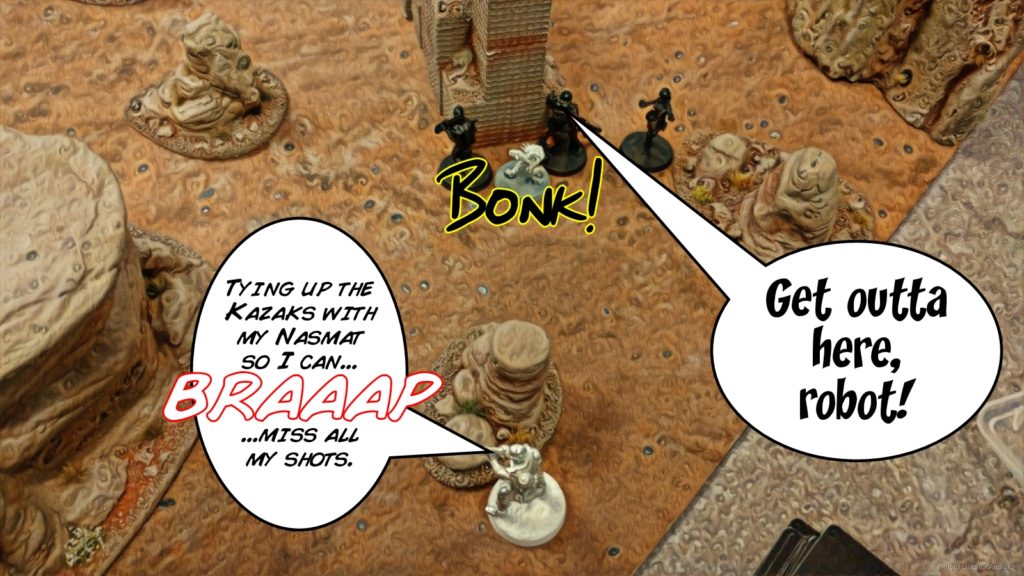 Hakims and Tomcats are pretty similar in a lot of respects. AD Troops with DTWs are pretty great in general.
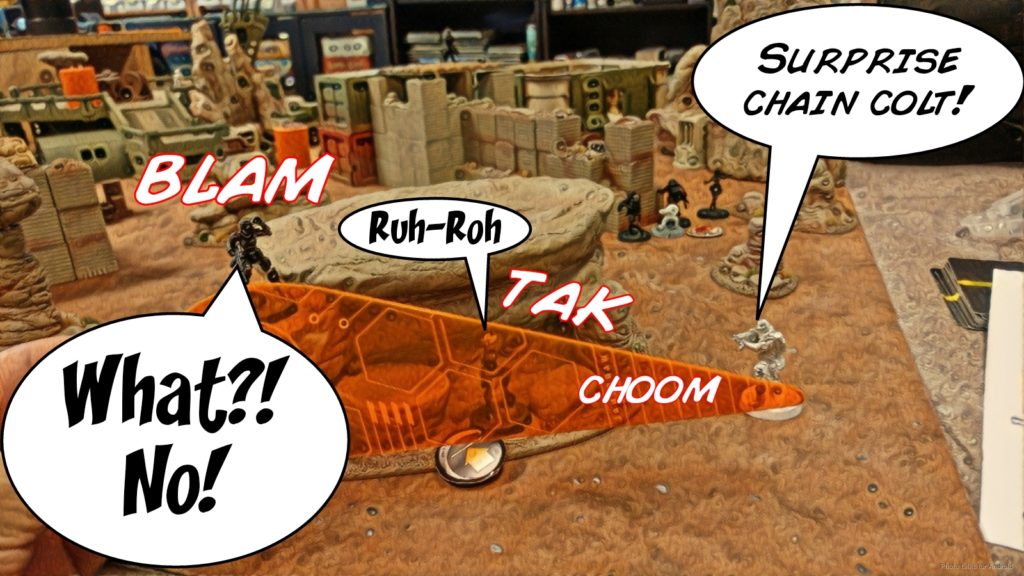 And that’s it for examples. Let’s recap a few things. Timing is relatively easy to summarize. Essentially you’re waiting for the point during the game where you have some sort of advantage to exploit, usual positional, and you have the right amount of orders to follow through with your exploitation. As we saw in Example 2, it doesn’t have to be a lot. I got a lot done with just two orders per Hellcat.
Positioning is slightly more complicated. You generally want to let your opponent advance or reposition his troopers, which will open some sort of vulnerability for you to exploit. Or you can just take advantage of a deployment mistake. You can either actively exploit a positional advantage, like I did in example 4, or you can do something passive, like my opponent did in example 1 by dropping in a bunch of Hellcats and basically saying: “here, deal with this.”
Hopefully this relatively simplistic discussion gave you some ideas to try out on the table. Good Hunting, Bromads!
–WiseKensai