No Country for TO Camo
We’ve got a battle report from Erik (Zelaponeepus)! –WiseKensai
Overview
-
Mission: Tic Tac Toe
-
Forces: Haqqislam versus StarCo (300)
-
Deploy First: StarCo
-
First Turn: StarCo
Aint No Hollah Back Namurr
GROUP 1 |9
1
GROUP 2 |
MUKHTAR (Multispectral Visor L2) Red Fury, 2 Nanopulsers / Pistol, Knife. (1 | 37)
NAMURR Spitfire, E/Marat, D-Charges / Heavy Pistol, E/M CC Weapon, Knife. (1 | 44)
FARZAN (Chain of Command) Boarding Shotgun / Pistol, Knife. (0 | 26)
TUAREG Doctor Plus (MediKit) Rifle + Light Shotgun, Antipersonnel Mines / Pistol, Knife. (0 | 33)
RAFIQ REMOTE FTO (Fireteam: Duo) Red Fury, Sniffer / Electric Pulse. (0.5 | 22)
KAMEEL (Minesweeper, Repeater) Electric Pulse. (0 | 8)
FIDAY Boarding Shotgun, Smoke Grenades / Pistol, AP CCW, Knife. (0 | 29)
BARID Hacker (Killer Hacking Device UPGRADE: Lightning) Rifle + Pitcher / Pistol, Knife. (0 | 16)
MUYIB Lieutenant Rifle + Light Grenade Launcher (Normal and Smoke Ammo.) / Pistol, Knife. (1.5 | 23)
HUNZAKUT (Forward Observer, Deployable Repeater) Rifle + Light Shotgun, Antipersonnel Mines / Pistol, Knife. (0 | 18)
4
MUTTAWI’AH Chain Rifle, E/Marat, Jammer, Smoke Grenades / Pistol, Knife. (0 | 5)
DAYLAMI (CH: Limited Camouflage, Inferior Infiltration) Light Shotgun, Panzerfaust / Pistol, Knife. (0.5 | 8)
5.5 SWC | 300 Points | Open in Infinity Army
Starco. Free Company of the Star
GROUP 1 |
EMILY (Chain of Command) Combi Rifle + Light Grenade Launcher (Normal and E/M), Nanopulser / Assault Pistol, Knife. (0.5 | 35)
ALGUACIL Paramedic (MediKit) Combi Rifle / Pistol, Knife. (0 | 12)
GROUP 2 |
BRAWLER Lieutenant Rifle + Light Shotgun / Pistol, Knife. (0 | 16)
JAGUAR Chain Rifle, Smoke Grenades / Pistol, DA CCW. (0 | 10)
SPECTOR (AD: Combat Jump) Boarding Shotgun, Nanopulser, Drop Bears / Pistol, E/M2 CC Weapon. (0 | 33)
UHAHU Hacker (Hacking Device Plus. UPGRADE: Icebreaker) Pitcher, D-Charges / Assault Pistol, Knife. (0.5 | 25)
SALYUT Hacker (EVO Hacking Device) Electric Pulse. (0.5 | 25)
CSU (Specialist Operative) Rifle + Light Shotgun, Nanopulser / Pistol, Knife. (0 | 12)
REAKTION ZOND HMG / Electric Pulse. (1 | 26)
BANDIT Hacker (Killer Hacking Device) Light Shotgun, Adhesive Launcher / Pistol, DA CCW. (0 | 25)
HARDCASE FRONTIERSMAN Tactical Bow, Rifle / Pistol, Knife. (0 | 14)
4 SWC | 299 Points | Open in Infinity Army
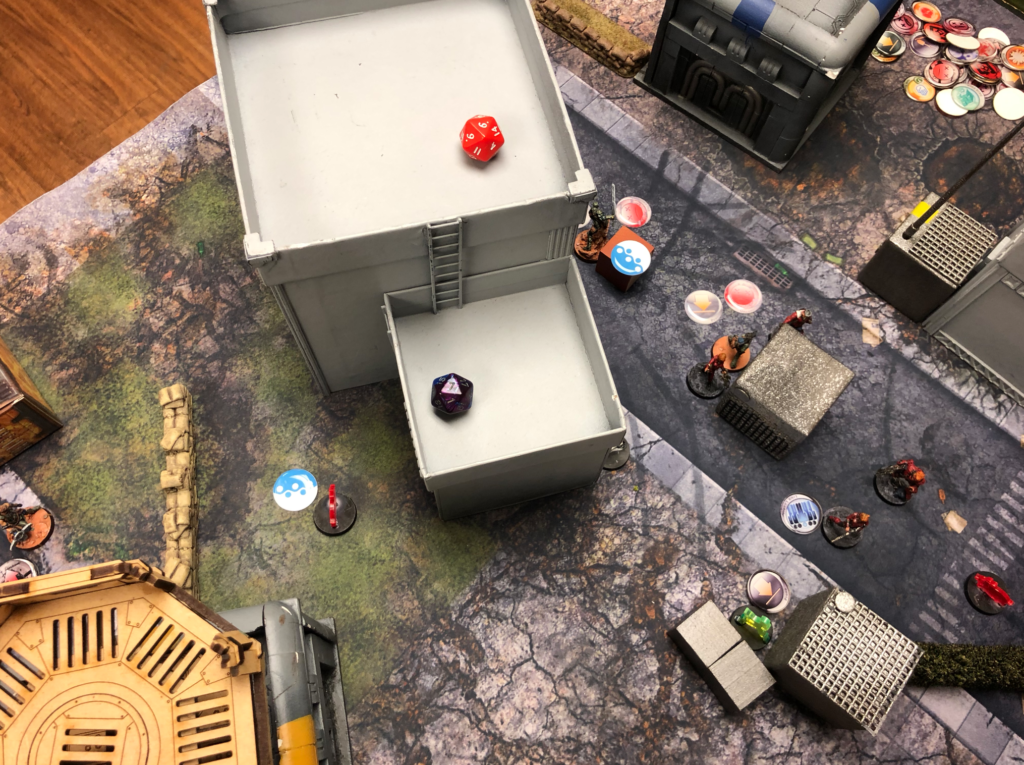
Deployment
I won initiative and picked table deployment. Marko opted to go first and began deploying his mans.
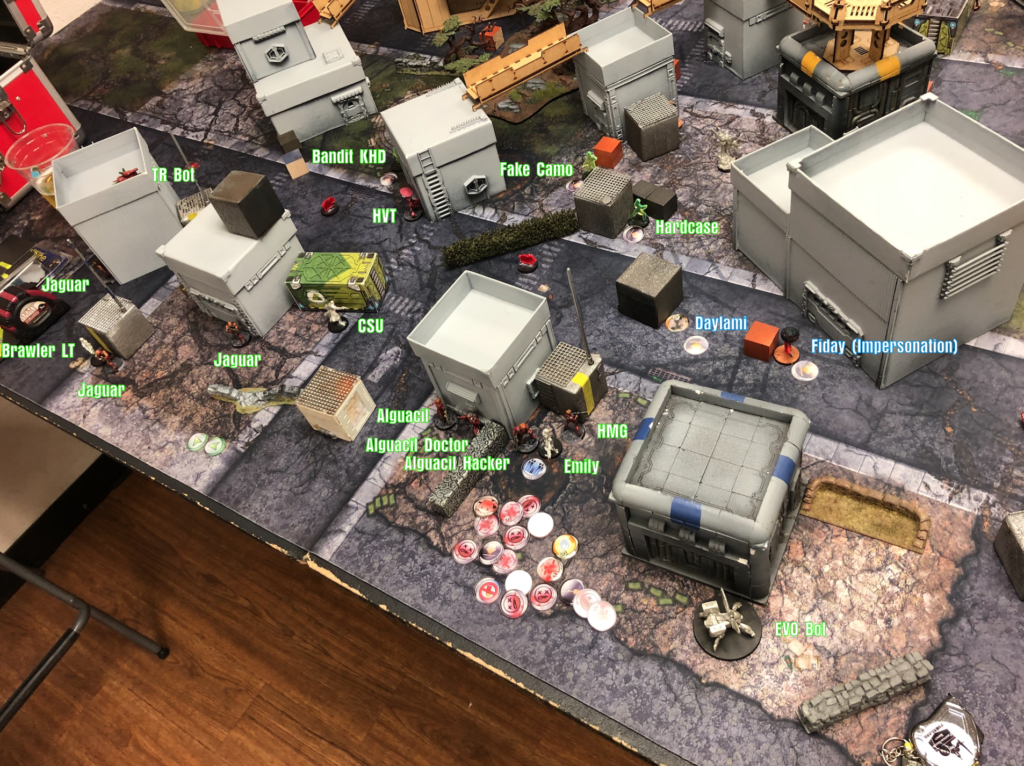
His left flank was protected by a TR bot and 3 Jaguar with chain rifles. His LT hid amidst this. Down the center went a CSU and a wad of Alguacil’s. Emily was kept as his reserve, but I knew she was going to be joining this group based off of the fact that only 4 linkable members were put on the table and the fact that he was playing StarCo.
His right flank was put just an EVO bot. Down the center line he put three camo markers. This was a pretty standard deployment with little to digest. He had his tools and he was keeping things pretty safe (with the exception of a fairly exposed right flank). I didn’t spend too much time trying to figure out if he had any clever ploys. This biggest obstacle here would be his TR bot, so I deployed my Muhktar MSV2 on that flank with both a Mutt and source of predictable smoke.
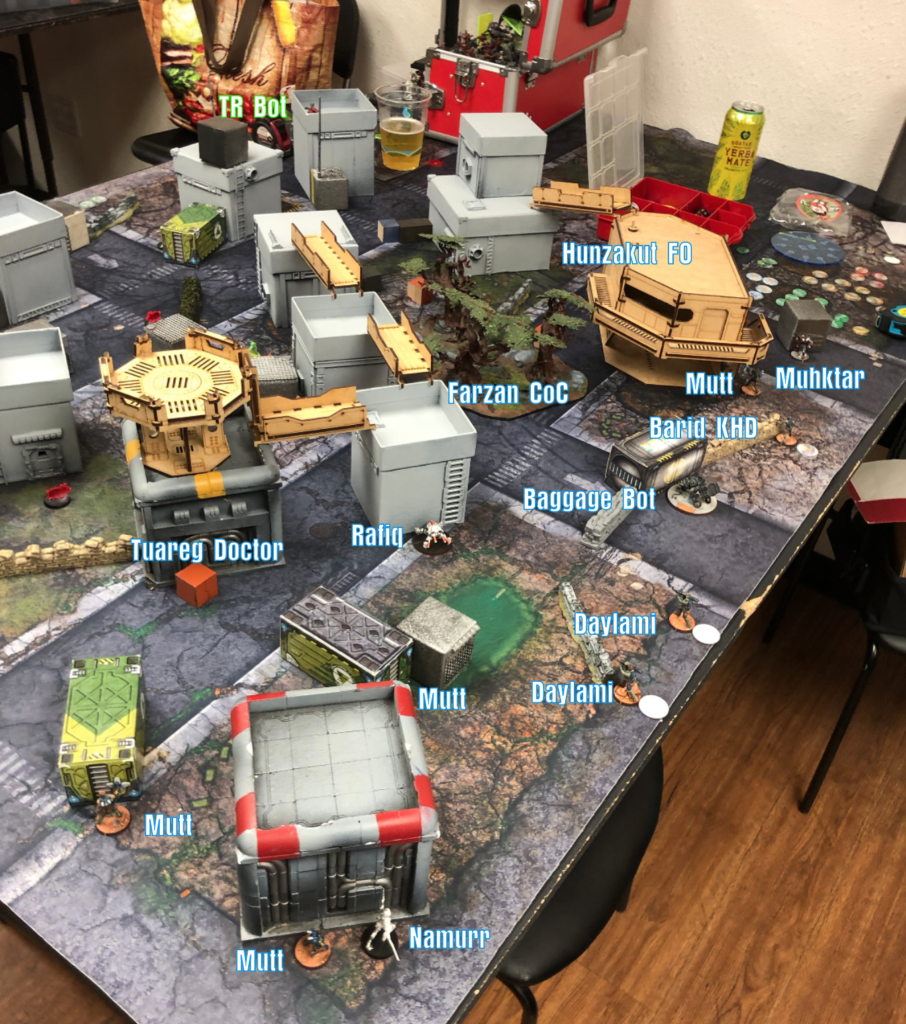
I’ve been conceptualizing the Muhktar and the Namurr as the two highly mobile arms of this list, so I deployed the Namurr on the opposite side of the board. In my head I imagined a brutal 6-2 dash, pushing buttons and ultimately collapsing his exposed flank with the EVO bot.
My Daylami went in the center to watch long fire lanes. The Rafiq, Tuareg, Farzan, and Hunzakut are all here to push buttons, so I dropped this across the center line where I could easily push any line of 3 objectives that seemed vulnerable.
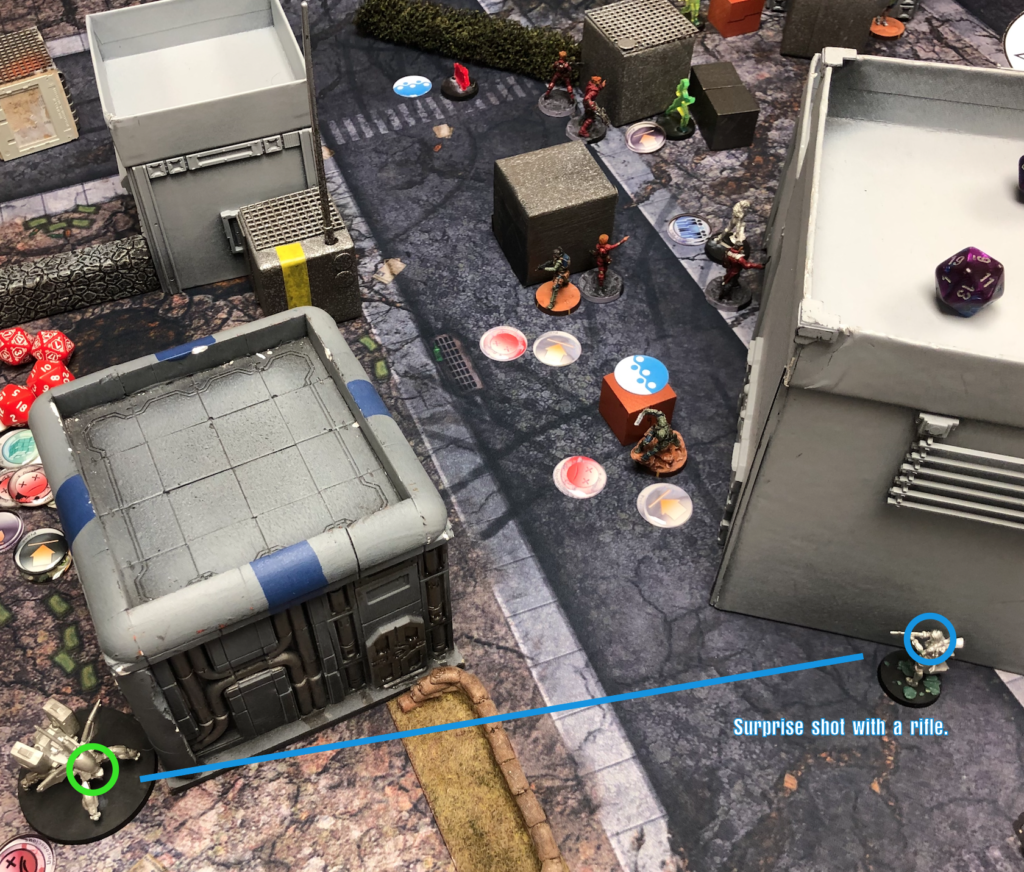
As predicted, Emily joined the Alguaciles. In response I dropped my Fiday next to a Daylami that had already successfully landed within template range of the link team. The link team was locked down (more on this later). Since this bat rep pertains to TO, here’s the shot of my Tuareg going down:
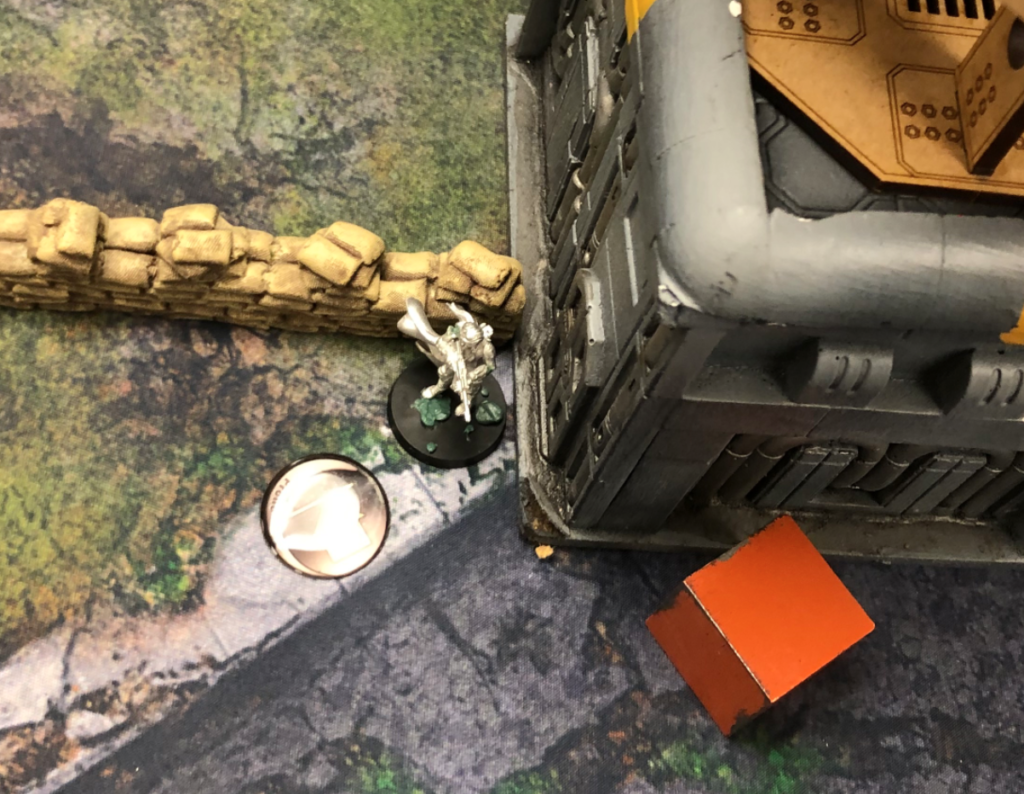
I put her prone on the left flank. As I mentioned before, the whole plan with my infiltrators it to play for the long game. My Tuareg is ideally a last turn surprised that can flip the scenario to my favor.
Turn 1
Top of 1 – StarCo
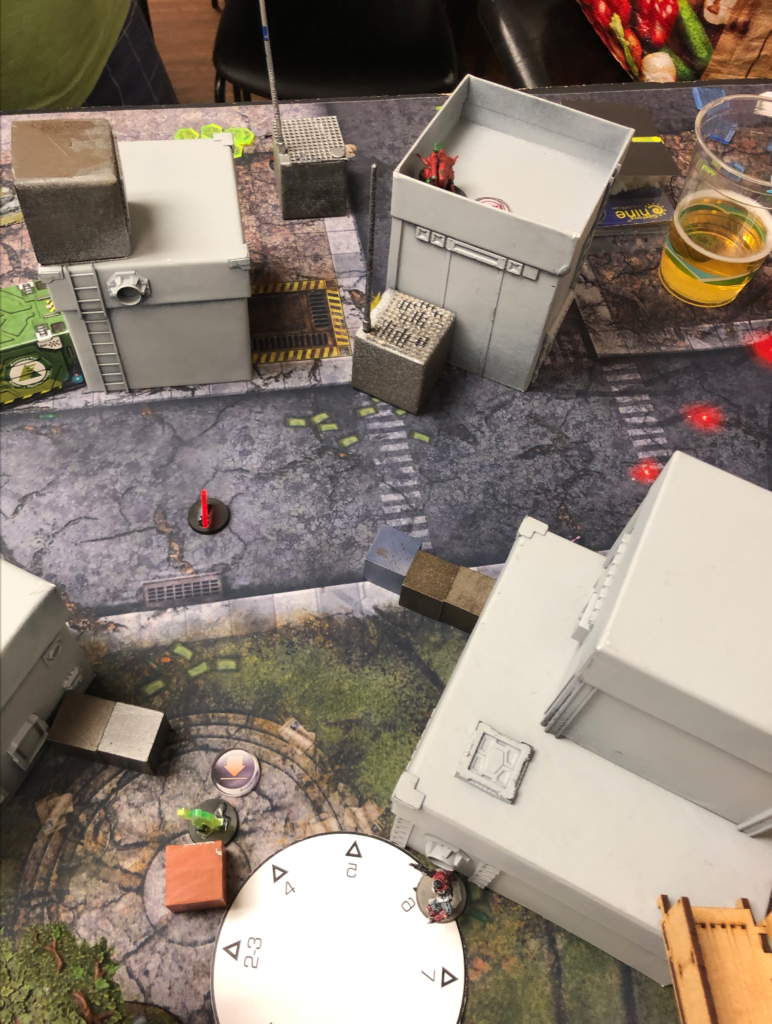
Marko begins his turn by landing Raoul on my left flank. He flubs the roll, even with help from the EVO. Raoul scatters towards the center and is spotted by a Daylami, who shoots and misses him with a panzerfaust.
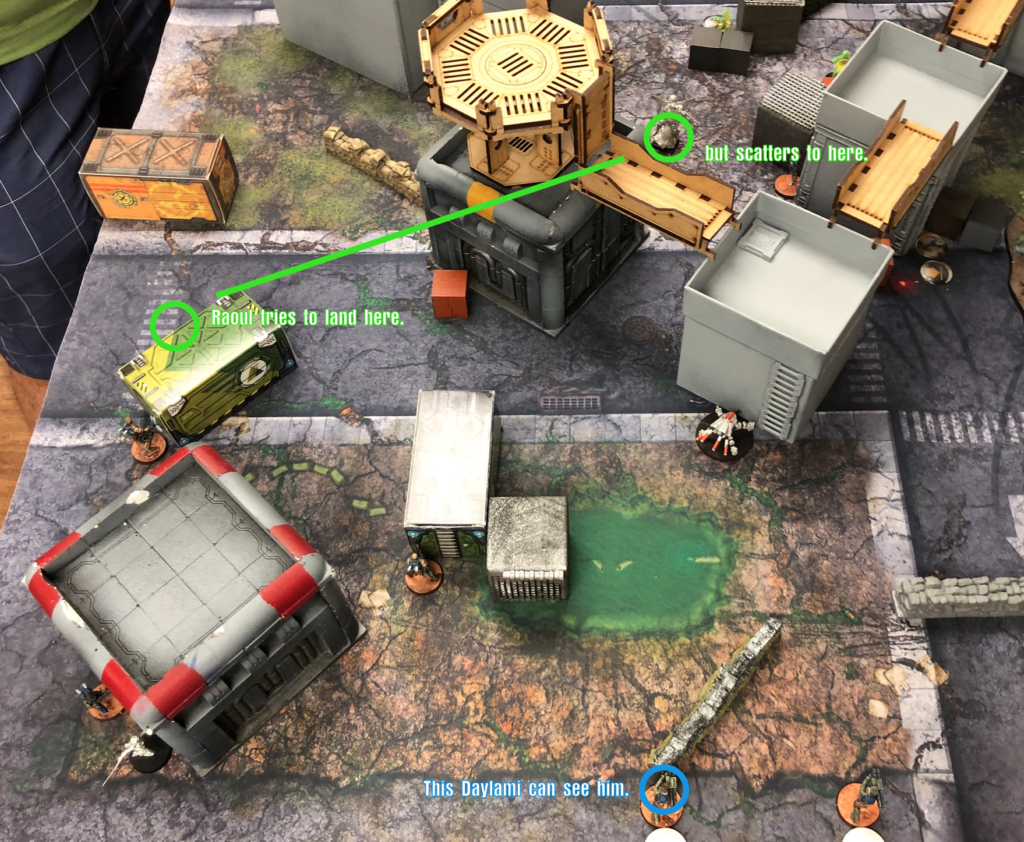
A mutt on the far right also take a shot with her pistol, but turns out to be too far away. The panzerfaust misses.
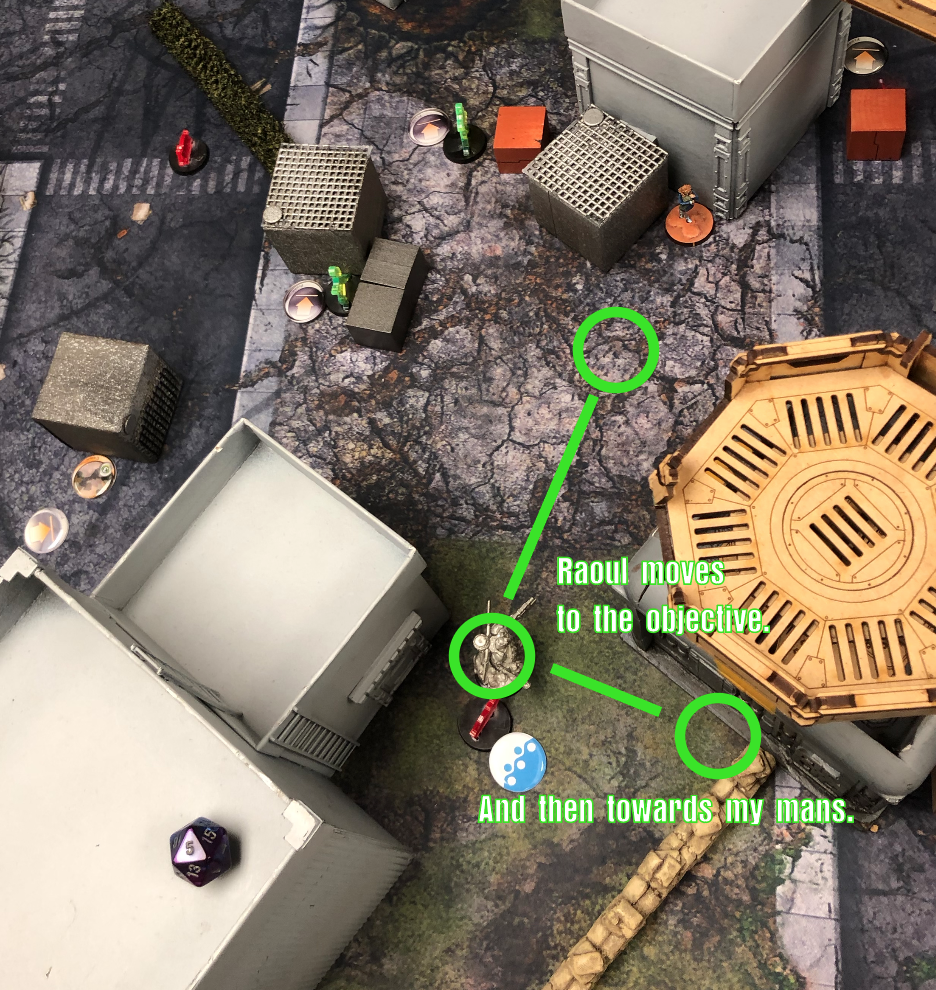
Raoul then goes for the center left (from my perspective) objective. I take (and flop) a second panzerfaust shot as he goes. He flips the objective (we were using a PanO token to represent him because he forgot his markers. This was likely a worst case scenario for many of the Nomad units on the other side of the table).
After flipping the button he moves along the building towards my left flank.
I debated revealing my prone Tuareg here for a light shotgun shot, but opted for the long game. In my experience, it’s best to stick with the plan for your TO when things start happening unless there is an absolute emergency. This reduces the number of moving parts that you have to grapple with midgame. An extra shot in the early game is often not even enough to make a big difference in the match later on.
Back to Raoul. He shoots at my Mutt, but fails to kill him. Then throws two drop bears to lock down this flank. Back on Markos side of the table the link team is activated via Emily.
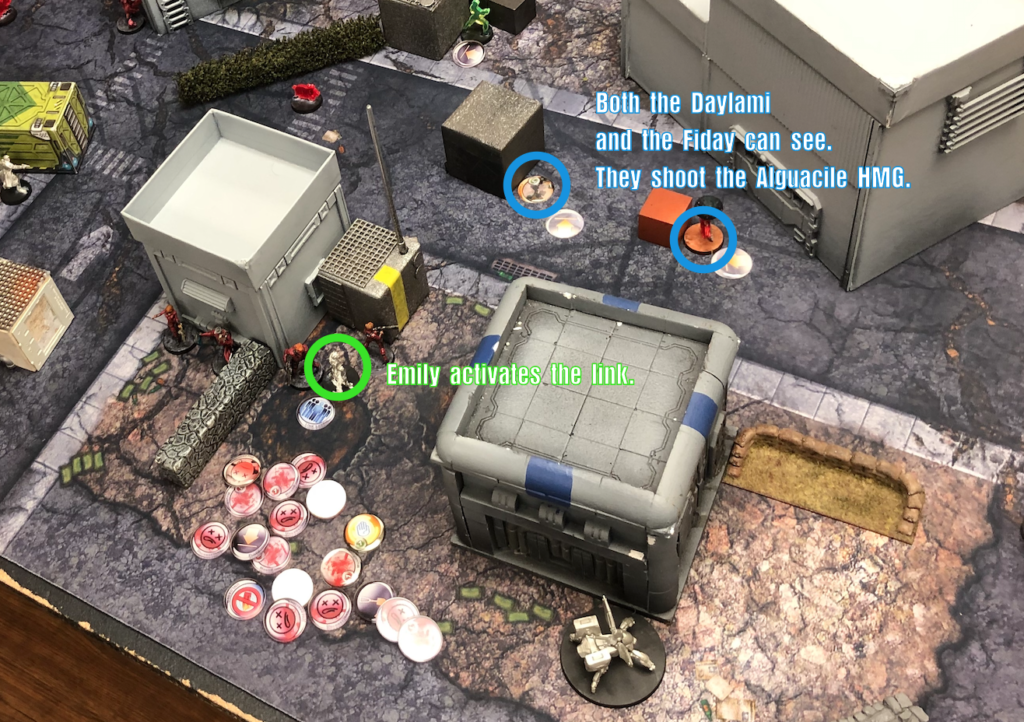
As the image shows, this turns out to be a mistake. Both my Fiday and my Daylami use their shotguns to hit the link team via the HMG. Marko attempts a dodge, but the damage is devastating. Marko forfeits, and I suggest that we rewind the clock a bit to accommodate some different decision making.
This time around, Marko leads with the HMG Alguacile. Two shots go into the Daylami, and three into the Fiday. It’s worth noting that had Marko led with the HMG, I probably wouldn’t have revealed the Fiday, but since we had just been through the uncomfortable situation of a turn one forfeit, I stick with my original decision and take the hits to both the Daylami and the Fiday.
In a normal situation, I usually like to waste my opponents orders on discover rolls on the Fiday, but I digress. With the Fiday and Daylami down Marko then moves up the table and activates the nearest objective.
Marko also forward observes the unconscious Daylami to complete is classified objective. Marko then finishes his turn by using the couple of orders in group 2 (I docked this pool 2 orders) to press a button with his Bandit KHD.
Bottom of 1 – Haqqislam
My turn one kicks off with one regular order lost from group one (my Fiday), and an irregular order from group two (my Daylami).
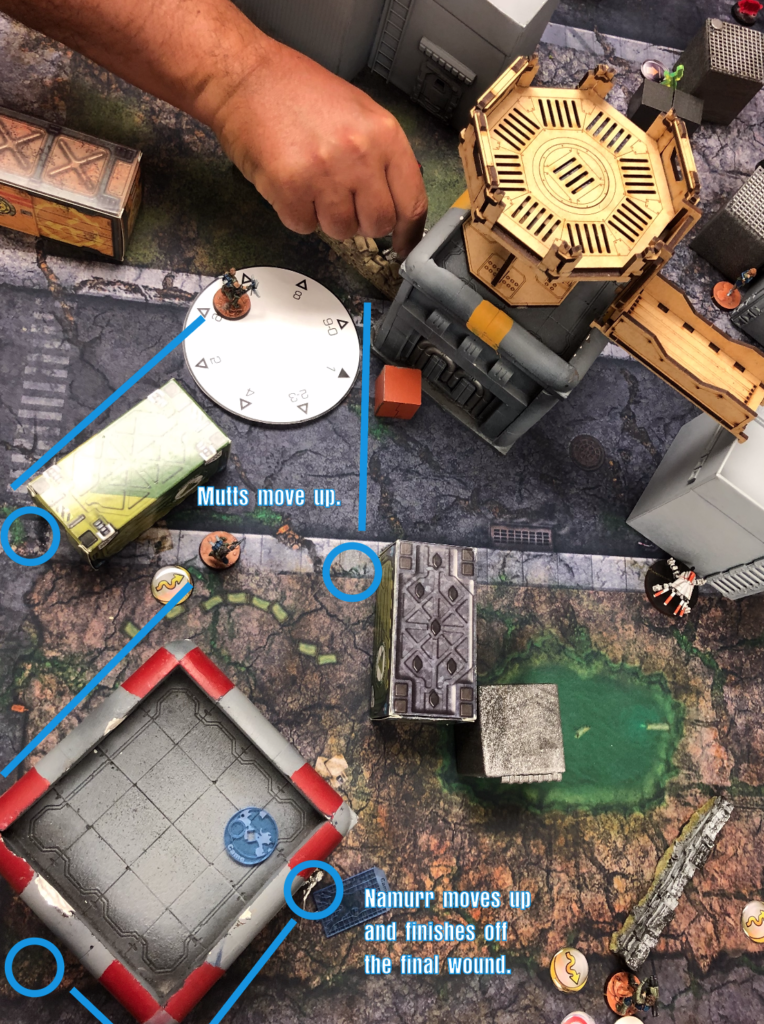
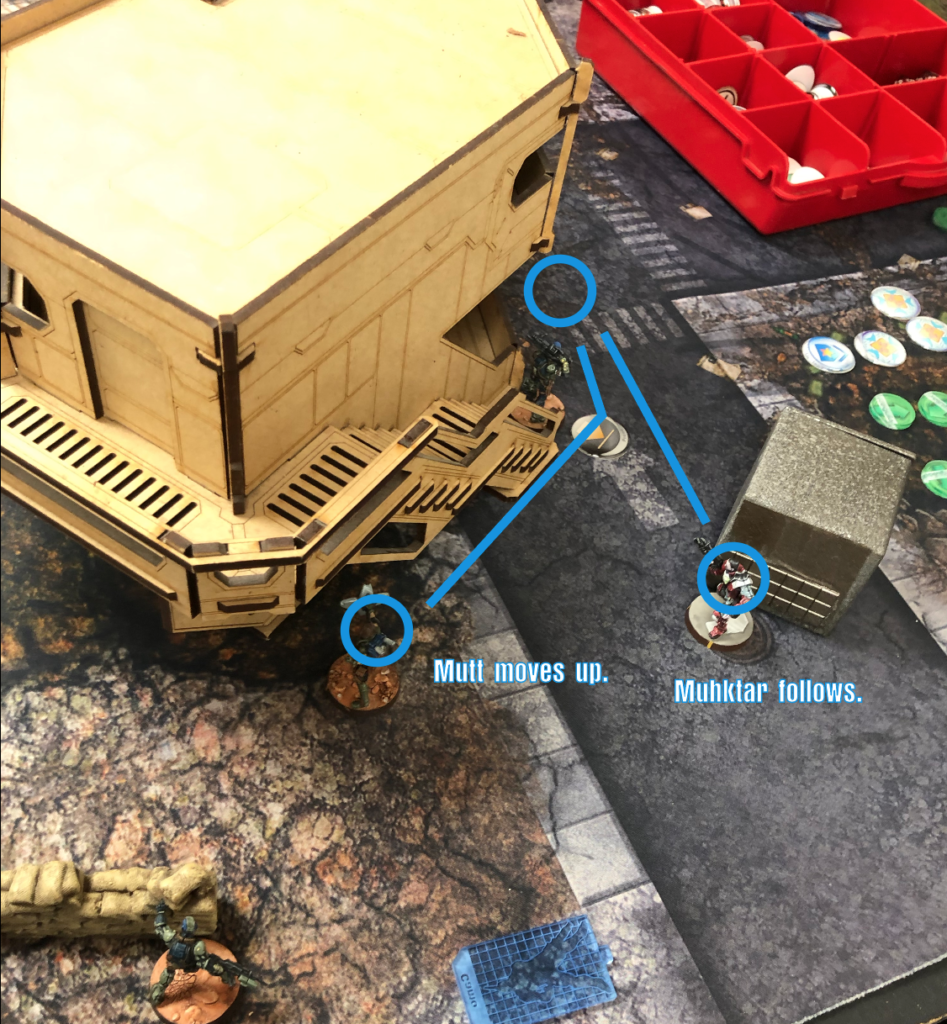
One facet of playing Haqqislam that I love so much is that having an impetuous phase makes it super easy to get right into the momentum of a turn. My Mutts need to move up, and so I opt to move the nearest Mutt towards Raoul. His route will catch both dropbears without hurting anyone else. I figure that losing a 5 point unit really isn’t the worst way that you can neutralize several orders worth of area control.
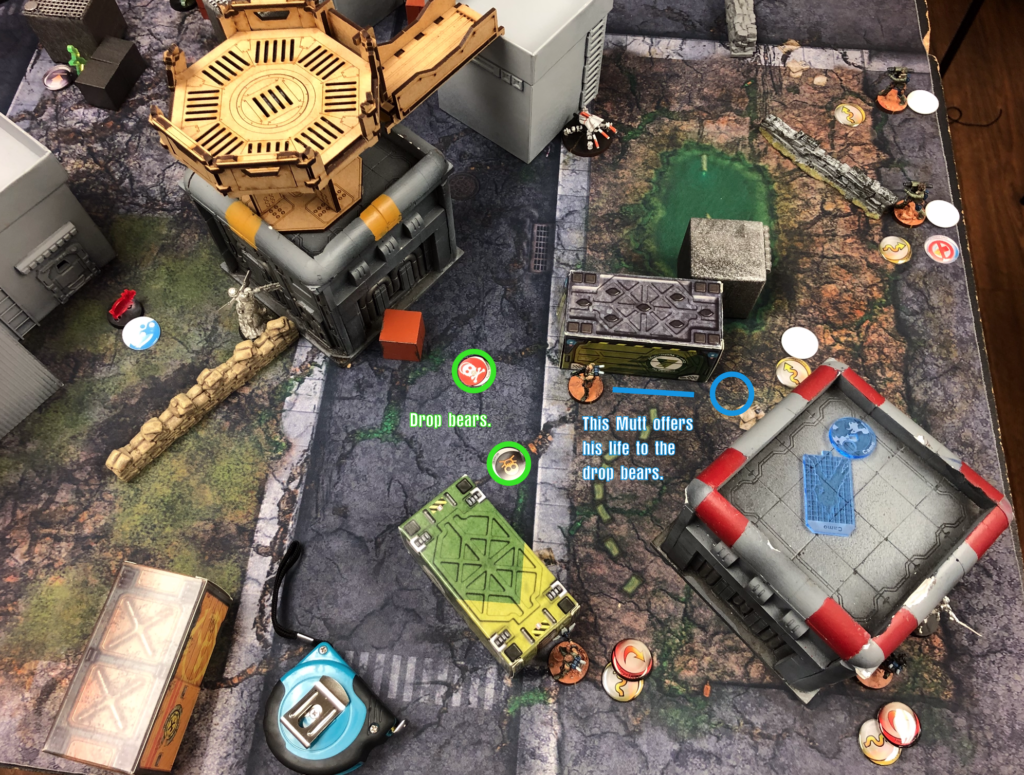
The Mutt dodges the drop bears (hah!) and Raoul takes a shot at the Mutt, sending him to dogged.
The other Mutts advance, dropping smoke, but leaving a gap where Raoul can still see the dogged Mutt.
The dogged Mutt moves up, takes another shot from the BSG, but sends Raoul to NWI with his chain rifle.
My Namurr then comes up from behind the building and finishes Raoul off with her spitfire. On the right flank my Mutt uses both her impetuous and irregular orders to get smoke out for my Muhktar.
The Muhktar uses this smoke to take out the TR bot.
The Hunzakut then drops a repeater within 8” of the recamo’d Bandit.
The
Muhktar then retreats and goes into suppressive fire looking at the
Bandit. This turned out to be my largest mistake of the match, as I
didn’t look at the other side of the board to make sure he was totally
out of sight from the link team. If I had spent that extra order on
another 8 inches of movement then this whole match would have been a lot
easier later on.
The end of my turn uses an irregular order to move my Daylami into ARO range.
Turn 2
Top of 2 – StarCo
As I said; the Muhktar got gunned down by the Alguacile HMG.

My Daylami tries to take a shot of opportunity, but isn’t so lucky as to land his shot. Most of the rest of Marko’s turn sees him moving the link team around. He snags the Daylami with Emily’s LGL, and the template hits my baggage bot. He also spends a lot of time dancing with the Mutts.
A LOT of orders go into trying to kill my Barid KHD. Lightning is a blessing, and the Barid proves to be the luckiest unit in my army, surviving everything that comes after him.
Bottom of 2 – Haqqislam
Here were go for a round of TO camouflage! That past turn really hurt. Losing my Muhktar to sloppy play really stung. But the show must go on, so I look at my options and decide that Marco’s weak right flank is just asking to take some surprise shots from behind.
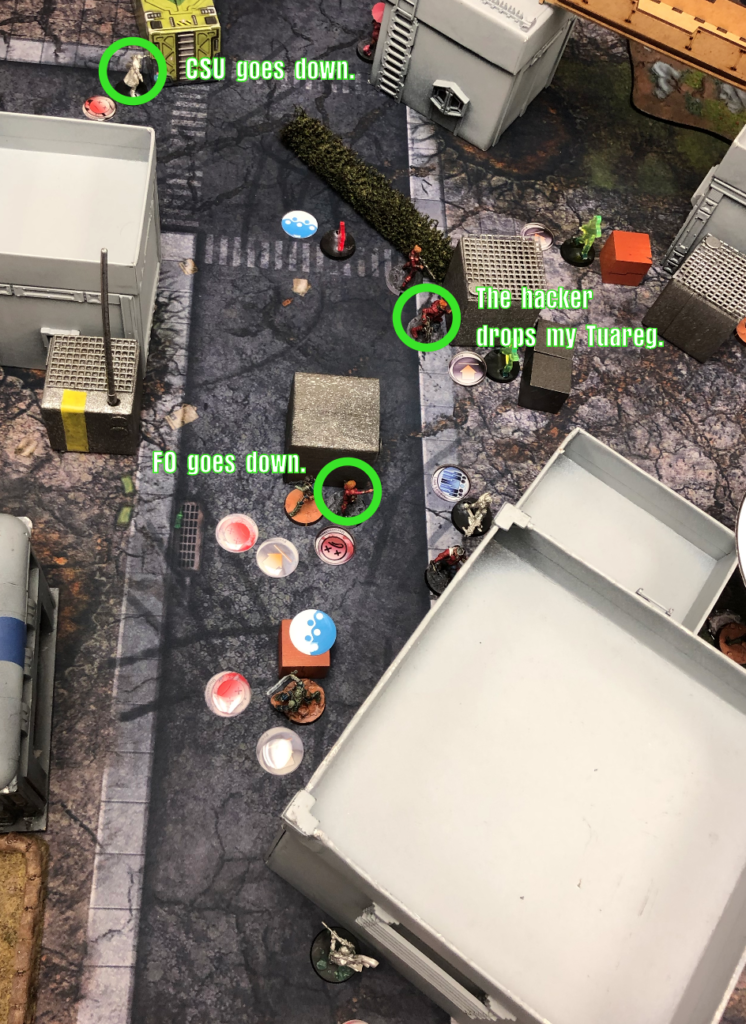
First up is the EVO bot. Next is the backside of the Alguacile link.
I drop the CSU, the FO, but am stopped by the hacker’s ARO as I continue to try and chew through the team.
| 71.50 | 19.21 | 9.21 |
The numbers give me a 71.50% of succeeding at this attack, so when the hacker drops my Tuareg, I’m a bit frustrated. This attack should have been able to completely cripple the link team.
Moving on from that, I spend the end of my turn using two orders failing to kill the Bandit KHD with my Barid, before finally dropping him with my Muyib’s LT order and a (direct fire) LGL shot.
Turn 3
Top of 3 – StarCo
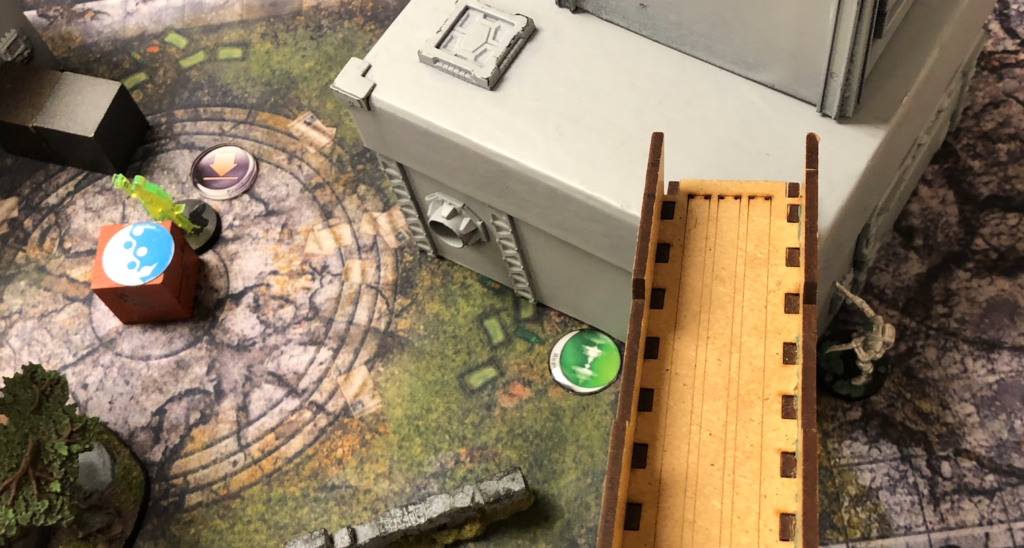
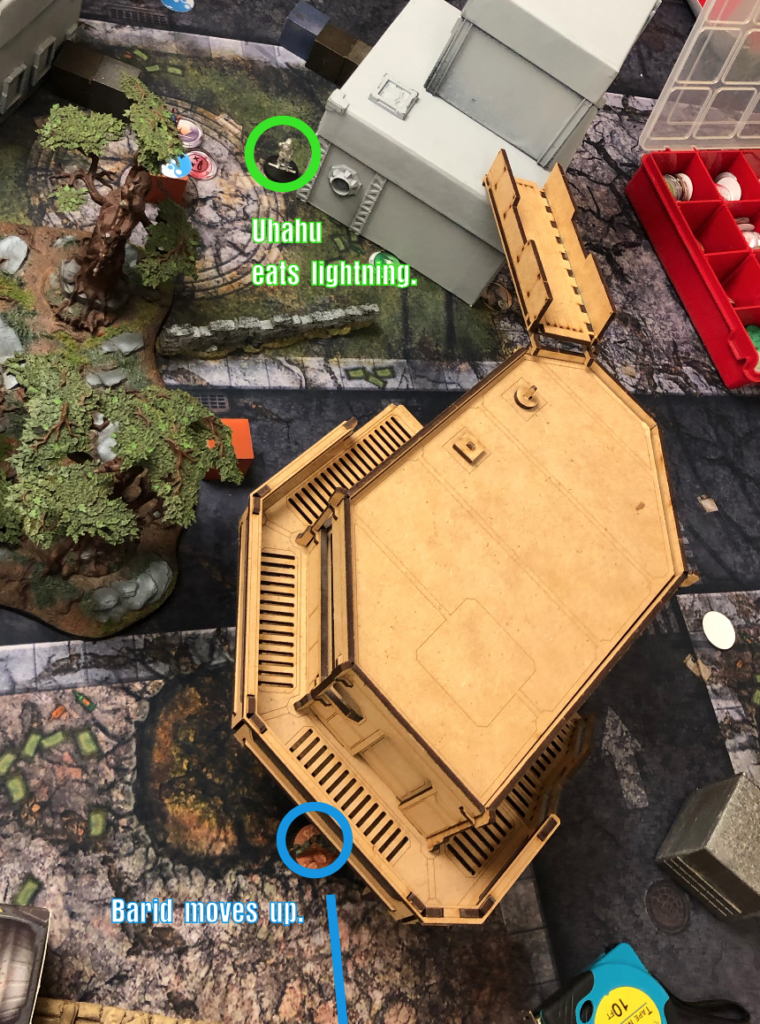
At the top of turn 3 Marko makes a run with Uhahu and pushes the button on his left; which completes a line of 3.
As Uhahu goes though, she walks within 8”of the repeater that my Hunzakut dropped early. My Barid hits her with lightning for her trouble but neither attack goes through, sending the turn over to me.
Bottom of 3 – Haqqislam
I don’t have a ton of orders to make a lot of magic happen.
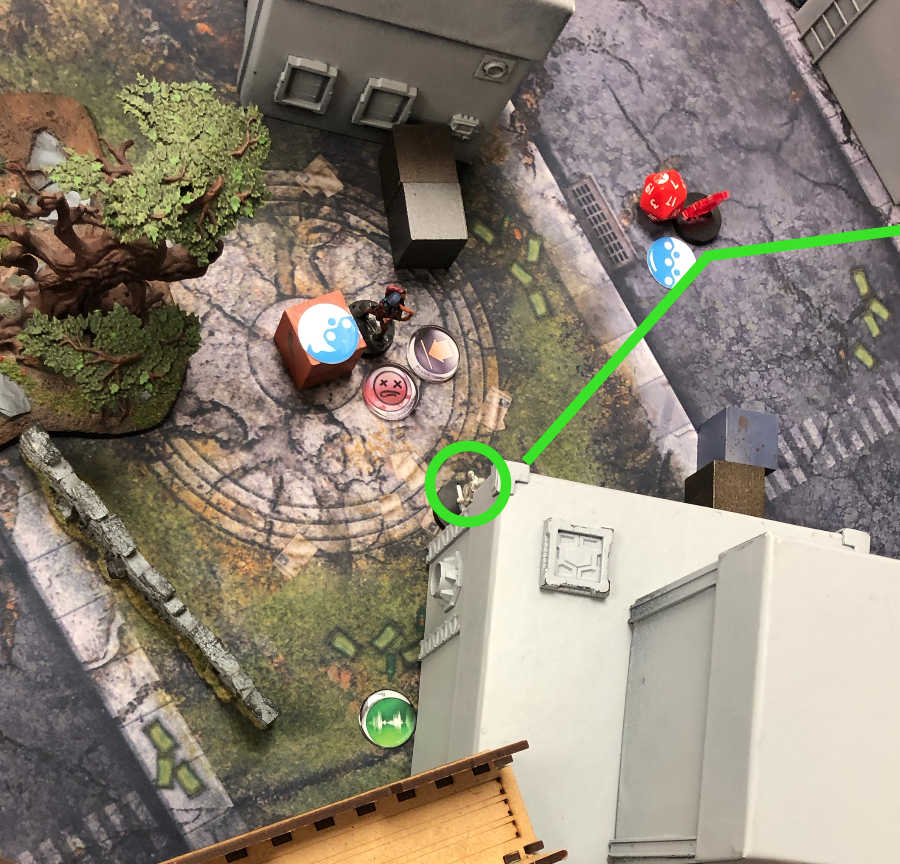
I start by moving my Barid towards the closest objective on my right flank. He hits Uhahu with lightning at the same time and she goes down.
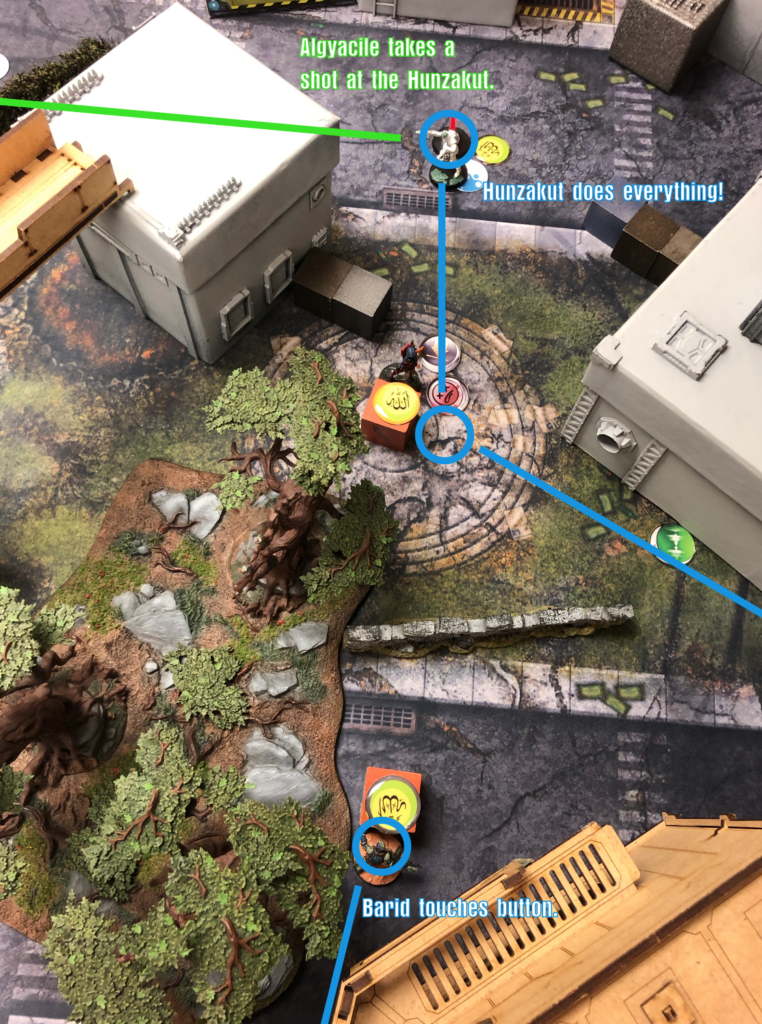
It’s up to the Hunzakut now. He goes for the middle button and pushes it. After that he runs towards the button on Marko’s side of the table and pushes that one while taking a shot from the Alguacile doctor. He passes his role AND survives the shot. Good boy.
The Barid finishes by making a run for the closest console and then tagging it on my last order. This finishes the game in a win for Haqqislam. 6-3.
Post Game Analysis
Man, that game got messy.
I really wasn’t sure that I had to orders to make my last turn run work, but I planned to at least flip the switch on his side to deny him a victory. So the fact that I had a final order for my Barid was a streak of luck.
In previous games I have used my Tuareg purely as a last turn button pusher, and although I think she serves that role beautifully, I also think its worth emphasizing just how scary a TO rifle can be when it goes on the offensive; especially when there’s an open flank to exploit. The fact that she fell to a lucky shot shouldn’t diminish the potential that she had there. If she hadn’t died to that stray bullet then my final turn would have been spent running up with the Namurr to connect the consoles on my left, and this felt like a pretty straight path towards victory. It was certainly a lot cleaner than the route I ultimately took.
Any game that comes down to one or two dice rolls is honestly anybody’s game, so I want to emphasize how close that was.
Important lessons for the future will be to double check across the board fire lanes when placing an attack piece in suppressive fire, and using that 8 inches of movement to get the heck out of dodge so that I’m not in that position in the first place. So, some back-to-the-basics type lessons here.
I’d also like to point out that I really didn’t play this the way that I usually like to. I’m all about ignoring the giant blob and using my orders to calming approach the objective. I got pretty thrown off by that first turn ARO with the Fiday and Daylami, and spent the rest of the game slugging it out with the fire team.
Again, that’s some back-to-the-basics stuff for me… Things wouldn’t have to have been so down to the wire if I’d just ignored the link team and used my orders to activate consoles earlier in the match.
I’d like to thank my opponent for playing an excellent game with me, and for doing so on a Sunday afternoon (which is unusual for me).