Play the Mission
By CrazyNomad
Overview
- Mission: Multiple by WostCase
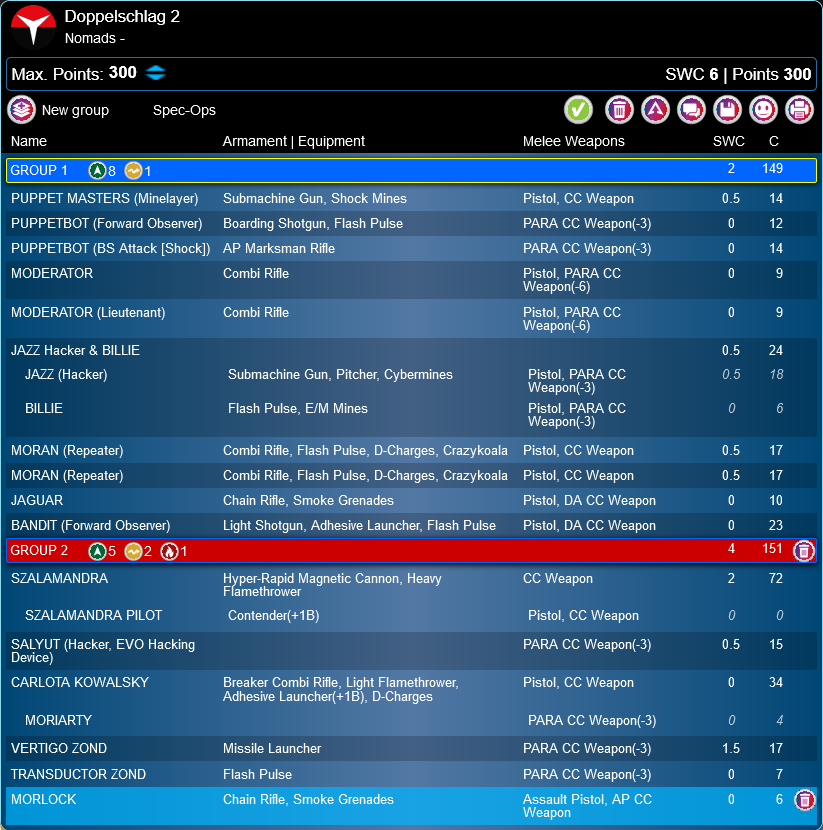
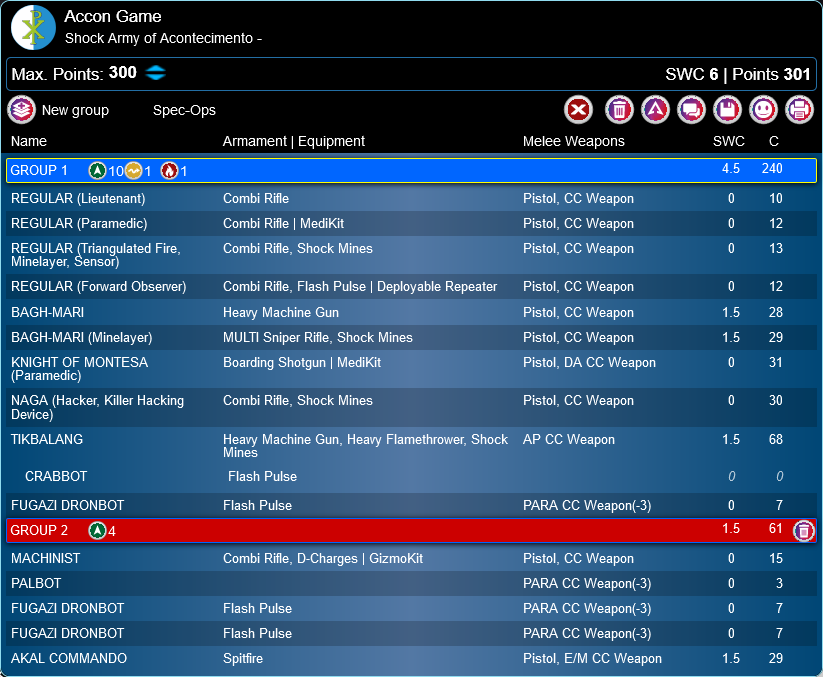
- Forces: Nomads versus Shock Army of Accontecimento (300)
- Initiative won by: Shock Army of Accontecimento
- Deploy First: Nomads
- First Turn: Nomads
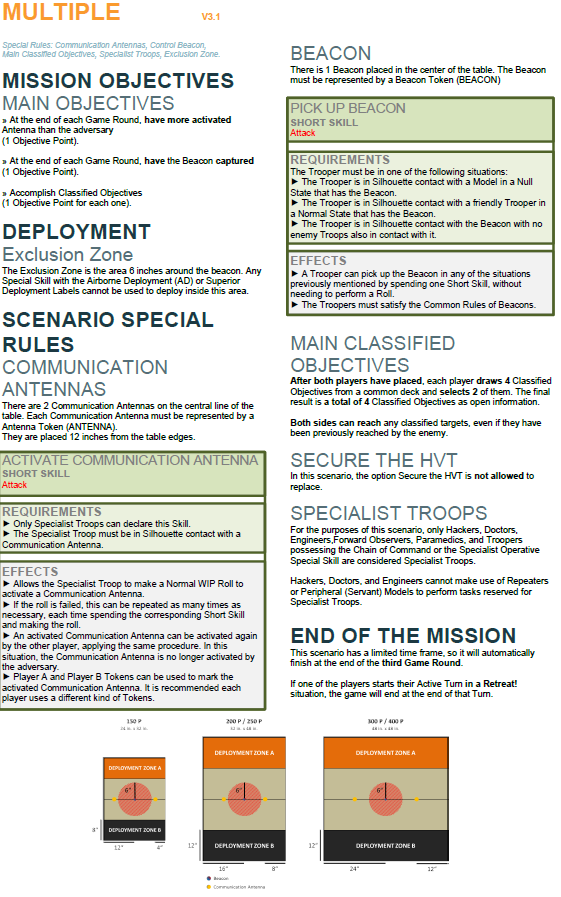
When we discussed the Mission we came around the question when the classifieds are actually drawn. The mission says “when both players are places.”, which we interpreted as after we finished deployment. I did chat with the author about that and we did as intended.
I will go into details of the mission in the post game analysis.
The Screencast of this match is here available:
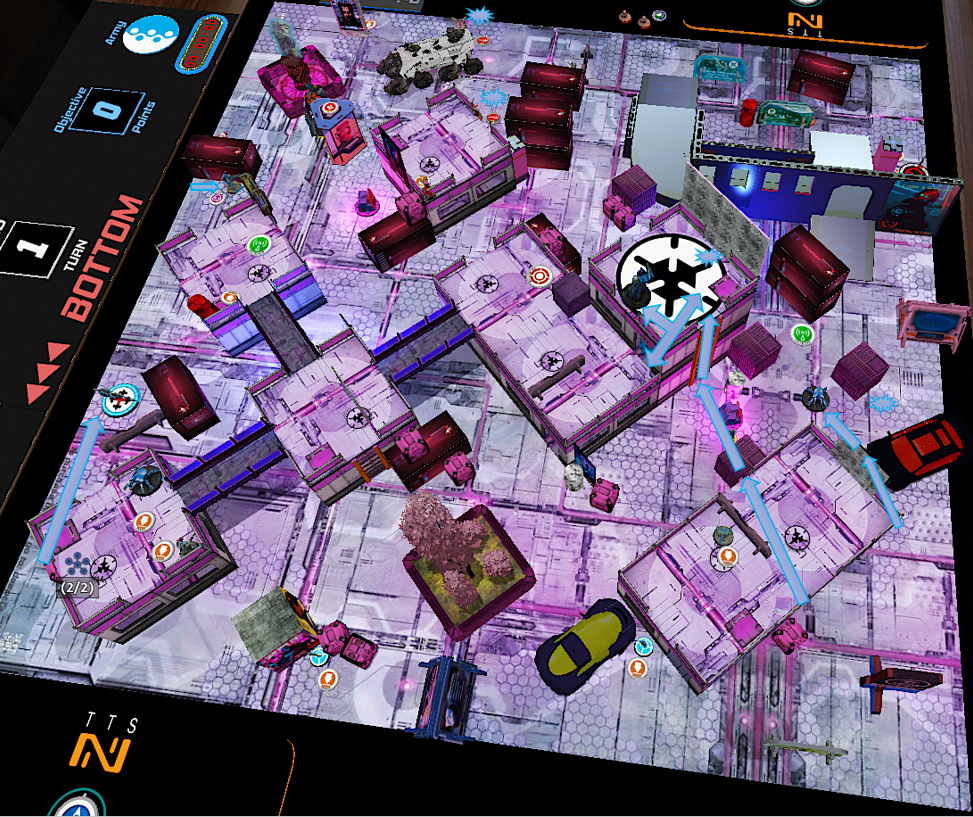
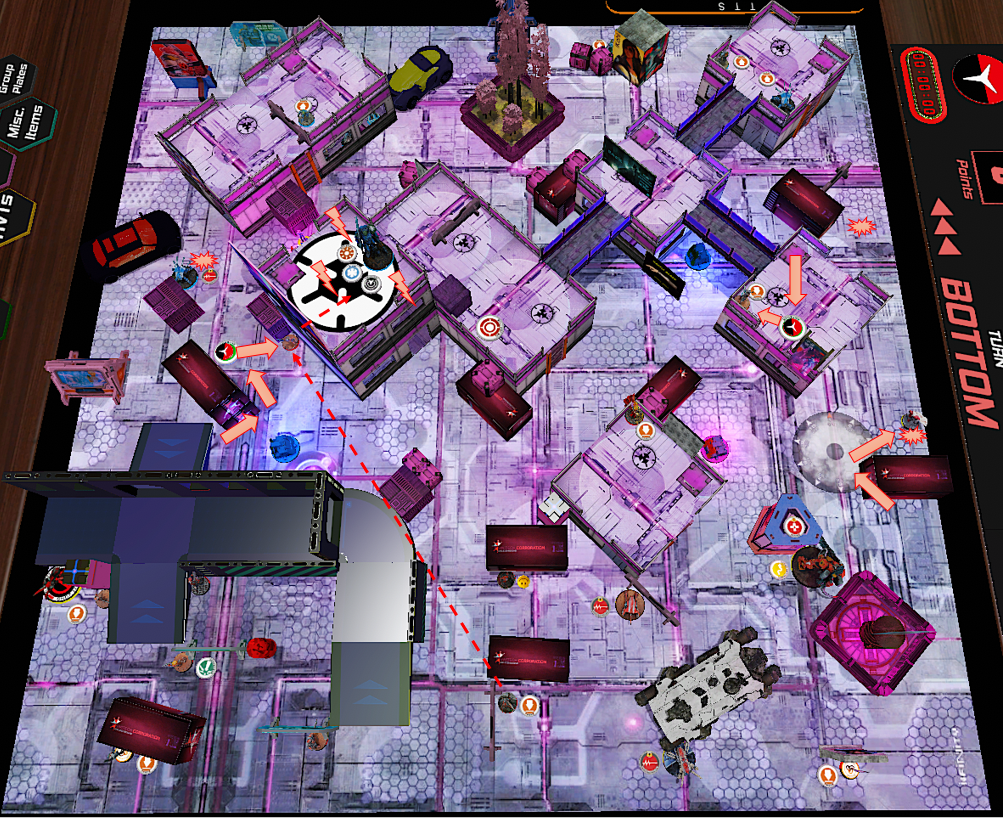
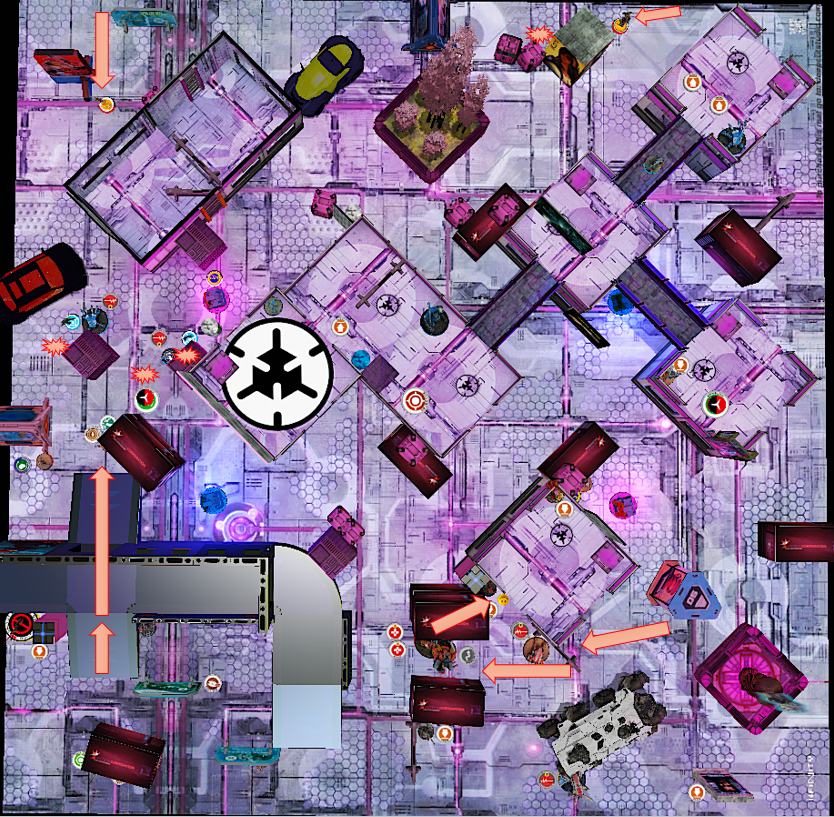
Deployment
I did spend a Command Token to hold back two Units. These were the Puppetica Company (Group 1) and the Sally (Group 2). Whatever is on overwatch can be solved by them.
The Main part of my Army is in total cover (Zero Deployment) and only watching fire lanes on my side of the table. This works very well for this Nomad list. Interesting to point out is the Vertigo which is on one hand very important to make my opponent fear my repeaters (targeted units will get shot on my Turn) but also has to compete for his place in the list with a Zero MSR which both cost 1.5 SWC. Therefore I usually place him in a way that he covers a ling fire lane that is hard to reach for my opponent. In this case he is meant to look at the entrance of the left building to protect my Lieutenant.
Billie is in an advanced position to be able to grab the Beacon if I get the opportunity. She is fast, small and can get White Noise to cover MSVs if necessary. Beside that I have my infiltrating specialists split along the centerline in total cover.
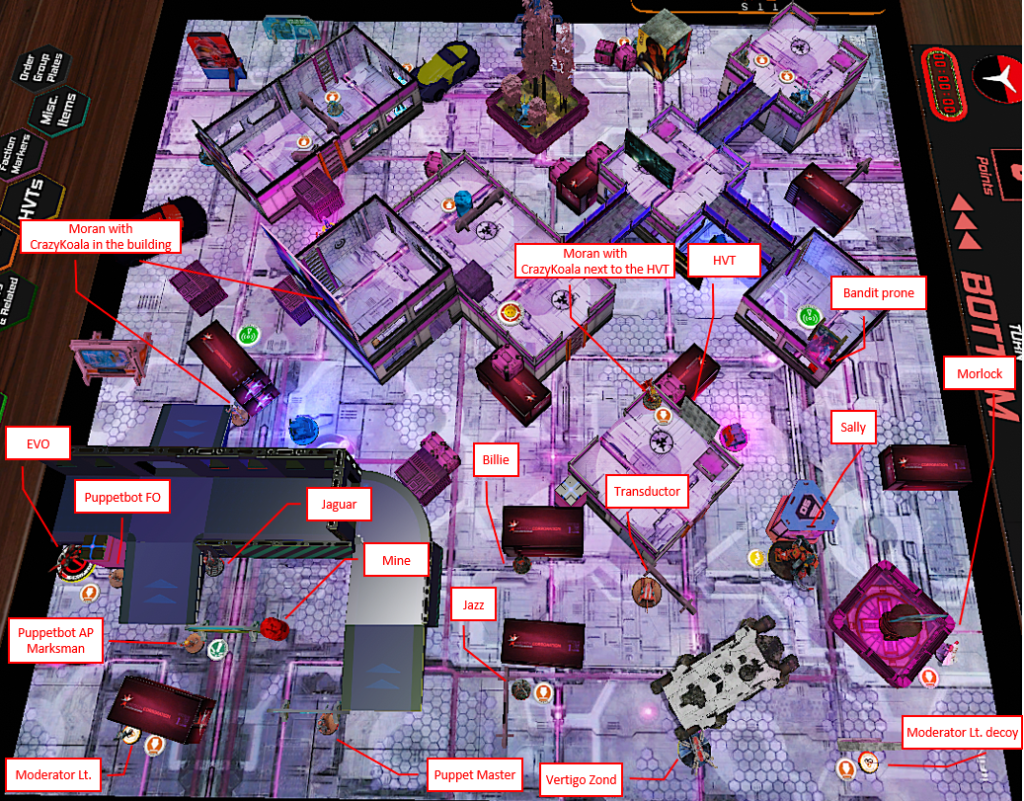
When we look at the decision from my opponent for picking one side and his deployment, we need to consider that he wasn’t able to see the containers. We found that problem at the beginning of his first turn. But his decision to pick the red side is clear, because there was no visible cover on the other one.
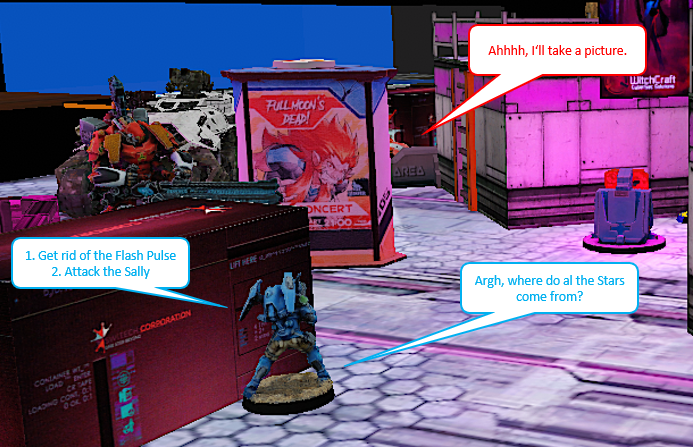
He did hold back his Tikbalang who was meant to stand on the roof of the right building in Suppression Fire. But he changed his mind when he saw my Sally and put him in total cover.
Other than that nearly everything is in total cover except the Flash Pulse Bots from Group 2. Looks like this Group is mainly to slow me down.
When we picked the classifieds, we already raised the question: “Do I pick the ones that are easy or hard?” Probably at least pick those that I can fulfill but my opponent does not.
We ended up picking the following:
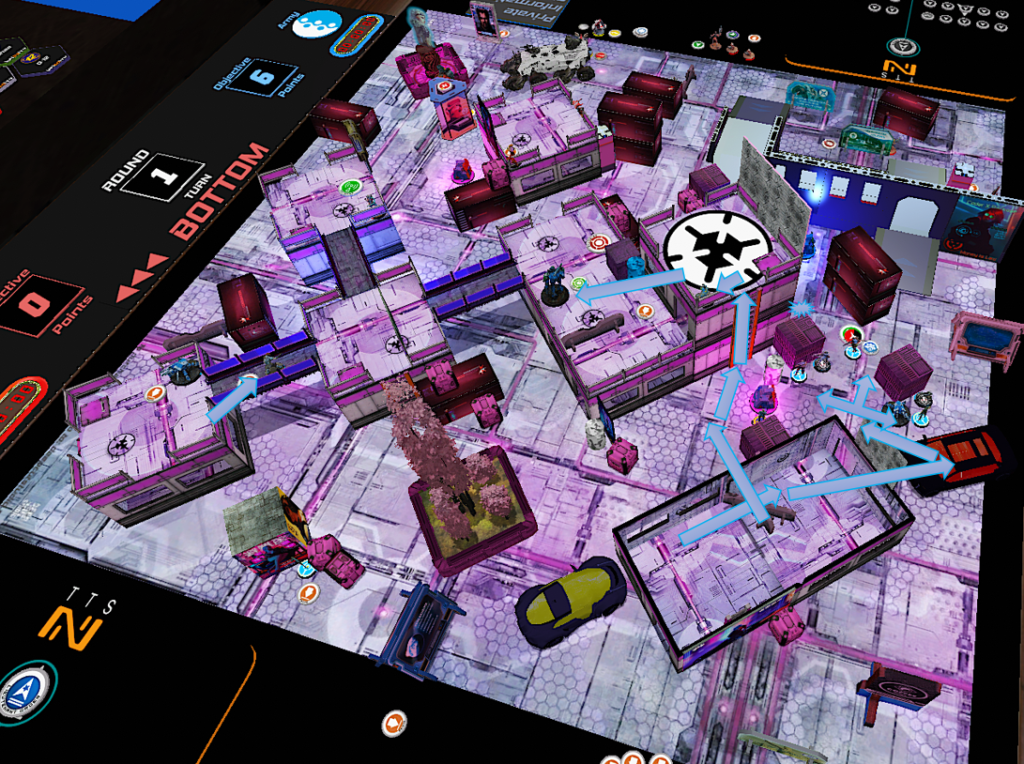
Turn 1
Top of 1 – Nomads
Ok, I have the first Turn and there is nothing I can easily shoot. But there is a lot to do Mission wise. Grabbing the antennas is always difficult if going first. Hence I decided to go for the beacon.
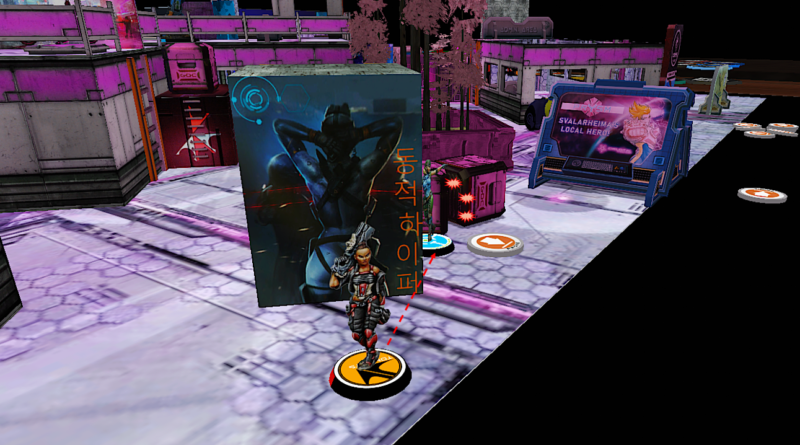
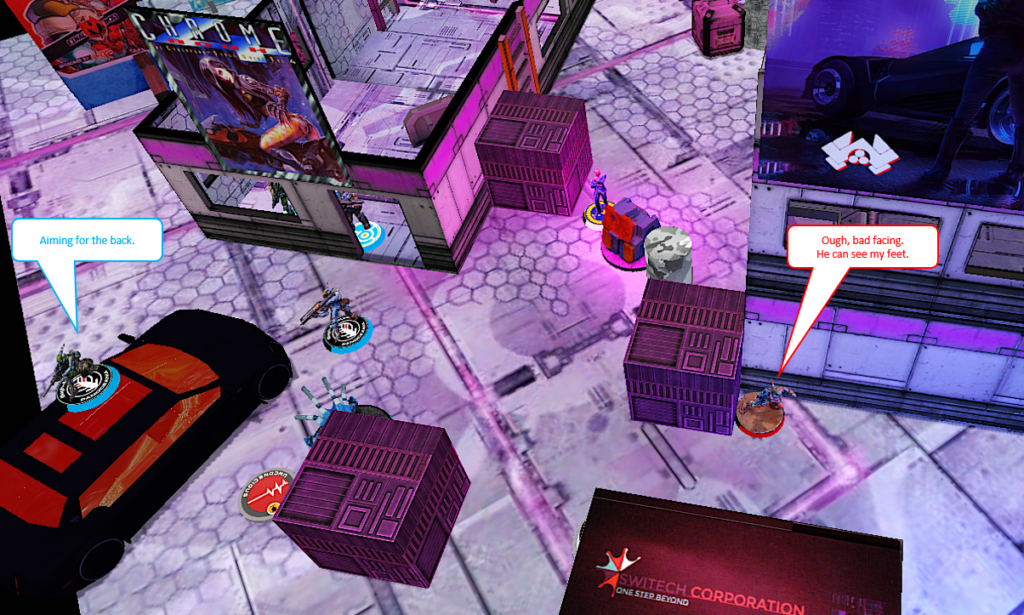
Billie moves out to grab the beacon and back. It takes me some orders (around 5 or 6), because I’m afraid of a hidden Sniper (Accon doesn’t have a hidden deployment unit….) and move prone on the building.
I reposition my Bandit to be closer to the Antenna and the Moran on the left flank places a Crazy Koala. Nothing fancy here just setting a Nomad style defense.
Sally can get LoS with one Flash Pulse Bot and needs his whole order pool of the second group to deal with it.

Bottom of 1 – Accon
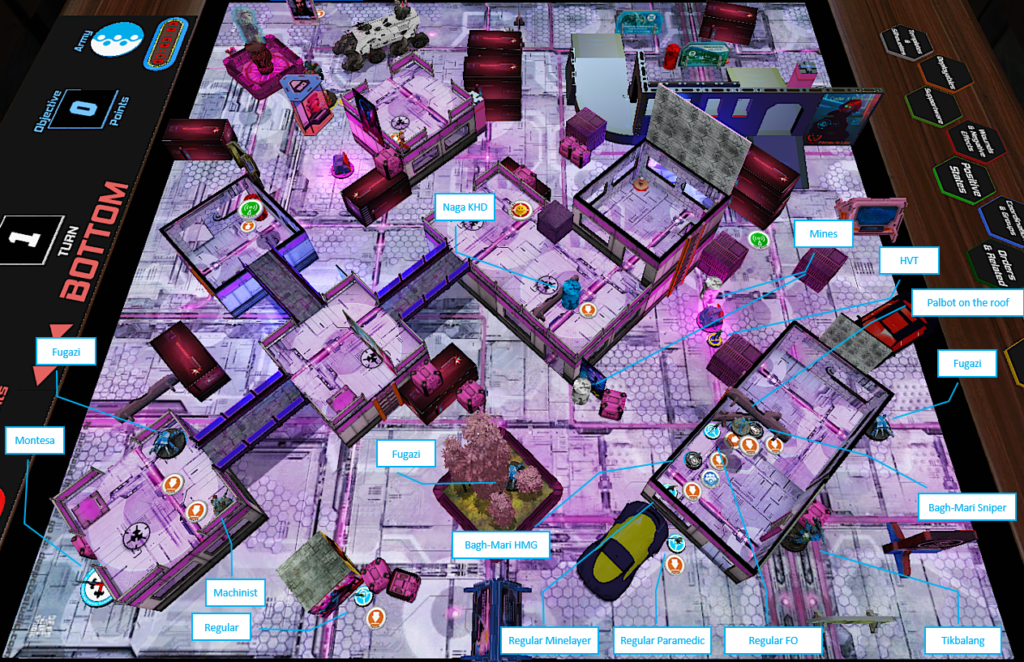
So now first Turn for Accon. Let’s see how my defens works out. The Knight of Montesa uses his Impetuous Order to move forward. This is the time when we realize that he can’t see the Containers and we have to fix the map.
The first regular thing my opponent does is successfully dodging the Crazy Koalas with the Fugazi on his flank where the Tikbalang is. On one hand this only uses orders from group 2, but on the other hand the Tikbalang has to go that way as well. And the Tikbalang is more robust to surviving, therefore I would have used him. But in the end it worked out.
The next move is to bring a Akkal Commando with Spitfire on the Flank where my Sally is. He has to face my Flash Pulse first and then wants to attack Sally. Unfortunately he gets stunned by a crit.
But was that really “unfortunately”? Assuming he would have killed the Flash Pulse which he easily could have done. He would then have moved to see Sally and attack it by facing him in cover and below 8”. I would very happily have placed a HFT and taken the risk of spitfire shots. Taking out an enemy unit in ARO with low risk gives me more orders in my active turn. Now I will have to spend orders to deal with him.
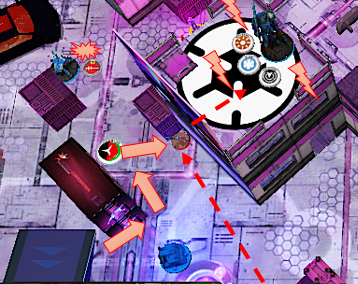
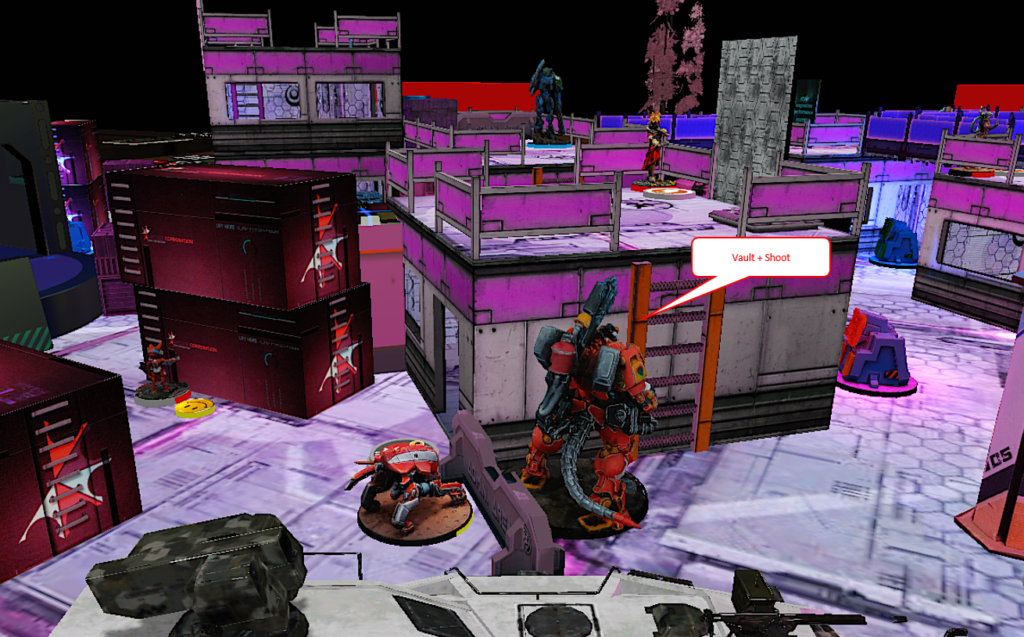
And now things get interesting. Accontecimento moves the Tikbalang forward and on top of the building on his right flank. That caught me by surprise and showed another fire lane my missile bot had that I didn’t see before. Currently I’m happy with that Situation, because the TAG has to face a lot of AROs and I realize he “only” has a regular HMG.
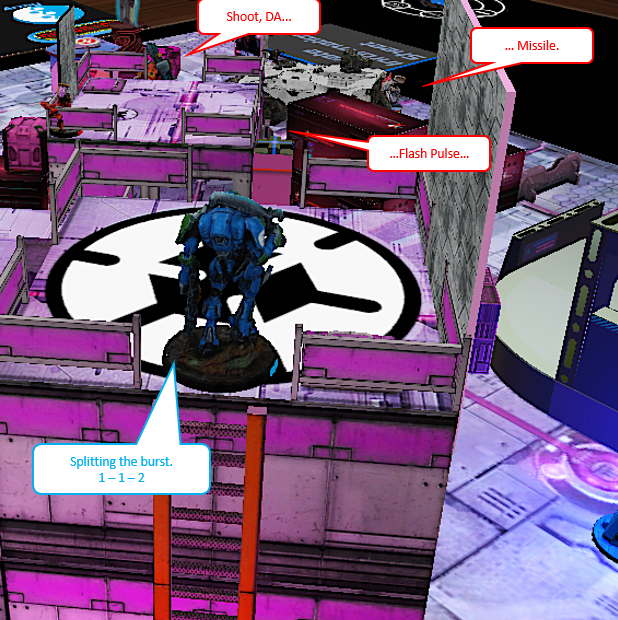
A massive shootout starts. A lot of shots bounce off the armor or miss and the TAG is climbing around trying to gain better positions but the only one available is on the top of the building. Things go the way they have to statistically. The Flash Pulse dies first, then the missile bot and Sally takes a wound. After a whole bunch of orders (maybe 4) the TAG ends in total cover from Sally but on the roof in Suppressive Fire.
I’m fine with this outcome, because I just lost two orders in Group 2 (I have a spare slot in Group1 where I can move Sally if he needs the orders at any time). And those units were the ones that are meant to give AROs in some way. The missile bot is especially dangerous but he can’t strike every game.
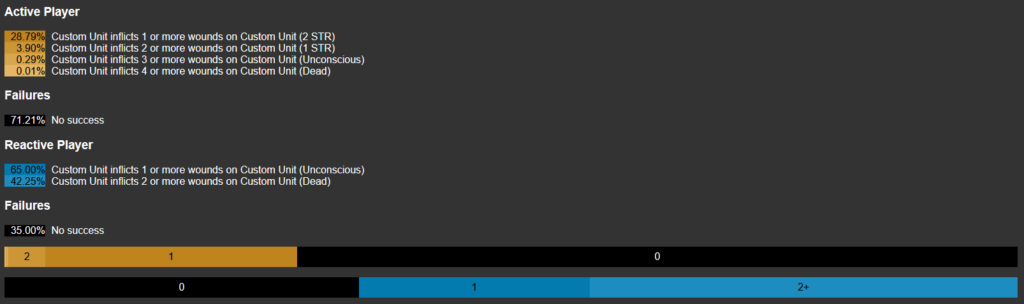
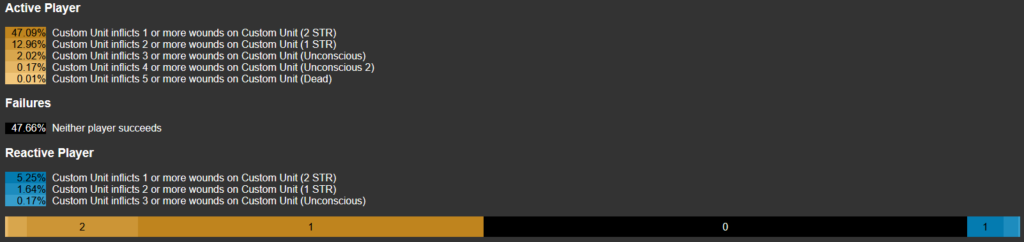
I would like to consider some statistics here again to validate the decisions. First of all the danger of the missile and I think splitting at least two shots into him was the right thing.
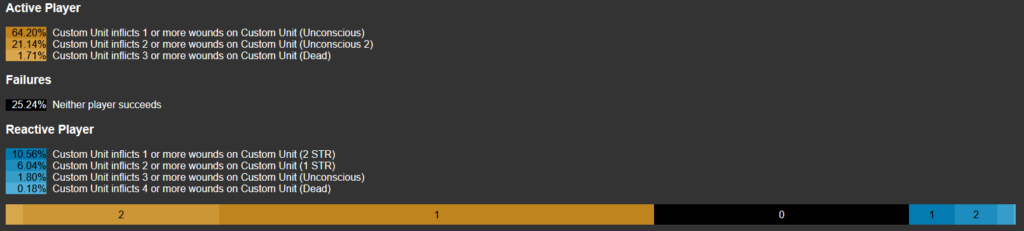
The numbers turn out to be not as dangerous as I expected during the game. The real Danger comes if (luckily) he succeeds, the potential damage is high. So the chance is low but the benefit is still significant and can ruin someone’s plans. And that makes them fearsome.
After both soft targets went down, my opponent kept shooting the TAG in cover, who sroug off nearly all hits with his armor. The numbers show that I felt safer than I actually was. 50% chance to cause one wound is at least something. But there was nothing else I could have done and I had Carotta to bring Sally back in case.
Current Scoring: Nomads 1 (for the beacon) Accon 0
Turn 2
Top of 2 – Nomads
My goals for this turn are clear.
- Get at least one Antenna
- Kill the Knight Montesa (easy Target)
- Kill the Akal Commando (he is too close)
Since Sally is in total cover from the Tikbalang he uses his Tactical Awareness to get rid of the Montesa with his Burst 5 AP HRMC.
To achieve the other goals I need to deal with the Tikbalang, because he has a lot of oversight over the map. Therefore I take some minor risks with the Moran on my left flank but with some good opportunities as well. This moves with the Moran have prioritized goals as well:
- Move the Moran in ZoC of the TAG
- Kill the Flash Pulse (he provides orders)
- Grab the antenna (If I succeed, one main goal is fulfilled. If not, I have the Bandit who can grab the other one)
I decide to move the Moran aggressively and even attack without cover because the FlashPulse can’t stop me from reaching my main goal.
Jazz then hacks the TAG with Oblivion and Spotlight.
-> The TAG can now reset on 0 and my first classified is done.
What I didn’t know at that point is that the camo unit right below the TAG is a Naga with KHD. And I think my opponent considered to ARO with him, but I feel he did totally right by not doing so. I did declare Idle first and this way I could have reacted with Trinity to his ARO. This way he would have brought me a situation where I hack an enemy hacker in my active turn through my repeater. Yummy.
Additionally my Opponent expected me to use Total Control on his TAG. I Considered that, but expected the order Consumption to be too much of an effort (Total Control is only one dice). Accon then could easily get the TAG back by spending a Command Token. Thus I would have to make it worth it by attacking his Core Link and spending more orders. I’m totally not sure if this would have been worth it.

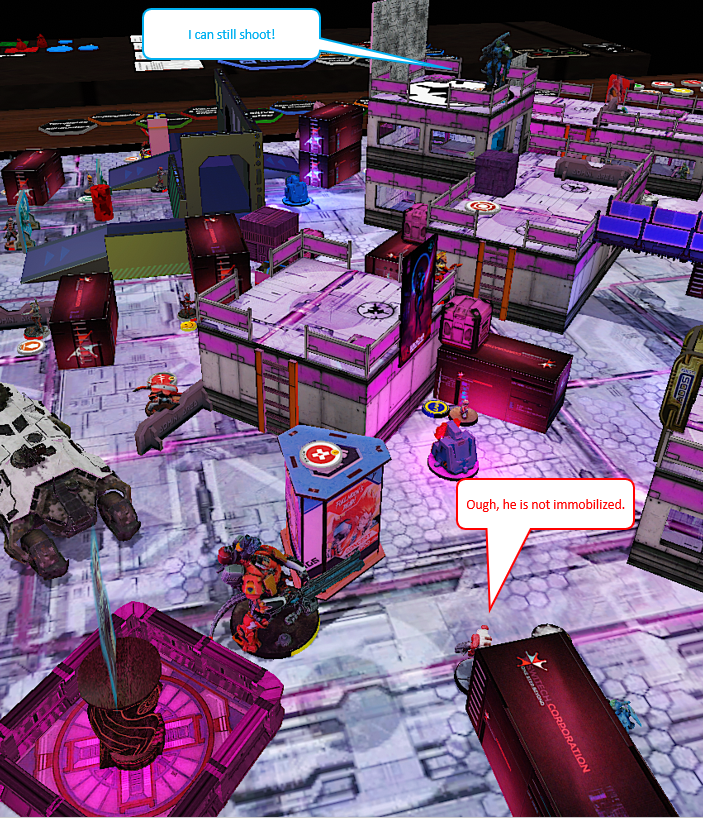
Ok now the last target is the Akal Commando who needs to be removed from the board. My best bet is to use the Morlock in CC. And since the TAG can reset on 0 he moves forward. That is when my opponent told me: “If I’m isolated I can still shoot right?” Ohhhh… right, I changed my regular process from Oblivion + Carbonite to Oblivion + Spotlight. -> Smokedodge which succeeds, puh.
Long story short, I return to Jazz to add a Carbonite to the TAG and kill the Akal in CC with my Morlock.
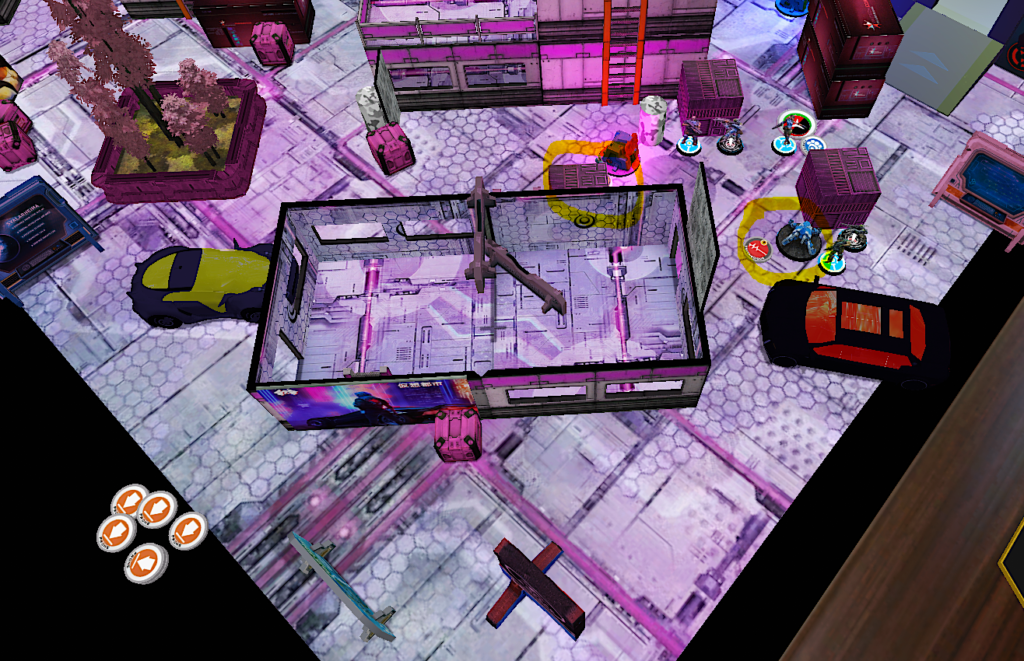
My last 3 or 4 orders are spent into my Bandit who keeps smashing the button of the second antenna and finally succeeds.
I feel very good about that turn. I have all objectives in my hand that provide Objective Points at the end of each round and one Classified fulfilled. I think this game is going my way.
Bottom of 2 – Accon
My opponent wants his TAG back. Therefore the Core Link with the Bagh-Maris moves out to get rid of the Repeater. I do realize again that my facing is suboptimal and the Sniper gets a free shot and kills the Moran.
Then the Engineer moves his Palbot to the TAG and removes the negative states. Finally Accon repositions a bit more to keep the board control and overview.
Current Scoring: Nomads 4 (for the beacon) Accon 0
Turn 3
Top of 3 – Nomads
I’m feeling safe now. I have a strong guess that the hidden Regular in the backfield is a Lieutenant. I would very much like to finish some more classifieds, but the two that I can solve require the HVT and an unconscious model. Unfortunately both are covered by mines and a Core Link.
That leads to a more martial plan:
- Kill the Lieutenant
- Kill as many soft targets as possible to minimize Options in the final turn
Carlotta is going for the first goal and shoots the Regular in the back.

Sally is next to pick the weak targets in the Core first. Therefore I shortly have to face the Tikbalang, but I don’t count him as a threat.
With the Positioning of the Core I have the opportunity to slice the pie and shoot the Paramedic Regular with his regular first (I can’t be in cover for that because billie has to move into that corner, what I forgot until then). The funny part is here that the so far immortal Sally catches a Combirifle Crit and takes a wound :).

But the PanO Sector doesn’t have the same Luck again. And three of five members die with a lot of AROs watching the antenna.
Bottom of 3 – Accon
My opponent offers to call it a game here. I killed his Lieutenant and he doesn’t have any ideas to achieve any goals.
Post Game Analysis
This was a fun game and for me felt exactly how people say Infinity is: “Play the Mission”. I focused on getting more and more objectives done. For that I didn’t have to commit anything into no man’s land and therefore could keep my losses low. In my last turn the push with Carlotta for the Lieutenant was just the last nail into the coffin of my opponent.
I feel like my opponent focused too much on his TAG and on killing. I’m not sure if I would have tried to get the TAG back. From my perspective he wasn’t very much of a threat and I already had most objectives done by that point. The HMG lacked the AP ammo and is probably better suited for soft targets, even though I feel Sally performed above average with her AMR rolls. Funny that a Combi Rifle managed to get a wound :).
According to the mission I have to confess I’m a fan. I did give a response about some wording improvements, but the concept feels awesome for me.
- There is plenty of stuff to do which feels like playing a mission and not being on a hunt.
- There is a route for the first player (grab the beacon) and one for the second (grab the antennas) so there is more opportunity to respond to the table or the opponent’s army.
- Zero defense might not be the best plan if going second, because denying the beacon is probably a good strategy as well.
- The fact that the classifieds are chosen after the deployment is another interesting aspect. Do I pick difficult ones? Or those the opponent can’t solve? It definitely encourages you to take a flexible list, to react to this factor. It’s 4 objective Points you can get here.
Pingback: Mission 037 Report: Custom Missions – Bromad Academy