Pirates Versus Police
(Dahshat vs. O-12)
Eric
Overview
- Mission: Vault Raid (custom, see below)
- Forces: Dahshat versus O-12 (300)
- Map: SET_S4S3_EDX_OPERATIONS (Vaul Map Collection)
- Deploy First: Dahshat
- First Turn: Dahshat
I’ve been tailoring a custom mission for the CB contest, so I want to share one of my run-throughs featuring the good (O-12), the bad (Dahshat) and the nasty (dice…).
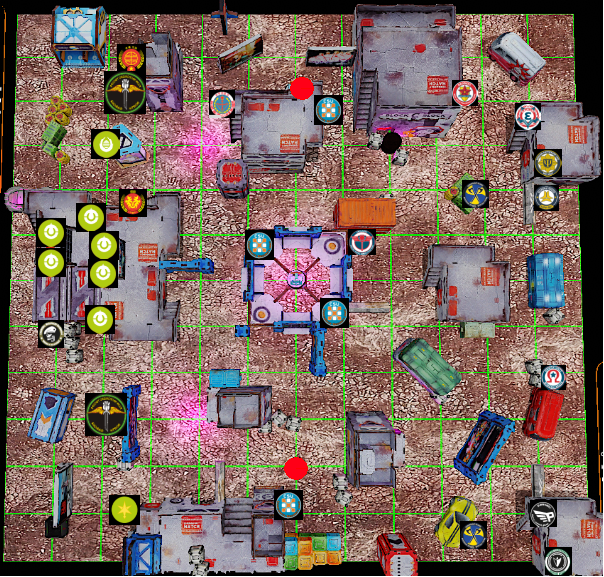
Mission
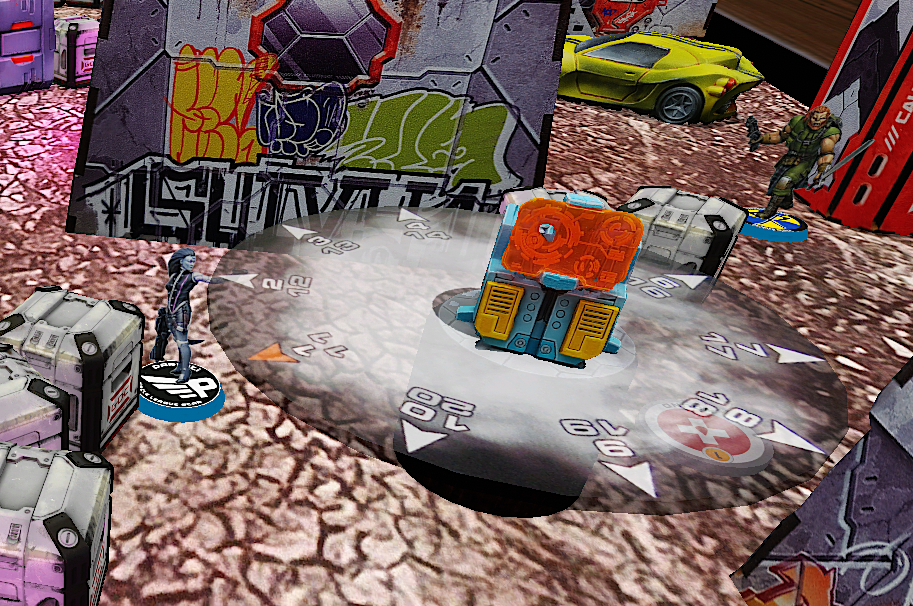
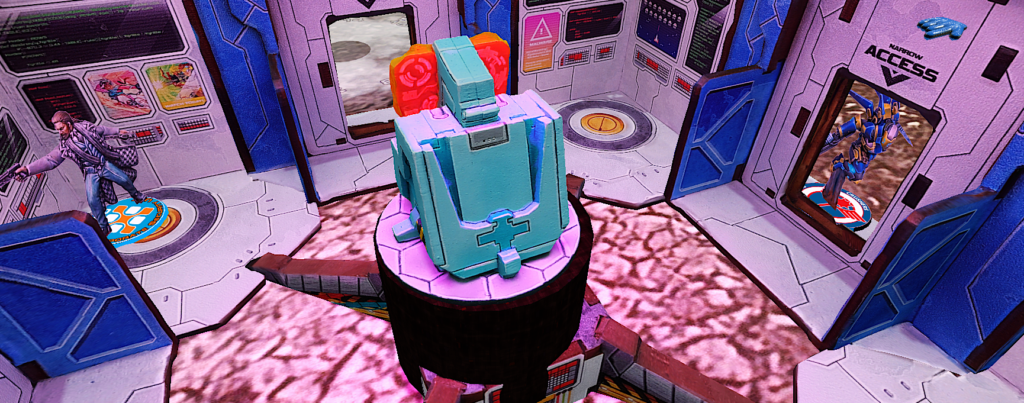
There is a central objective room, which safeguards a vault inside. The doors of the room are locked and need to be destroyed using anti material cc weapons or d-charges. Additionally, there are two consoles on the middle line.
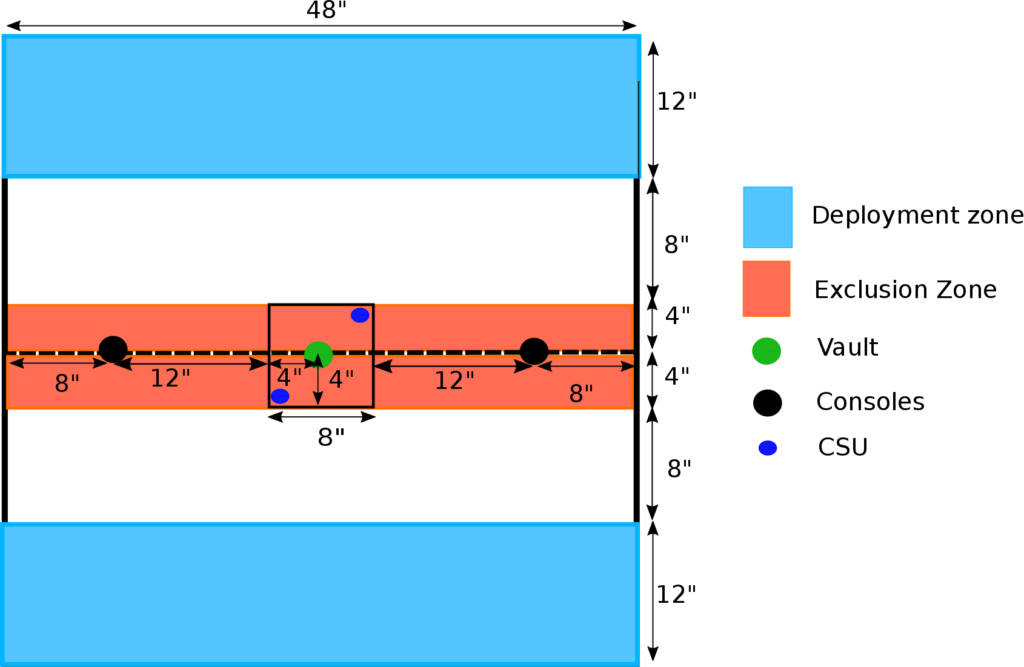
The aim is to retrieve a code from one of the consoles, break into the vault and use the code to retrieve supplies from the vault. It is sufficient if any model get the code and transmits it. The supplies should be returned to your DZ. As an additional feature there are third-party CSU on the board guarding the vault. Whenever they get to ARO your opponent can choose what they do.
As an overview:
- Setup
- 2 CSU in opposite corners of objective room, each player may place one with 4″ of one of the consoles, player going second deploying first
- Exclusion Zone: 4″ of each half from the middle line
- Objective room: doors (narrow gates) closed, can be opened using anti material CC weapons or d-charges (2W, ARM4)
- Bonuses
- Hacker bonus: 2 dice for console related WIP rolls with hacker
- Doctor/paramedic bonus: 2 dice for supply related WIP rolls with doctors/paramedics
- Scoring
- End of turn one: have console activated: 1 OP
- End of turn two: have at least one door of the OR destroyed: 1 OP
- End of game: have console activated: 2 OP
- End of game: have at least one door of the OR destroyed: 1 OP
- End of game: destroyed more doors of the OR than the opponent: 1 OP
- End of game: have at least one supply in your DZ: 2 OP
- End of game: control more supplies than adversary: 1 OP
- End of game: have more neutral CSU killed than opponent: 1 OP
Armies
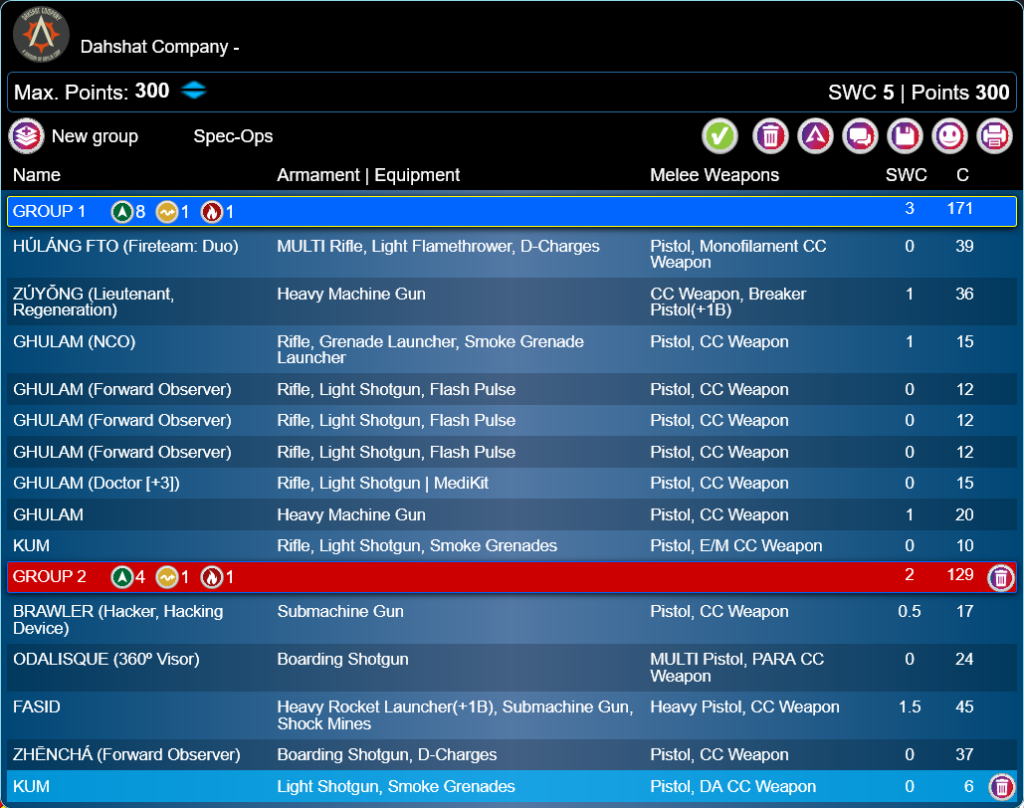
I’ve been busy lately. Hence, I found the random list generator very handy. My opponent and I had games before with picking one out of three random lists, so I did the same this time. For some reason the random lists I get tend to be viable – at least in my view. A Ghulam core backed by Hulang and Zhencha for objective grabbing, Kum bikers for smoke and harassment and Al-Fasid & Zuyong HMG for long range gun power seemed very reasonable for the mission. The Odalisque and brawler hacker are a bit odd though. Well someone needs to protect the DZ.
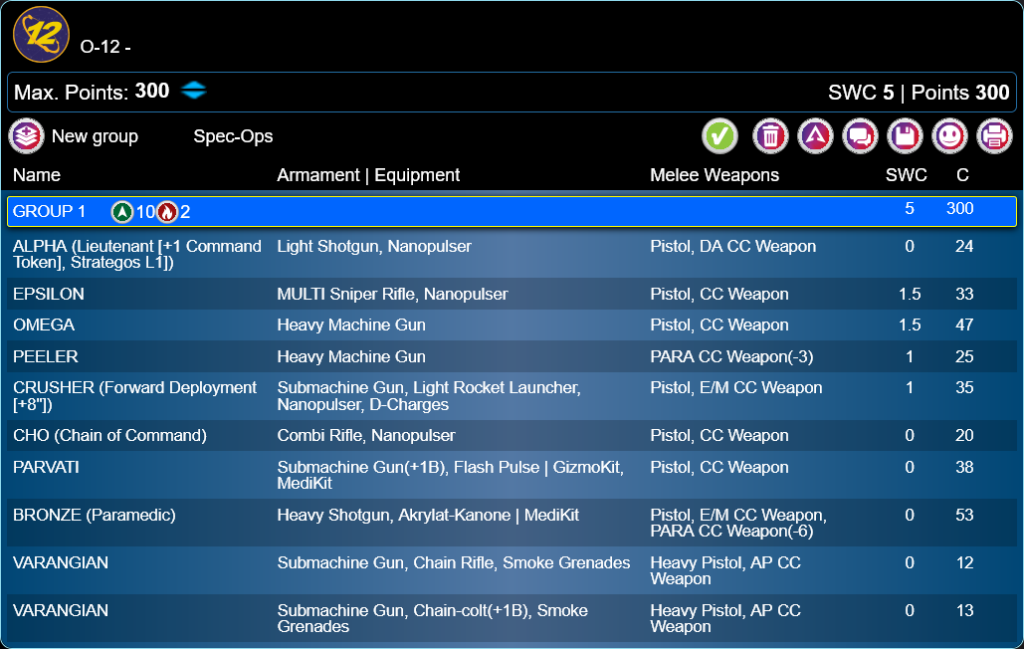
My opponent on the other hand decided to give O-12 a try and tailored a list for a first time with the police men and women. He usually mainly played Ariadna and Tohaa and was overwhelmed by the top notch profiles available to the good guys. Peeler and Epsilon for AROs, Omega and Bronze for bashing, Varangian for smoke and Parvati for kitting everybody back together if necessary and strong command with an Alpha and Cho. Still he might have tailored for too long, because his list ended up to be less focused on the mission with only the Crusher being able to blast the doors of the vault.
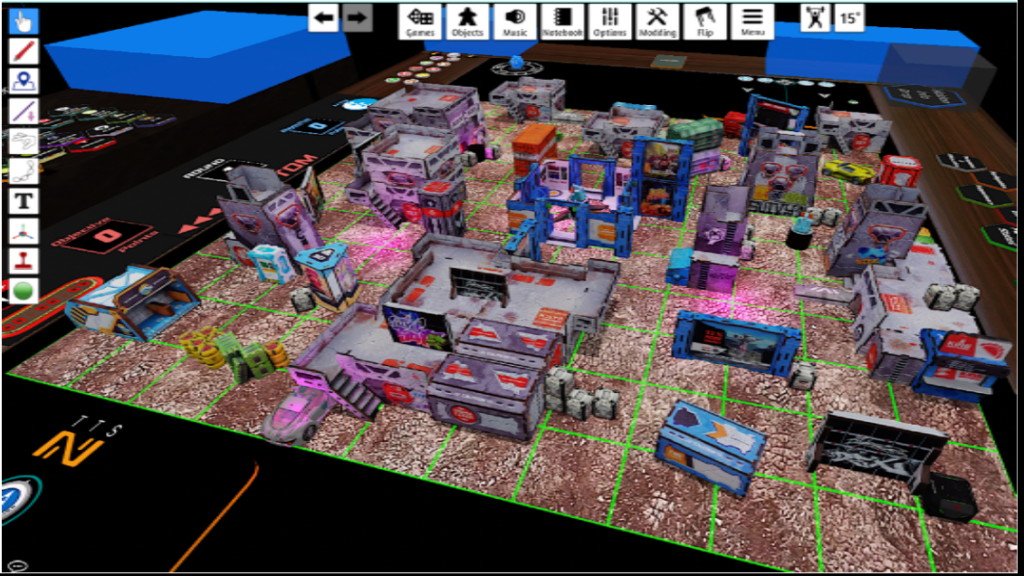
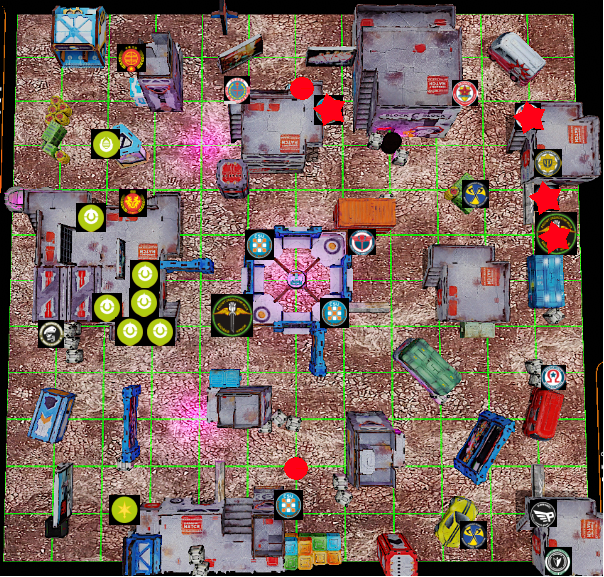
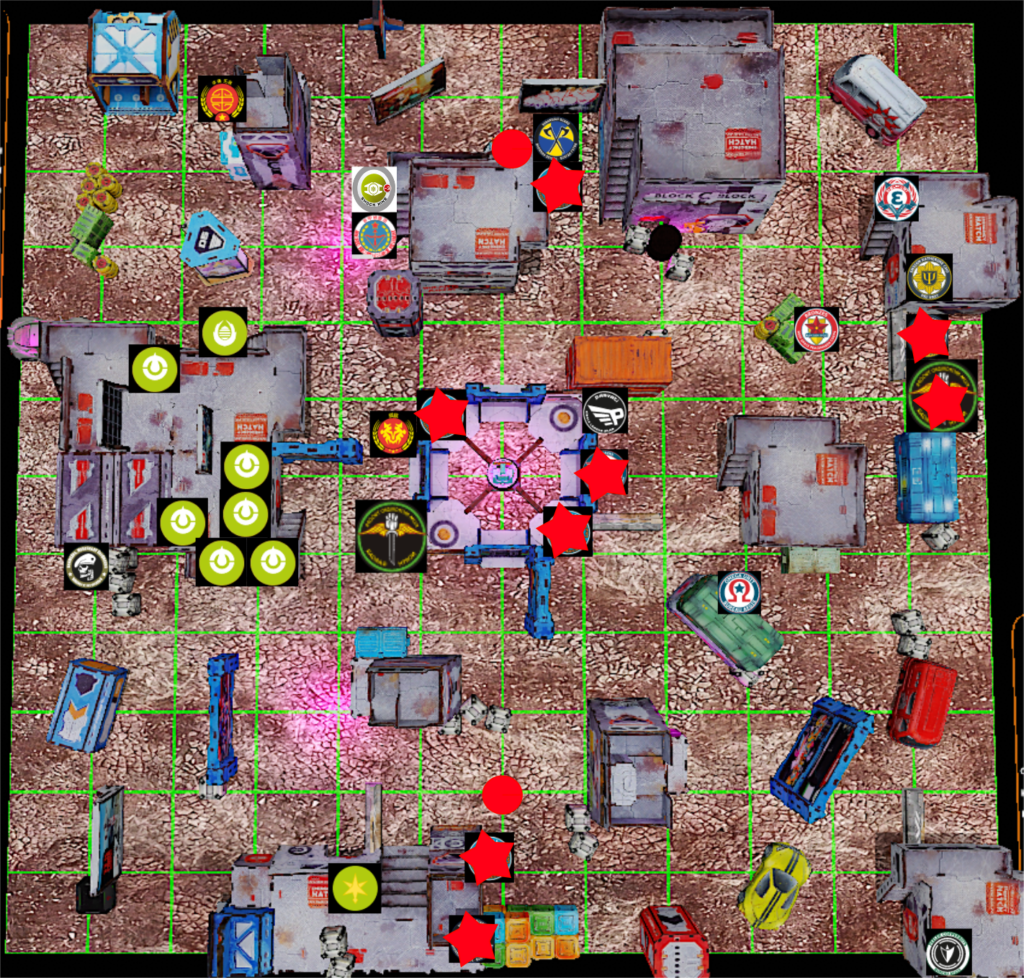
Deployment
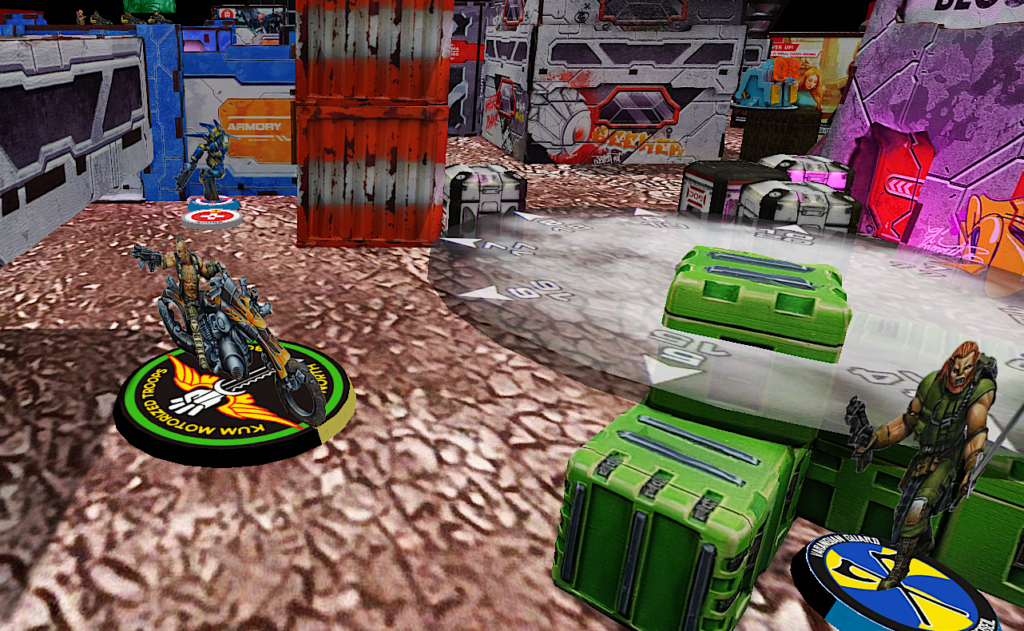
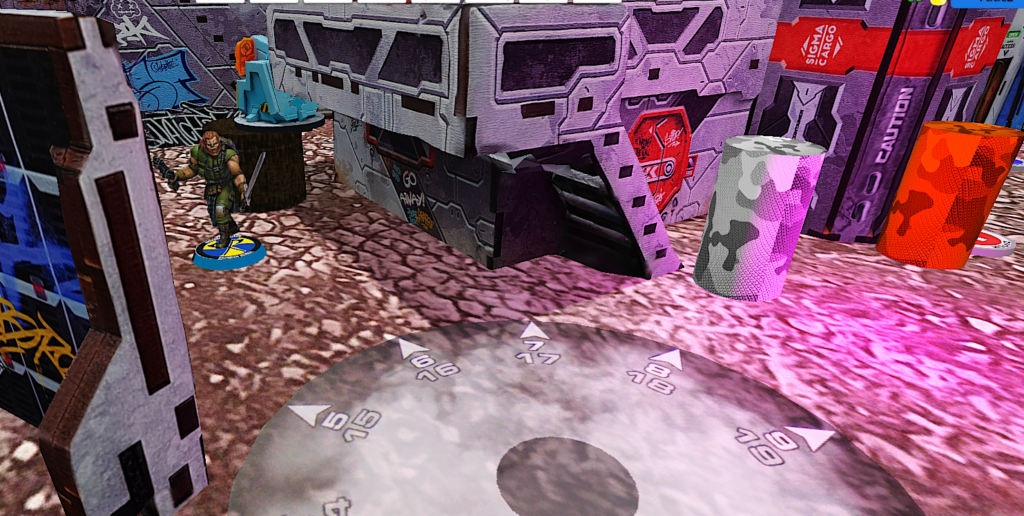
My opponent won the initiative roll and picked deployment. Since we were playing the map for the first time (thanks to Vaul for creating his map collection btw), he mainly wanted to see what he was up against as the sides seemed to be pretty balanced. I’ve put the core and the spare Ghulam on top of the central building on my side. The Hulang was supposed to go for the objective room, so he was placed central as well. I placed my other heavy shooting pieces (Zuyong and Al-Fasid) left and right to spread my gun power. I trusted Al-Fasids armor to soak up some hits, so he was out on ARO. As well I spread the Kum to have smoke where I needed it. The Odalisques should do what she was trained for – bodyguard my Lt – while the hacker was placed somewhere he could surf the web calmly. I held back the Zhencha to put him to the console I felt more comfortable cracking.
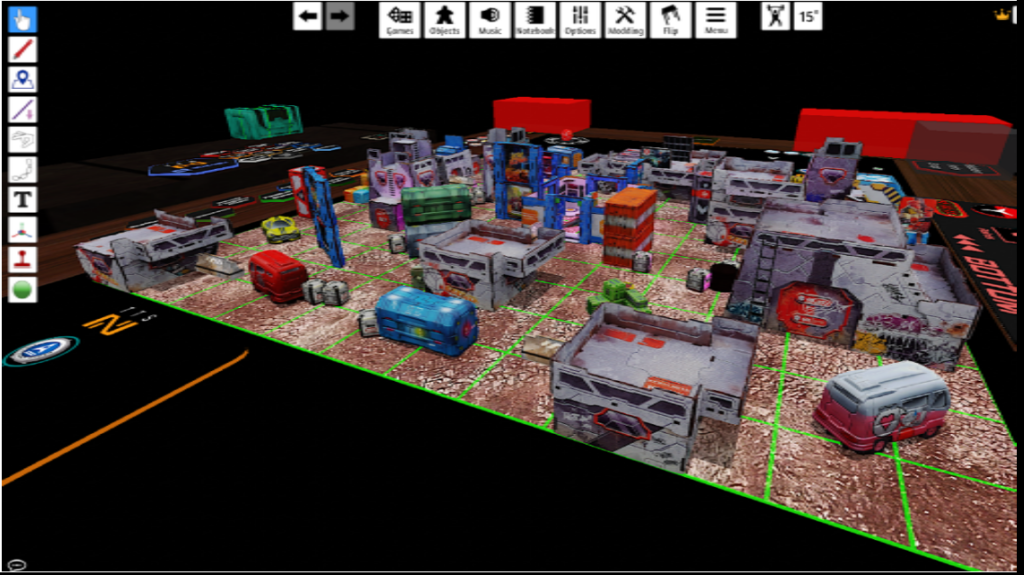
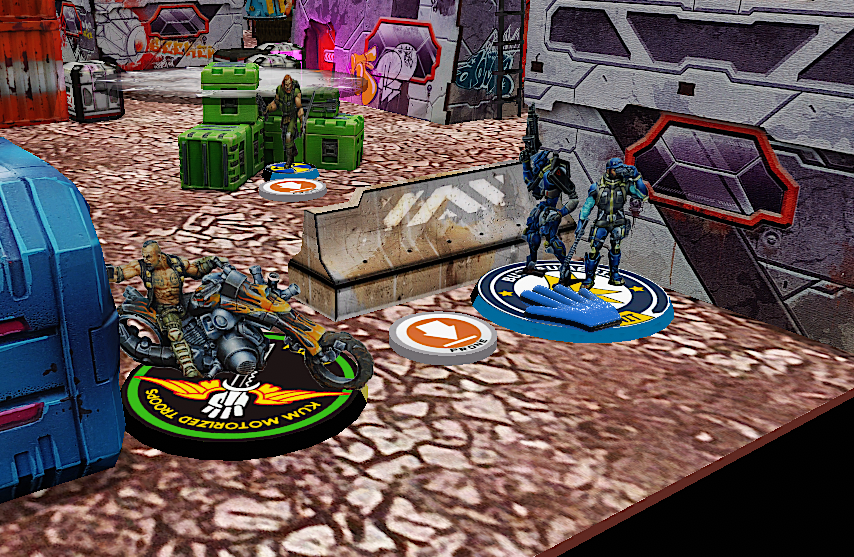
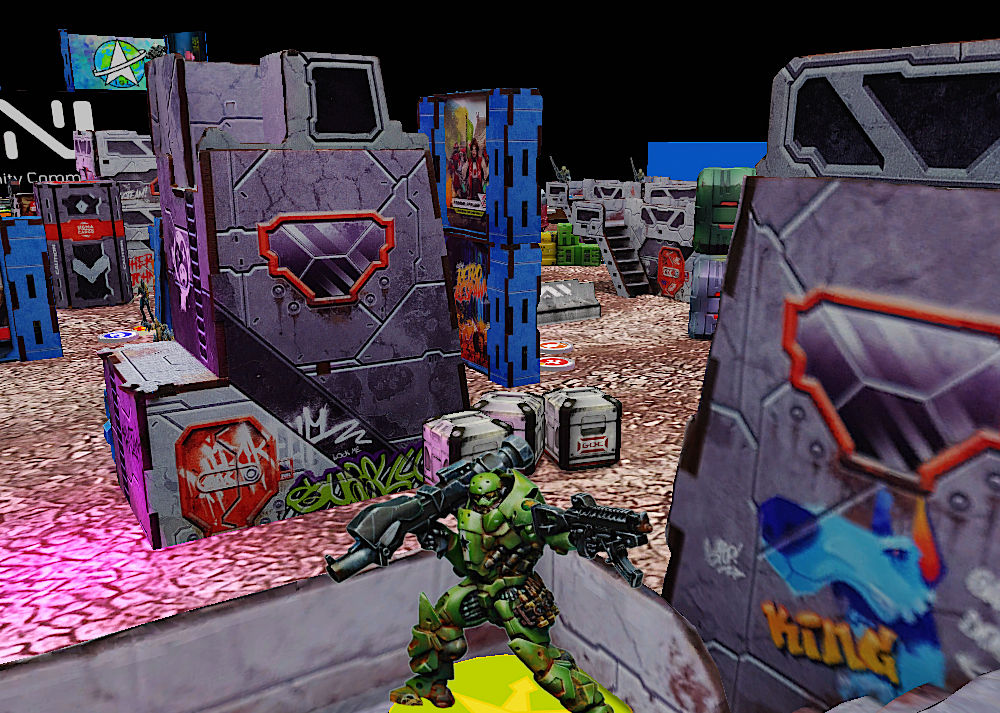
My opponent set out his Peeler (left) and Epsilon (right) to watch both approaches of my DZ to the consoles. Then Parvati was placed to baby sit the Peeler. The Varangians spread out to provide smoke, while the Alpha lay down behind a wall on the back edge. The Crusher was already knocking on the vault’s door and the Bronze took cover on his right behind a building. After I chose to go for the left console with the Zhencha (my perspective), he placed the Omega and Cho masked as another Epsilon (HMG) on the same building as the sniper.
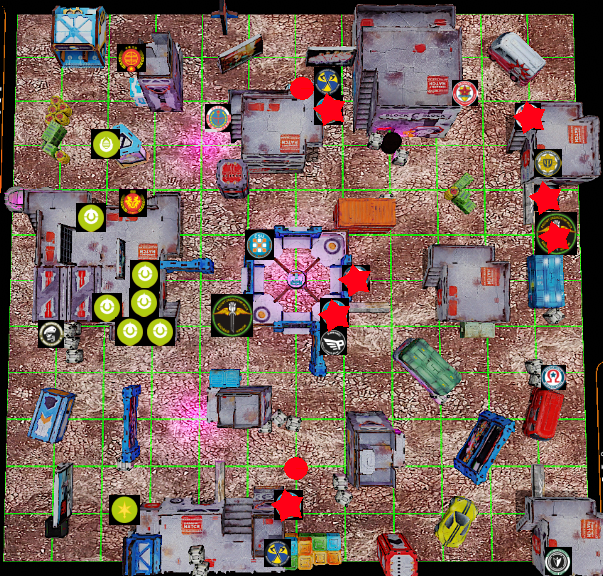
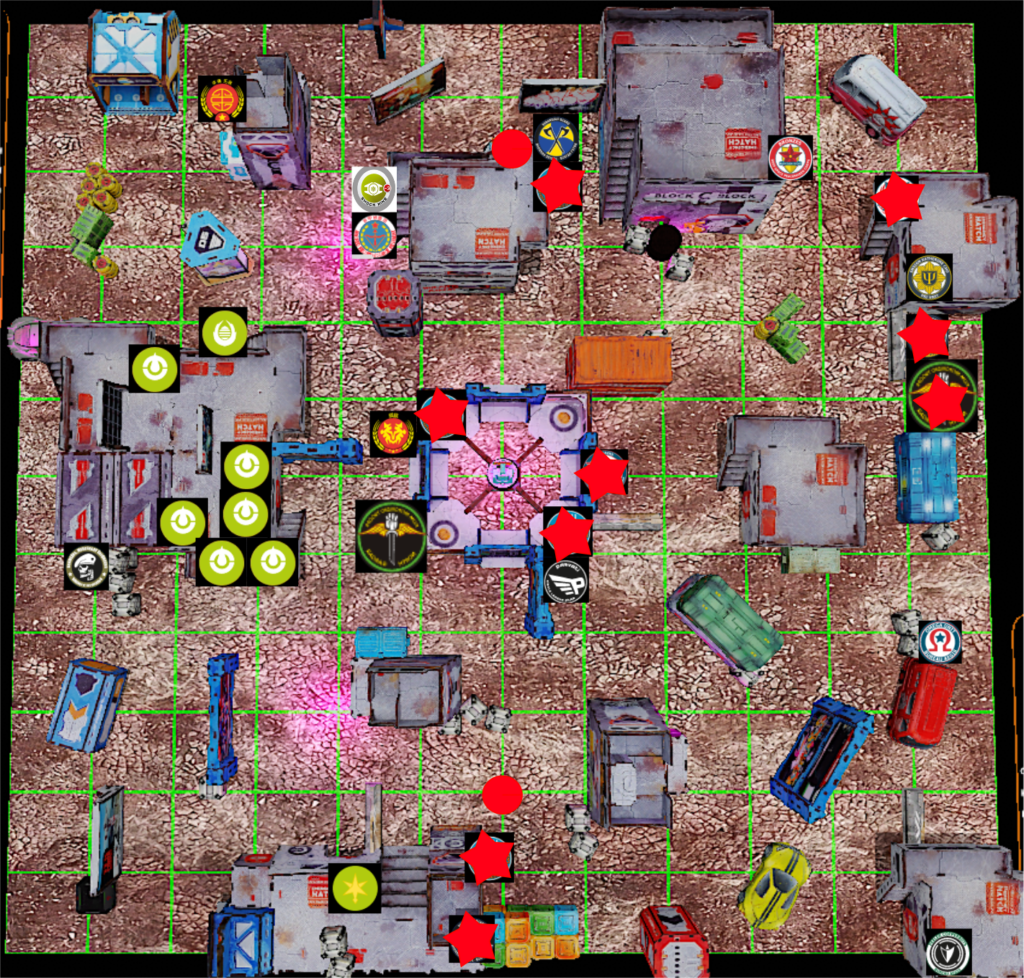
View from my side:
View from my opponents side:
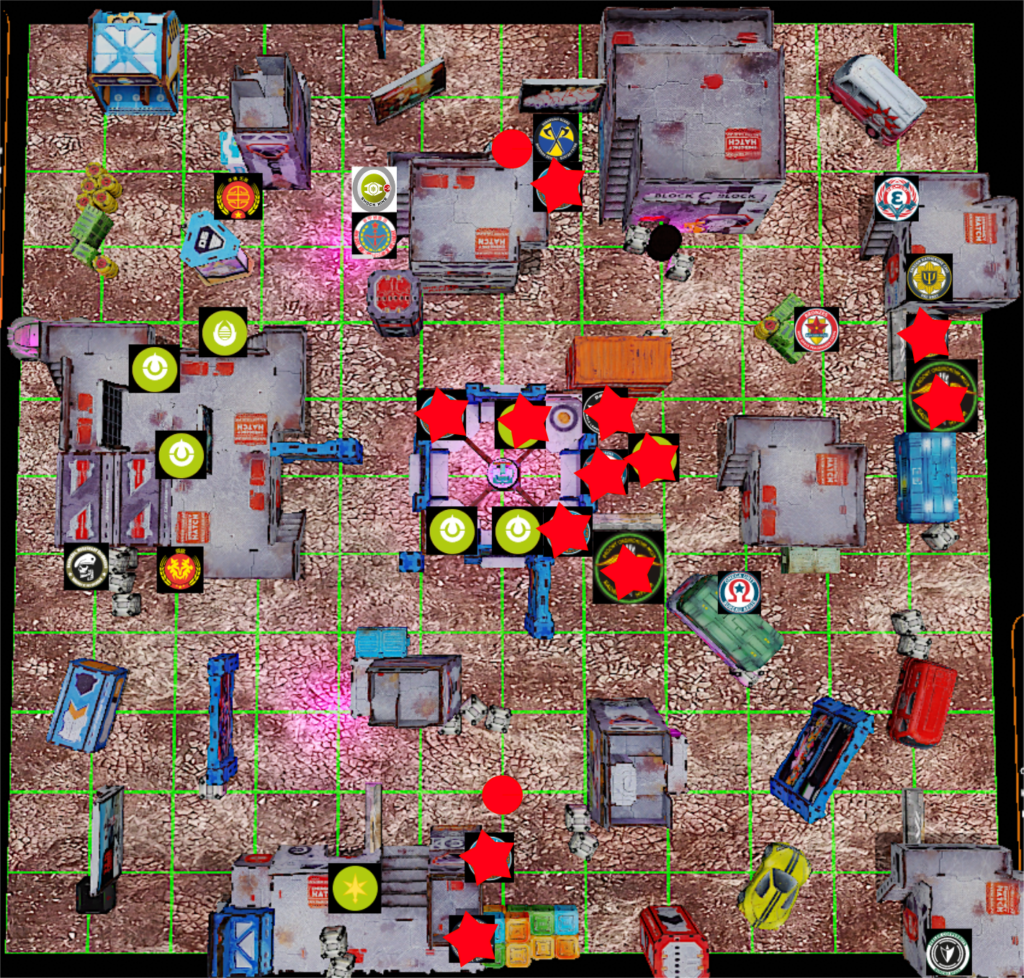
Turn 1
Top of 1 – Dahshat first turn
With only the Epsilon and Peeler peaking out I figured there wouldn’t be a lot of gun fighting in my turn, so my plan was:
- Clear the Epsilon
- activate the console with the Zhencha
- annoy the Crusher (as the only model with antimatrial CC Weapon in the opponent’s list – Parvati is one of I think two engineers without them…)
- maybe opened the OR with the Hulang.
The Peeler would not be of great interest for my approach and luckily my opponent had given the bot just a single proper fire lane. So I could ignore it.
I used only the impetuous order for the lower Kum as he was pretty safe with his approach and crippled the Peeler even more by throwing smoke. The Zhencha was able to tap his console without having to interfere with the CSU or anybody else.
Next, my humble Ghulams were to prove their worthiness by challenging the Epsilon. After reshuffling and approaching the front of the building the HMG took a first volley. The Sniper won the F2F failing to pierce the Ghulam’s tough armor. A second volley from the self-assured Ghulam overwhelmed the Sniper, putting him unconscious.
With (1) and (2) done I decided to position the link in a safer spot and charge the upper Kum forward. I had left the Zhencha in a stupid spot so, when the Kum drove by to clear the CSU the humble security force could template both Zhencha and Kum wounding the first. But that didn’t stop my charge, so the Crusher was next to face an unchained Biker. The Kum did not hesitate and first coated the Varangian to then kill the Crusher with his shotgun in no-time. For the sake of play testing the mission we decided the Crusher just got wounded.
But the Biker didn’t think of stopping here and took a last order to go for the Alpha, dying gloriously to pretty much anything else shooting him. Lucky me again – the Alpha was downed.
With the remaining orders of my second pool I commanded the Zhencha and living Kum into better spots. I have to admit that this first turn was much more successful than anticipated. The dice played a false game with the proud police force.
Bottom of 1 – O-12 first turn
Now, we got to the point where I figured that the second epsilon had to be a false one as it was the only S2 model that had not acted yet and could be Cho (I hadn’t done the math right because the second epsilon would have cause SWC to be 6.5 – I though the Crusher would just cost 0.5). Being three orders down really limited my opponents options, especially as he had to get a specialist to the lower console.
First, the Varangians approached by throwing smoke. That covered Parvati’s approach to take down the CSU and activate the console – and getting wounded by the nanopulsar in return.
The star from Aristeia took cover, leaving it to the Crusher. He cracked the door of the vault he was standing by anyway and challenged the CSU inside. Sadly, he could take out only one before dying a second time.
After this shock the police force used a couple of coordinated orders repositioning.
With only a few orders to go the police decided to hunt down the pirate Zhencha – who dodged anticipatory behind a building.
This ended the first turn – again that went very well for my pirates.
Turn 2
Top of 2 – Dahshat second turn
My plan for this turn:
- Advance Al-Fasid up the building, shoot Varangian and get into proper ARO position to trap Parvati and Bronze.
- Get Hulang into the objective room, clear the remaining CSU and grab some supplies.
- Lay a mine with Zhencha to slow the Varangian down.
Starting with (1) the Al-Fasid climbed up the ladder in front of him taking a shot at the varangian and taking him down. With another order the Al-Fasid was in place to see the lower right corner of the objective room and the tall building in the upper right corner.
Next the Hulang rushed forward with nothing to stop him. Two D-Charges later the vault was breached and the Hulang could challenge the CSU taking him down without an issue. So he could get into the room and leave it with some supplies after the second try.

So the Zhencha could drop a mine and recamo’d. With the remaining orders I repositioned the Odalisques to challenge the Varangian should he advance and finished my turn.
Bottom of 2 – O-12 second turn
The remaining Varangian advanced with his impetuous order and threw smoke (Note: we played as if below the stairs was solid, so no vision or movement in the shadows).
With only a small number of orders my opponent figured Parvati had to quickly get into the objective room, but my Al-Fasid blocked her from getting into the room.
So, the Omega activated to bring the Al-Fasid down. But this did not work as intended as the Al-Fasids armor proved to be worthy. Anyway I dropped the chunk prone – again for play testing reasons, my dice had been favorable so far.
So it was Parvati’s turn to go for supplies. Two orders later, she was back outside the vault. With just two orders left my opponent figured he would not be able to hide her in safety. So he coordinated a last time to bring the Varangian, Omega and Parvati into safety and advance with the Bronze. Finally the Bronze was able to revive the Epsilon sniper.
This ended turn two.
Turn 3
Top of 3 – Dahshat last turn
I felt like there where essentially two things to accomplish now:
- Eliminate Parvati
- Get another supply box
I forgot that Parvati would drop her box if she died and anybody could pick it up, but anyway it was the thing to do. With still 13 orders I felt pretty comfortable to get this done.
First, my link went down the building. The doc took up some supplies and left the building while the others took position. We missed a couple of AROs from the sniper and the Omega here… One of the FOs tried to get a lucky shot on Parvati, but the Aristos armor saved her this time while her friends killed the aggressor.
Now, I got the Hulang and doctor into the safety of my DZ with some coordinated orders.
It was the second time this game the Kum could prove their worthiness. I figured my Kum could rush forward and get a suicidal shot on Parvati. So the biker rushed forward and proved me right by putting Parvati into the ashes. Note, that the Bronze Paramedic could not bring her back up as he does not have wounds but structure.
So, all I could do was make it even harder to get to the supply boxes. So I dodged the Al-Fasid to stand up. This pretty much ended my turn.
Bottom of 3 – O-12 last turn
Six orders were not a lot and it was late. So we guessed it would be a fair guess that Epsilon and Omega might manage to bring the Al-Fasid down, so the Bronze could get the supplies and bring them to his DZ. This would lead to
Dahshat 8 – 7 O-12
Dahshat victory
Post Game Analysis
The result looks much closer than it felt. Dice were brutal to O-12 in any turn. This combined with some list building issues lead to a hard time for my opponent. Especially having to run Parvati to the console and later into the OR took a lot of orders and didn’t leave much opportunity to reduce my order pool. Additionally, the peeler was in a poor position as it didn’t have anything to do when I decided to go for the other console as there was no proper LOS to guard it’s DZ or anything like that. AROs should not just be established from DZ to DZ or objective but also to simply guard your DZ from warbands and the like. Not having to throw a lot of smoke really gave my Kum the possibility to go nuts.
The mission felt as tough as expected. It’s somewhat a mixture of Mindwipe and Supplies which I like both. Mindwipe tends to end in draws from my experience if none of the players gets to infiltrate the other players DZ was a proper tool. Supplies on the other hand often ends in too much shooting and infiltrators quickly picking up the boxes and run for me. I believe that this mission can possibly address the issues I have with the original missions. The CSUs were added to slow down especially the first player to not just run into the room and get all supply boxes at once with some link. I do think that this is still possible, but this might leave your opponent with just a single target on the table. This was the second run through and I liked the mission I came up with. There is complexity, but I think the mission is still streamlined enough as I left classifieds or other additional mental load off. I did like the idea of some additional special rules for the objective room, but I didn’t miss it. I enjoyed the idea with the csu although they proved to be pretty nasty with their templates inside the objective room. We will see what CB thinks of this.