The Meaning of Infinity Battle Report
By Obyiscus
Overview
- Mission: Mindwipe
- Forces: Shasvastii Expeditionary Force vs Military Orders (300)
- Deploy First: Military Orders
- First Turn: Military Orders
Video Link:
Lists:
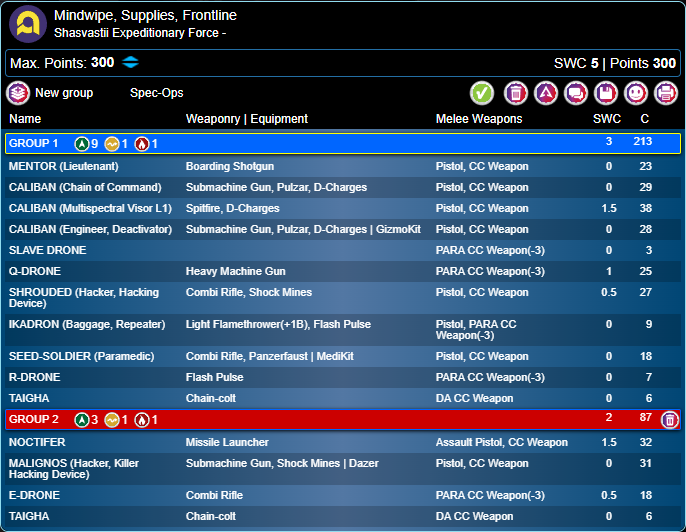
Shasvastii Expeditionary Force (Mindwipe, Supplies, Frontline):
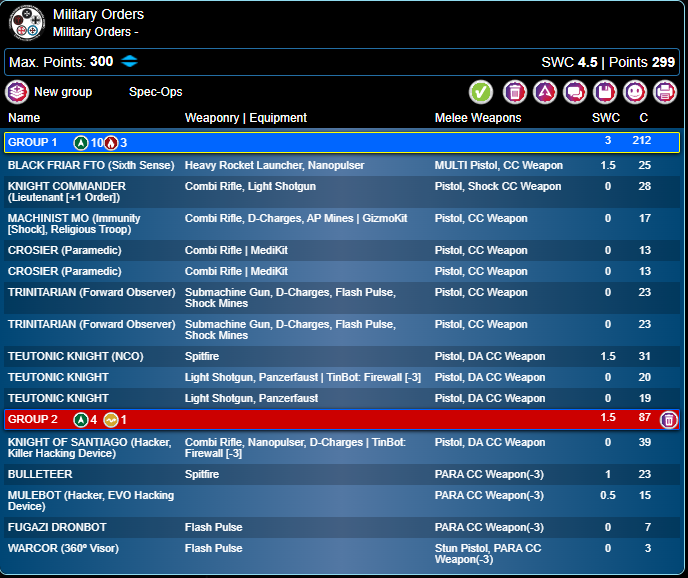
Military Orders (Military Orders):
Deployment
Military Orders Deployment
My opponent deployed a fireteam on each side of the board. The Crozier defensive core team was on his left with the HRL watching down the long lane on the left, and the other guarding the nearby server. He deployed his teuton harris (not as a harris) on his right side. He then deployed a duo of his Santiago KHD (his Uberhacker) and a Bulleteer on the centre building, ready to run along the centre to get some hacking on my servers. His trinitarians were deployed hidden centrally, ready to go towards either of the two consoles.

Shasvastii Expeditionary Force Deployment
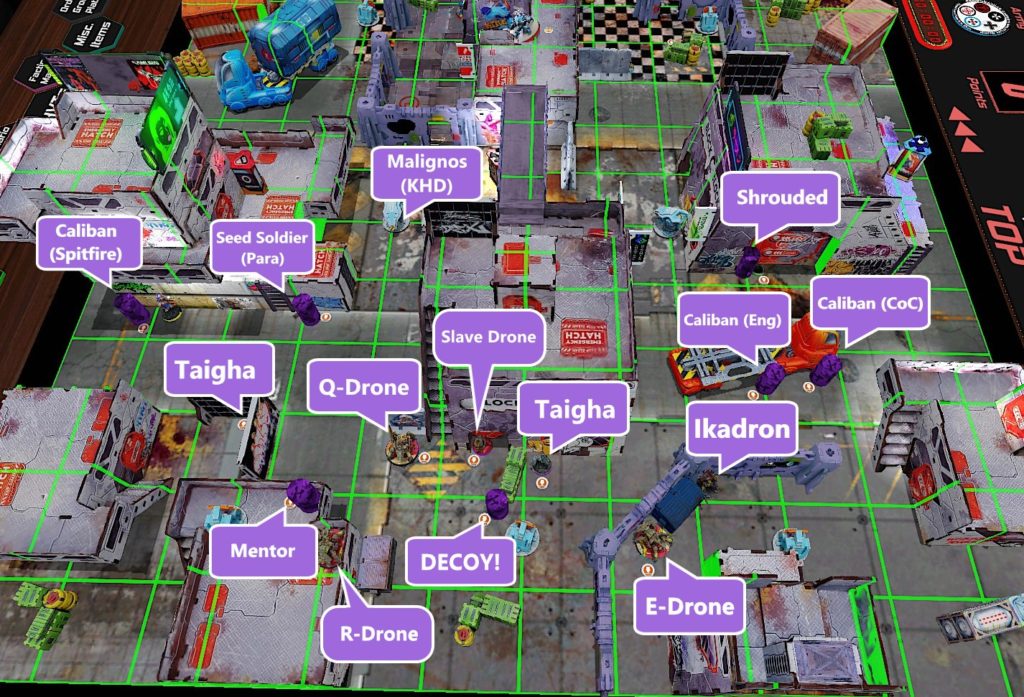
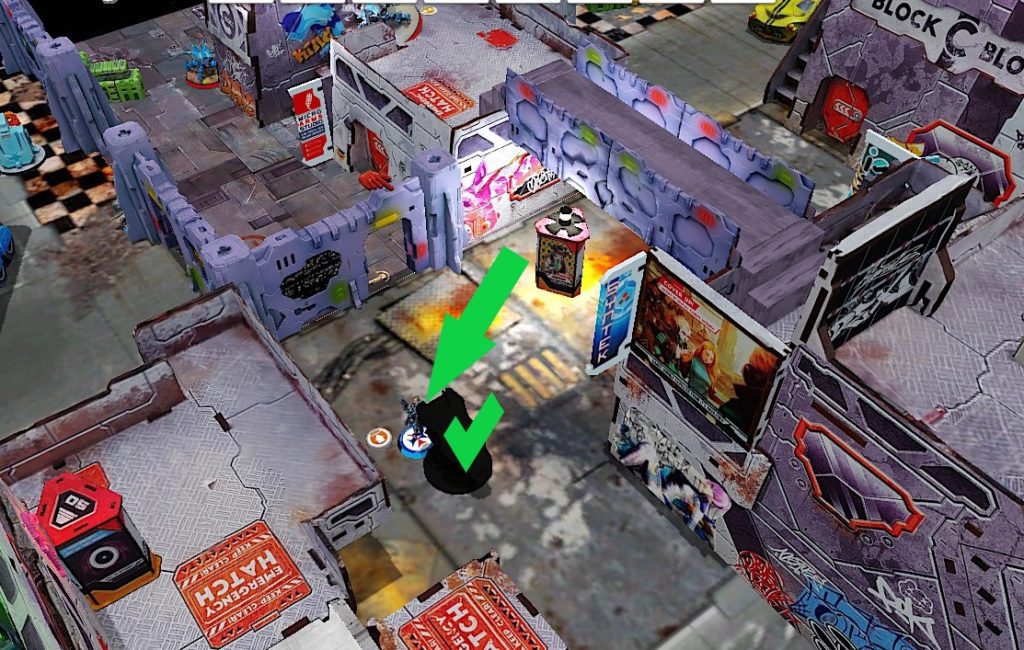
I deployed with my Q-Drone watching the server that my Malignos was hiding beside, while my shrouded uberhacker was deployed near the right flank server. I then spread my caliban across the 8” FD line with the two specialists on the right, and the Spitfire on the left (near a paramedic seed soldier). The engineer’s slave drone was deployed near, but out of blast, of The Q-Drone. I had an R-Drone near my mentor watching a server, while extending the repeater range to the Q-drone so my E-Drone could buff it, while defending my right server with an ikadron. Finally. I put my Taighas in hidden positions ready to start darting forward.
Turn 1
Top of 1 – Military Orders: This isn’t looking good…
The game started with a trinitarian appearing, moving up to a console and identifying my right server as the server with the Rogue AI.
With that done my opponent began moving up his Teutons, triggering my Noctifier to reveal when a solo Teuton moved past another. Unfortunately the Noctifier missed and the engagement was a bounce (the Q-Drone may have done a wound.
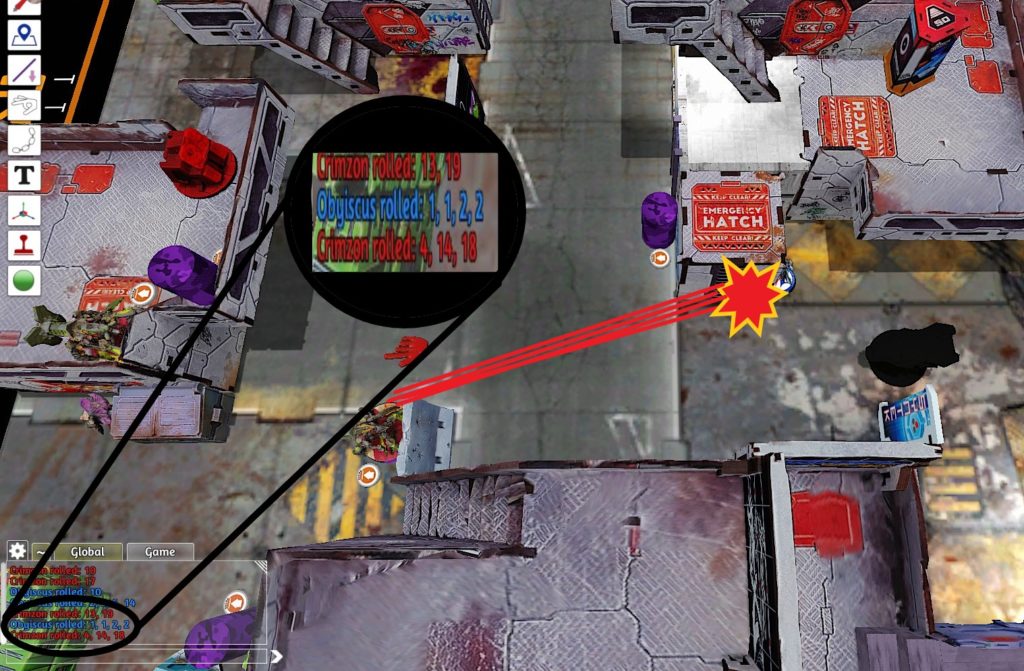
With that threat revealed, and not wanting to risk his Teutons to deal with the Q-Drone (he couldn’t slice to see it without a Noctifier firing as well) he engaged with the Q-drone. Due to mim-6 and range the Q-Drone was shooting on 2s against the Trinitarian’s 9s…but luck was on my side and after 2 crits and 2 hits the Trinitarian went down.
With that approach gone he rengaged with the Teutons, using a coordinated order to try and remove the Q-Drone. Once again luck was on my side and when the smoke settled the Spitfire Teuton and Tinbot Teuton were down and neither my Noctifier or Q-Drone had even taken a hit.
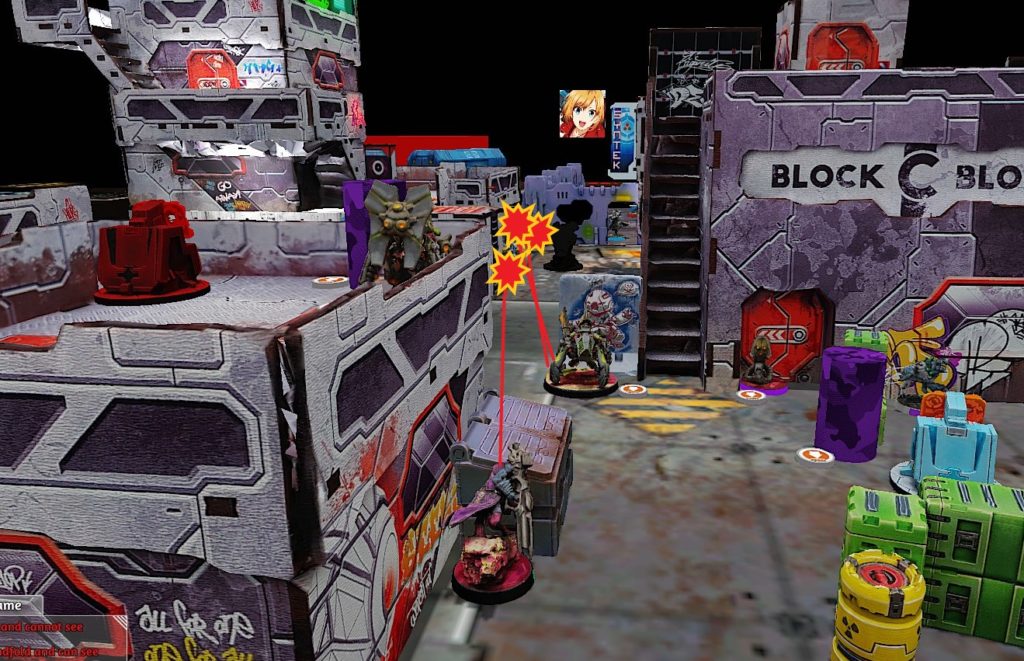
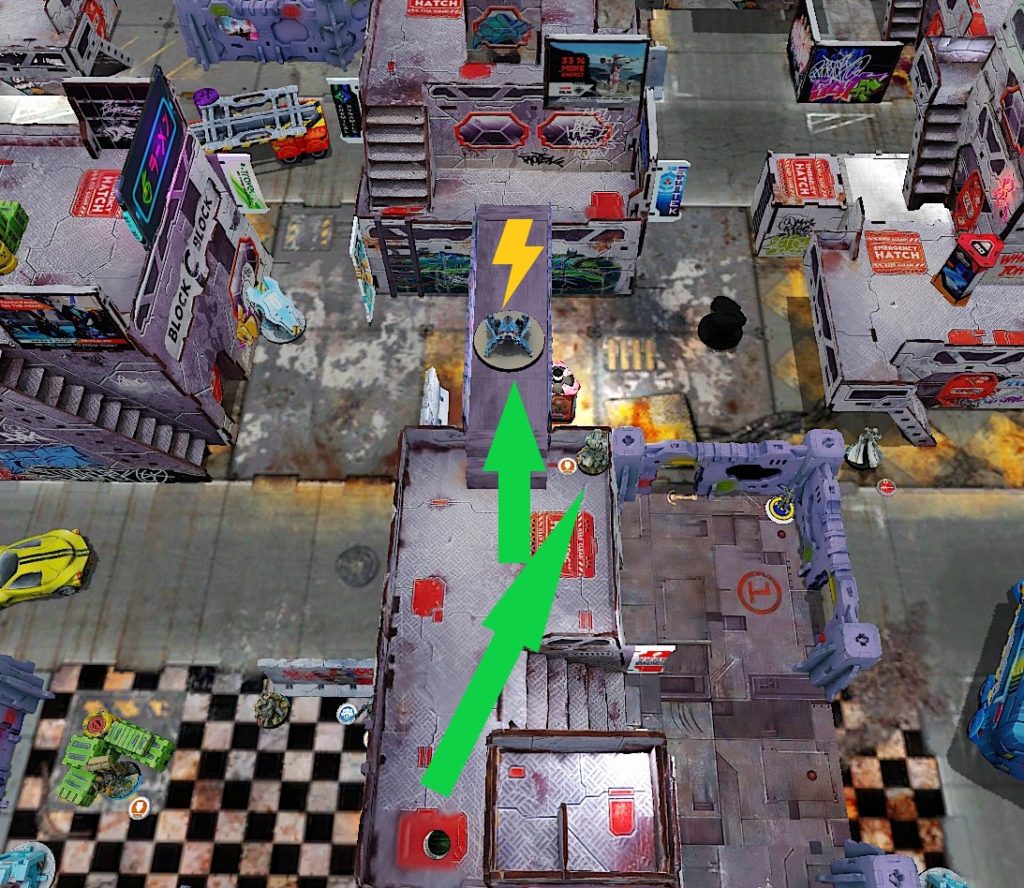
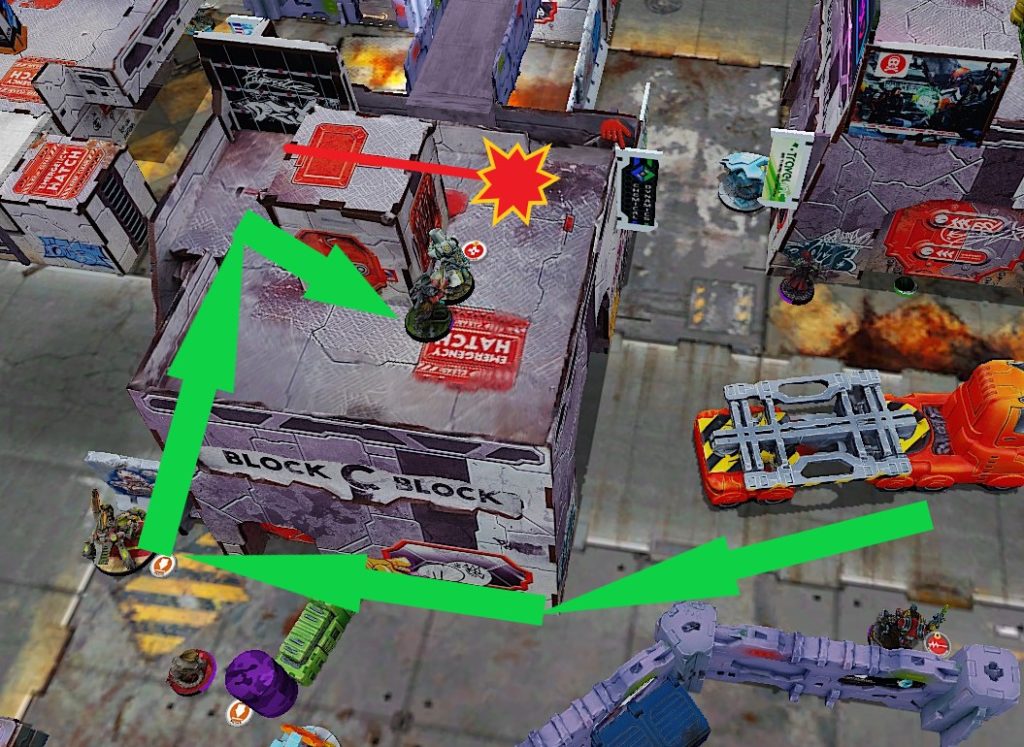
With his squad down the remaining Teuton began flanking to my left, likely setting up to go after a server on my opponent’s next turn. Seeing the threat my Spitfire Caliban dodged as the Knight approached and engaged the Knight in melee. The odds slightly favoured me, and the kill would be a huge deal, not only removing a threat but also powering my Caliban up to a massive 3 wounds.
Not wanting to take the risk of the cc engagement my opponent chose to turn to his second group and began moving his uberhacker up along with his linked Bulleteer (who got assisted fire from the EVObot). My opponent noticed that the central buildings were a direct line to my central console, and a safe position to hack from. After moving up to the midline the team stopped and the Bulleteer broke out and went into suppression.
Finally my opponent chose to take the cc engagement…and the Caliban rolled horribly losing the fight and going unconscious.
Bottom of 1 – Shasvastii Expeditionary Force: Remove the Last Threat
My left Taigha impetuoused forward, causing the Teuton to dodge out to face me…which he soon regretted. I immediately gunned him down with the Q-Drone before he could get too close and start templating my fragile units.
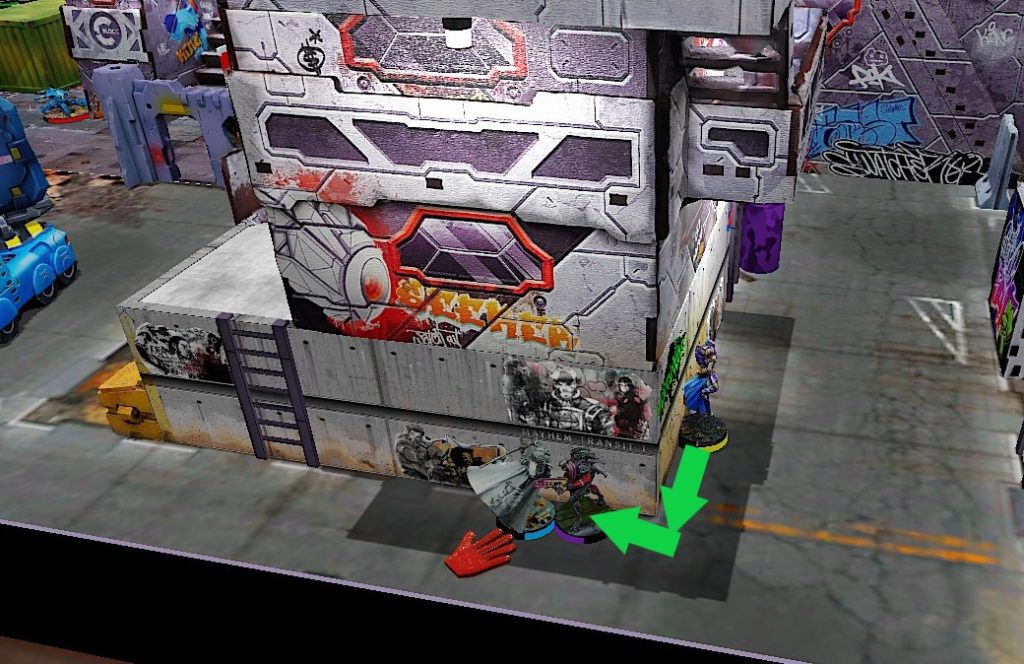
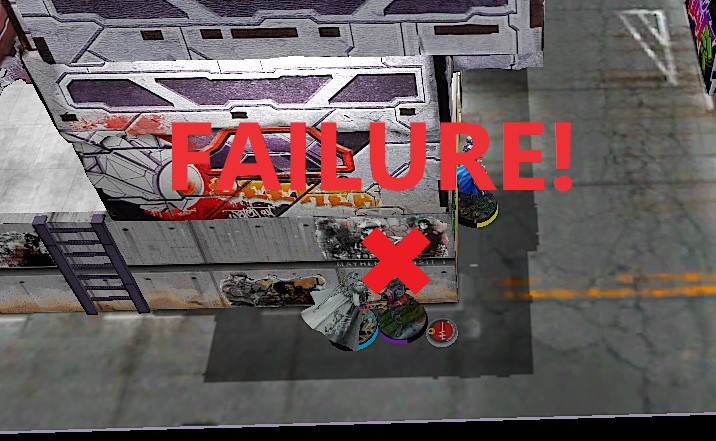
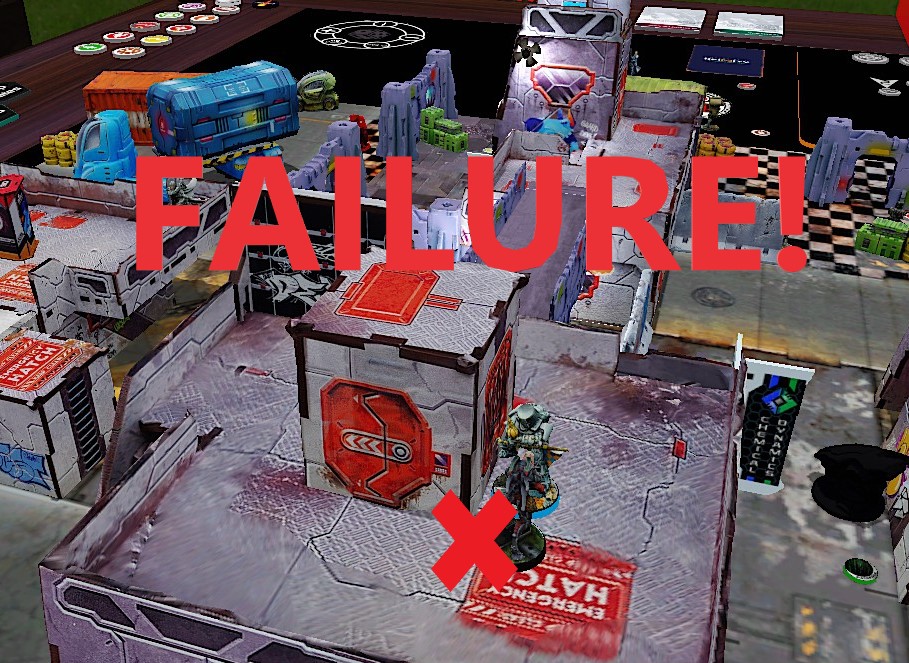
The next few decisions I made were pure failure. First my paramedic hatched and moved around the corner to jab my unconscious Caliban…who failed his PH roll. Next, looking to deal with the suppressing Bulleteer, my Taigha carefully moved up to avoid LoF until it was ready to run out 6 and blast it with its chain-colt. The Bulleteer chose to shoot, gunned down the taigha, and tanked the chain-colt. Looking to deal with this Bulleteer I moved my second Taigha up the large building in the centre, carefully moved and dodged it so that it wasn’t seen by anything until it berserked 12” into the Bulleteer. Again the Taigha was gunned down, and again the Bulleteer tanked it’s saves (2 thanks to DA).
Looking to try and do something, my Malignos moved up, past the Bulleteer and in position to complete a classified. When the Santiago chose to dodge rather then delay (I moved unstealthily) I changed my plan and took the unopposed trinity. At first I thought I had managed to kill the Santiago (his last model that could hurt the servers), but then we remembered his tinbot and he had actually passed his two saves. Also at some point my CoC Caliban had began moving up the building on my right flank towards my opponent’s servers.
Turn 2
Top of 2 – Military Orders: Push Up
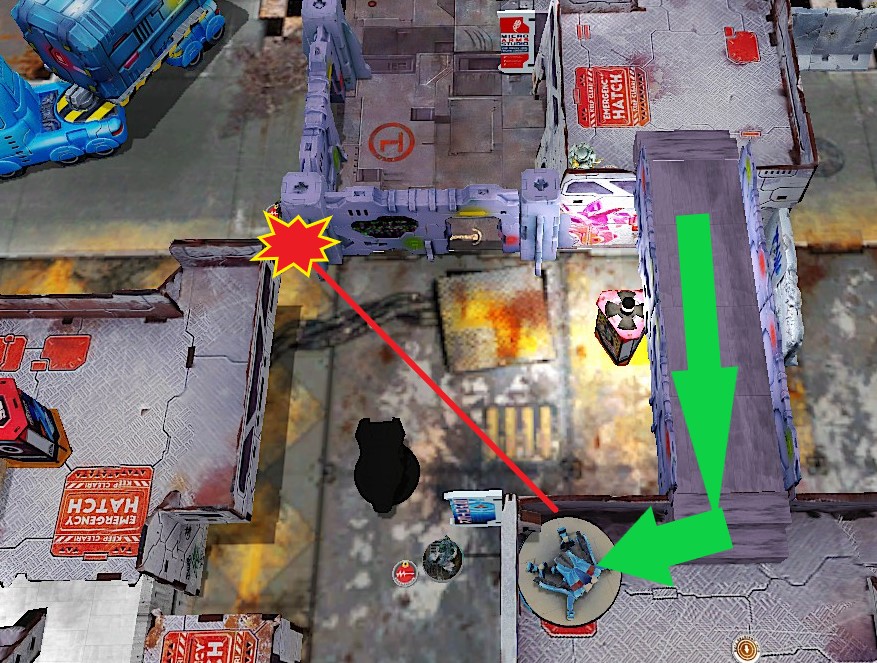
My opponent began by moving the Bulleteer further up, and blasted my Malignos. Sadly the Mim-6 wasn’t enough, and the Malignos went unconscious. My opponent then spent two more orders in order to ensure that he stayed down by blasting him down with the Bulleteer.
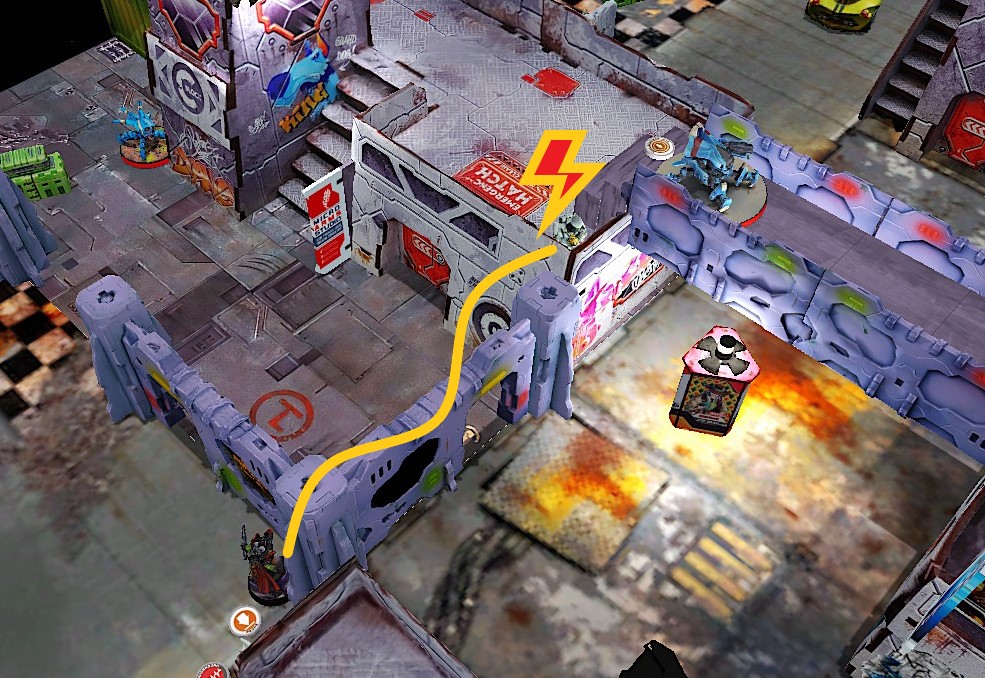
The Santiago then began his march towards my servers (I believe him and the Bulleteer had been swapped to group 1). On his way he revealed my shrouded who fought him back and forth for 3-4 orders before he finally knocked the Shrouded out. The Santiago ended a short move away from starting his Data Erasure assault on my
central server.
To end his turn and to try and prevent my counterpunch he moved his second trinitarian up and began mining up my right flank.

Bottom of 2 – Shasvastii Expeditionary Force: Stem the Bleeding
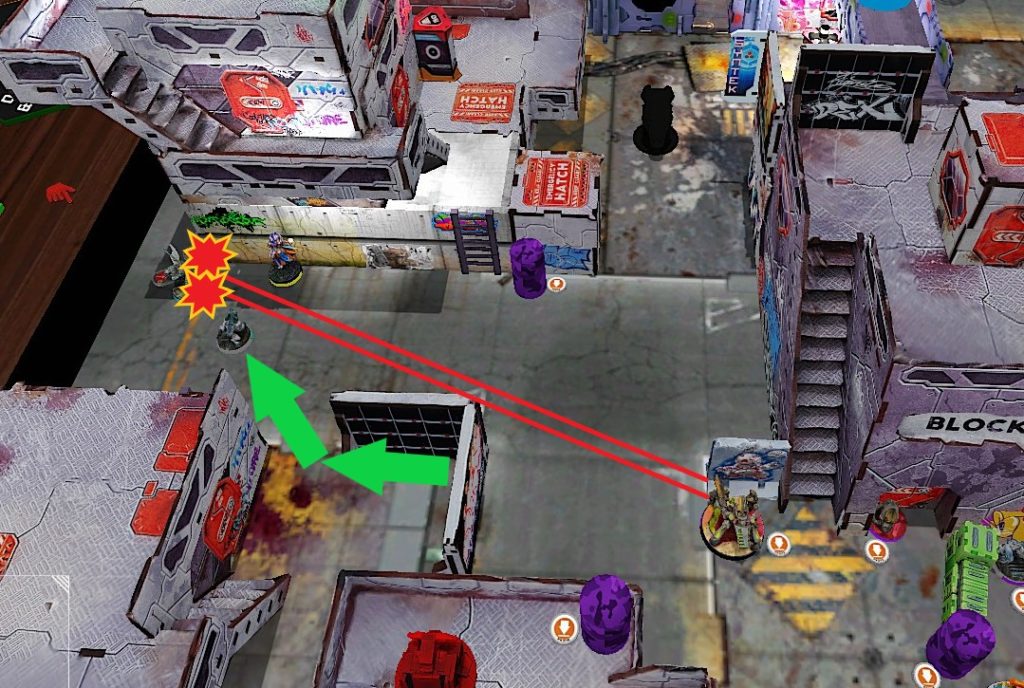
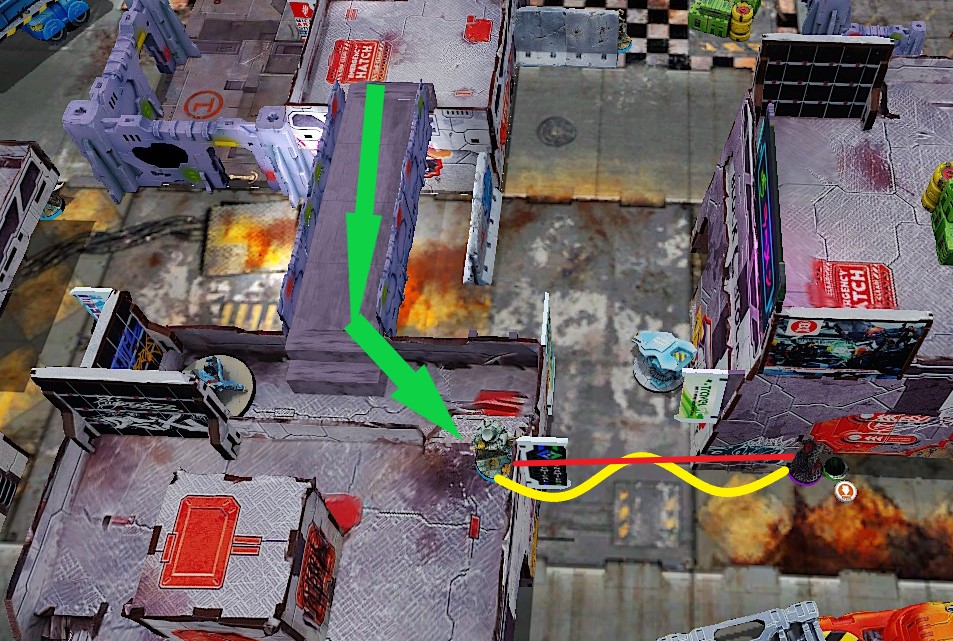
I knew that I had to stop the Santiago this turn to prevent my opponent from destroying my server, and likely my other forces. Luckily, my shrouded passed his regeneration roll and was back in play. I started by running my ikadron out and cleared both mines while also flaming the trinitarian, clearing the way for my Engineer Caliban.
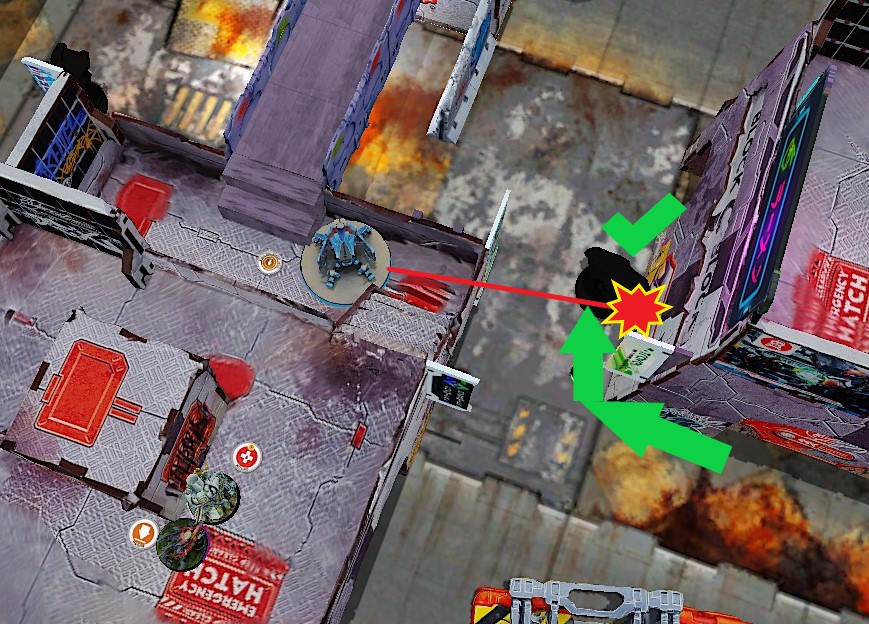
My Caliban then began the trek over to the staircase and up the building where he was able to unload into the back of the Santiago. After two gun fights that yielded only a single wound…the Santiago had moved to a spot where I would expose myself to the Black Friar. So the Caliban moved around the other side of the building, and dodged into cc (a more “reliable”) method of killing the Caliban. Rather that risk the engagement with my limited orders I chose to leave myself engaged and hidden behind the Santiago.
I then used my remaining orders to move the shrouded out and to the console where he revealed my opponent’s left server as the one housing the AI. My opponent would subsequently gundown the shrouded (making sure not to leave him unconscious) at the top of his turn.
Turn 3
Top of 3 – Military Orders: Destroy the Server
As I previously said, the turn began with the Bulleteer spending a few orders to permanently remove the Shrouded from the field. He then chose to take the engagement with the Caliban, and this time I won the CC roll…but he made all three of his saves. So we rolled again, and this time the Caliban died.
The rest of my opponent’s turn saw the Santiago take out my central console and then repositioning to defend his AI Server.
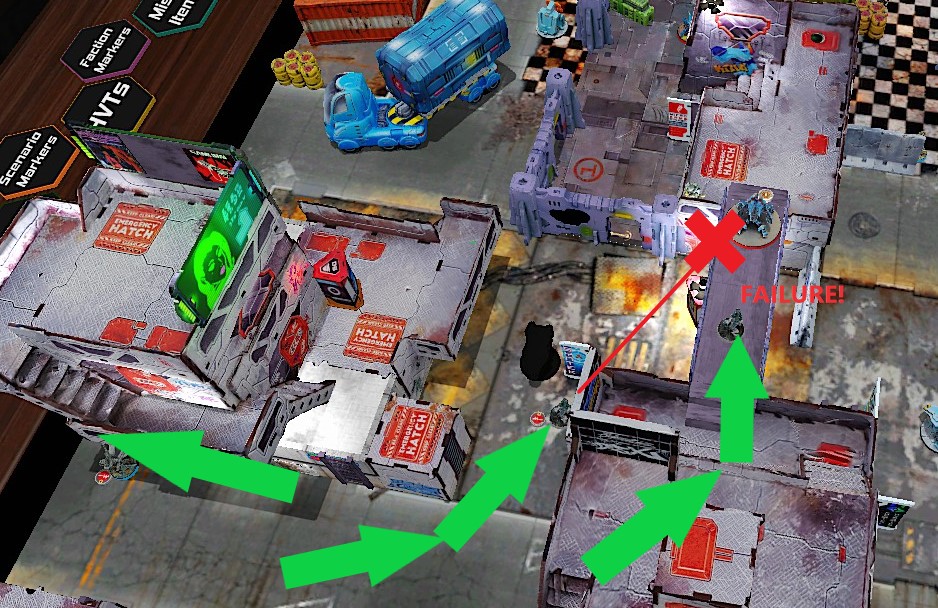
Bottom of 3 – Shasvastii Expeditionary Force: A Mad Dash
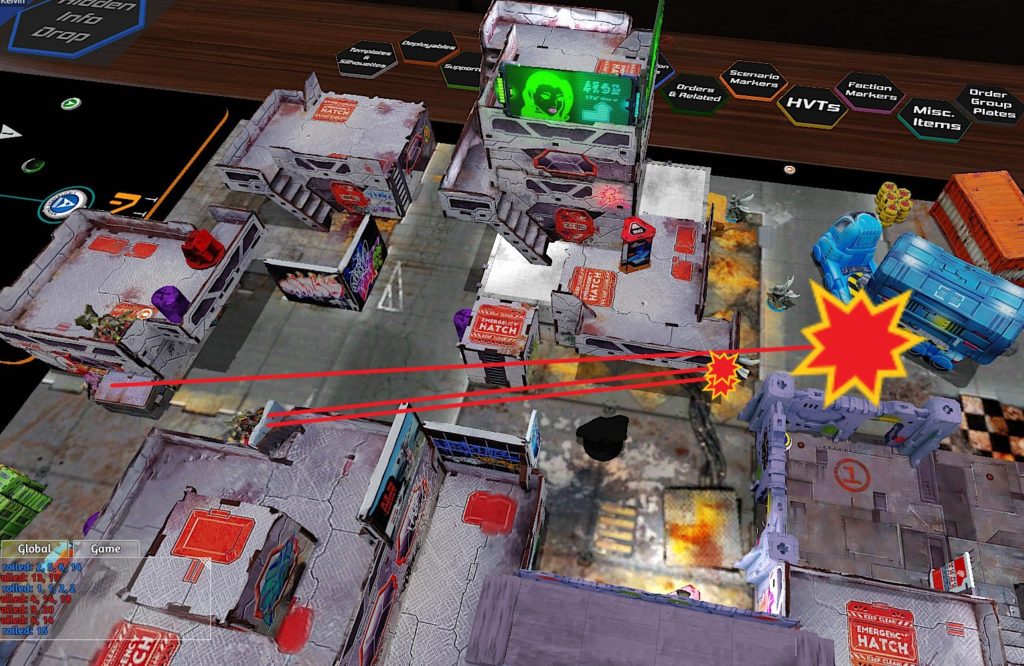
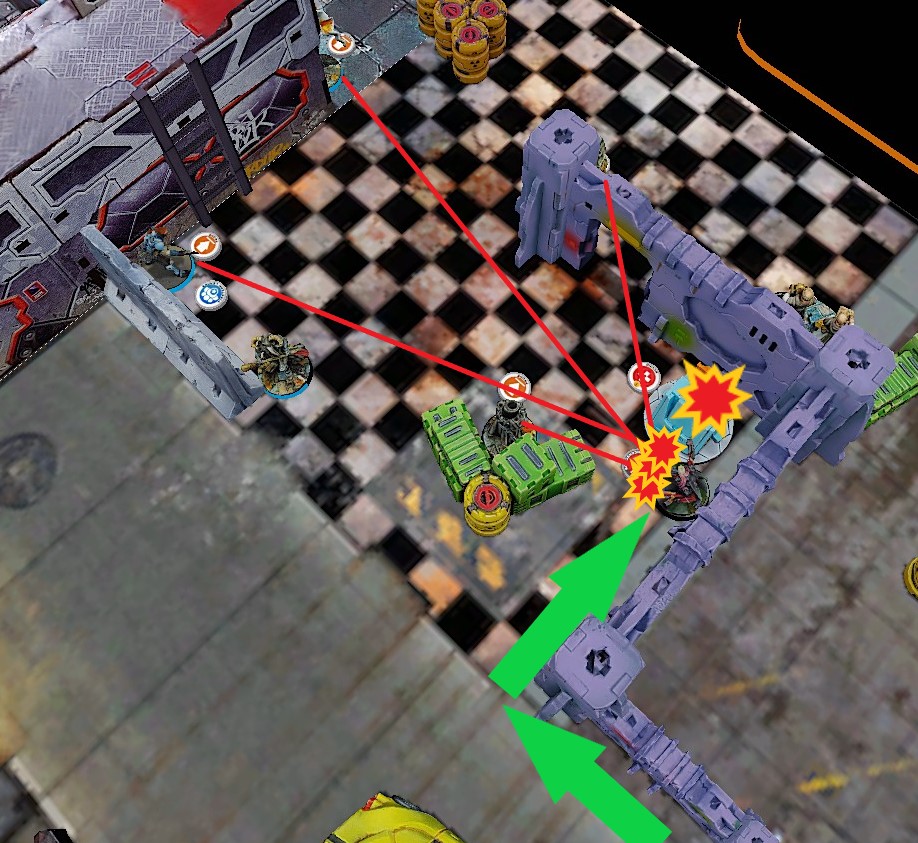
I had only one path to victory, and that was to destroy his AI server, and I had only one way to do that. I ran my remaining Caliban to his server using a combination of cautious moves, move-moves, and recamoing. I considered trying to clear some of the enemies, but I didn’t have a lot of orders and one bad roll would see the Caliban dead. The Caliban strapped the D-Charge to the Server as he was gunned down, and I rolled my first cc Crit of the game. 4 saves AP Dmg 14 vs the Arm 4 of the Server. I needed him to just roll 2 dice under 13…he rolled 1.
As an act of trying to maximize point I ran my Q-Drone up my left, and secured his HVT and that wrapped up the game.
Final Score:
Military Orders Victory (6-4)
Post-Game Analysis
This was my first game with Shasvastii, and army I’ve wanted to play for years. The main reason I’ve wanted to play Shas is how tricksy they are. Between camo, hidden missiles, and scary impersonators there are so many cool tricks Shas can do that really represent what drew me to Infinity in the first place, and this was a good chance to really embrace that. When I was first introduced to Infinity the thing that really caught me was the idea of private information. That the identity of your sneaky infiltrators weren’t divulged pregame was so cool to me (not to mention that some units could be completely hidden). These mind games are one of my favourite parts of Infinity, and something that I haven’t really found in other game systems.
This game also really exemplified another thing I love about Infinity, that even when things are going badly, you can still scratch out a victory. Now in this game I didn’t do that, but I was one more failed armour save from having scratched out a win. While some games of Infinity can really go downhill, I find that there is often some play that could work if you really dig deep and push units to the limits of what they can do (and get some look).
Pingback: Mission 042 Report: The Meaning of Infinity – Bromad Academy