
Basic – An Example Game
Hopefully by this point you understand the absolute basics of the game:
- How to read a troop profile
- How to read a weapons profile
- How to build a very basic list (including picking a lieutenant)
- How to roll off for initiative or deployment at the start of the game
- How orders work
- How troops move and shoot
- How normal and face-to-face rolls work
- How saving throws work
- How a guts check works
If you’re not comfortable with all of these concepts then we’d recommend going back and brushing up on them by checking out the core sections in the rules (pages 5 to 59 in the rulebook):
At this point in your journey it is normal to not know what any of the various special skills, equipment, and exotic ammunition does. It is also very normal to not know what hacking does yet. These issues will be covered in the Intermediate series. For now our focus is on the basics of reading profiles, building a starter list, and playing a beginner game.
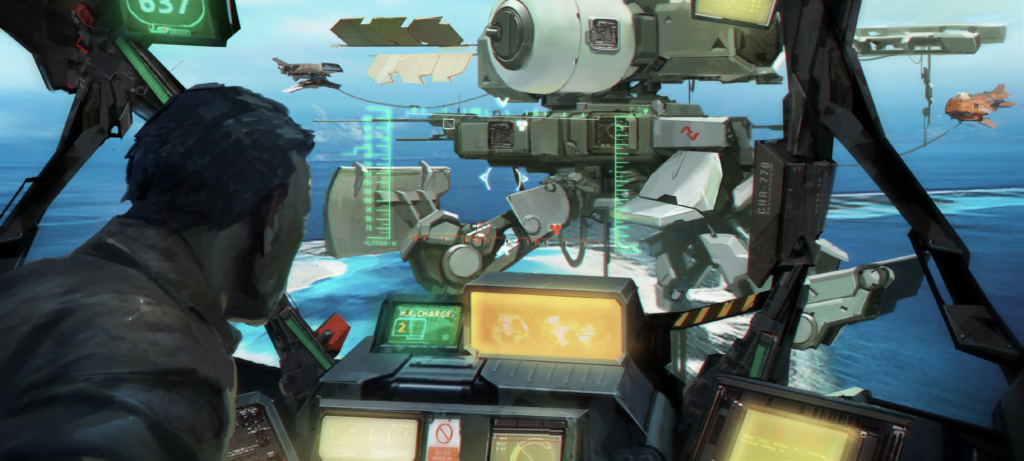
In this article we’re going to play through an example game with screen-shots. You can use these examples to check your understanding of the rules.
Throughout the game narrative information will be written in normal text, whilst rules and reminder information will be in italics.
Let’s get into the game!
Meet The Forces
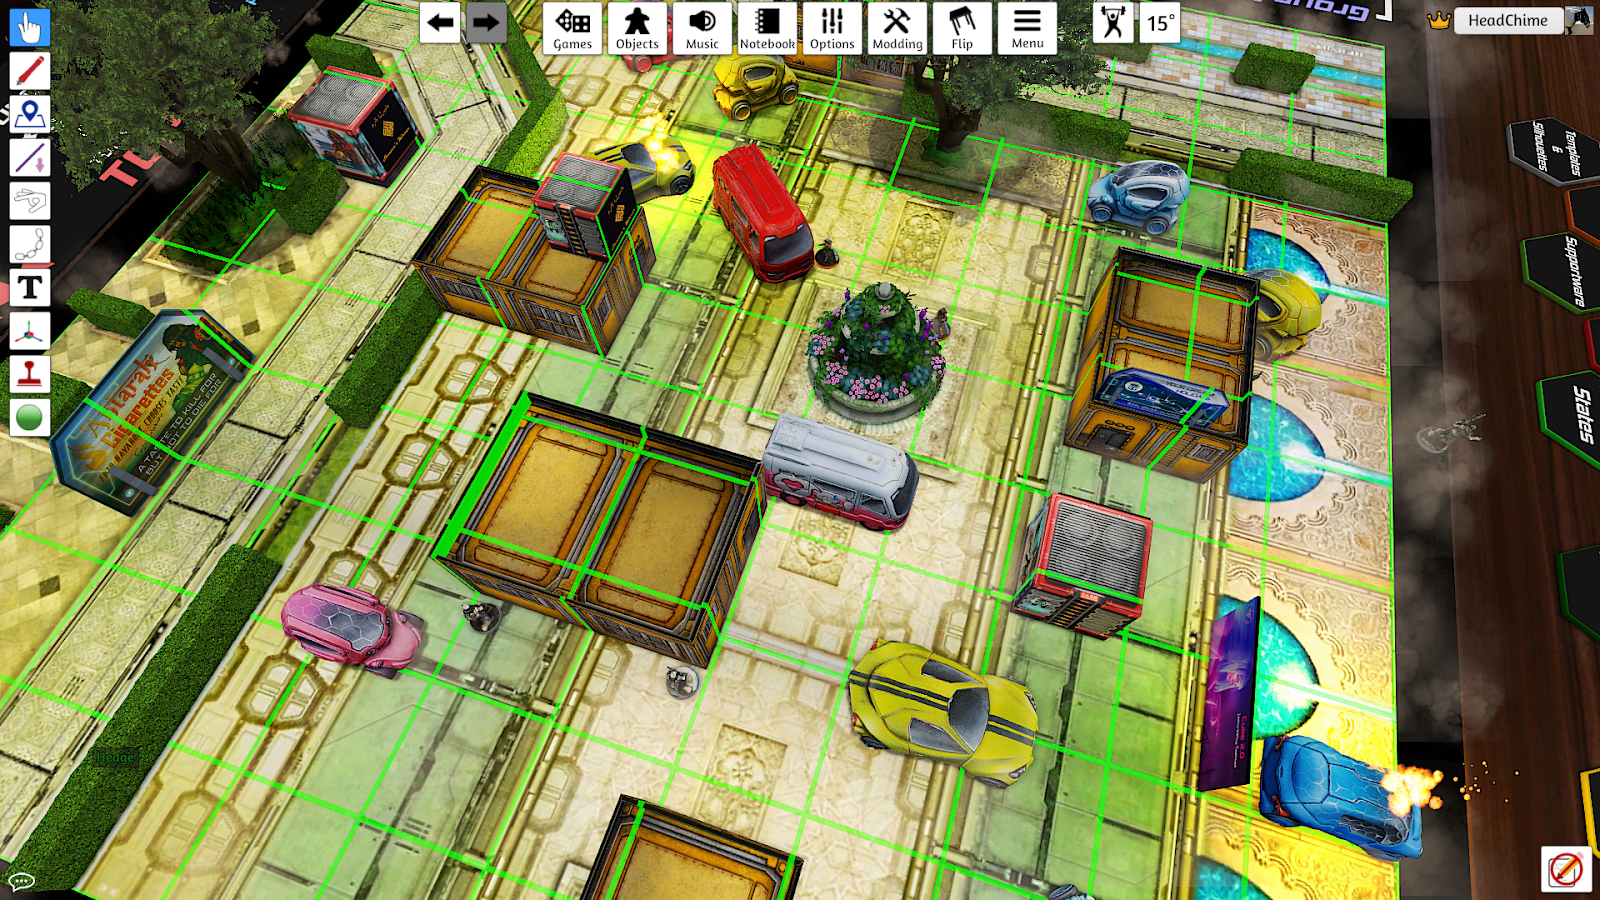
Today PanOceania is playing against Yu Jing.
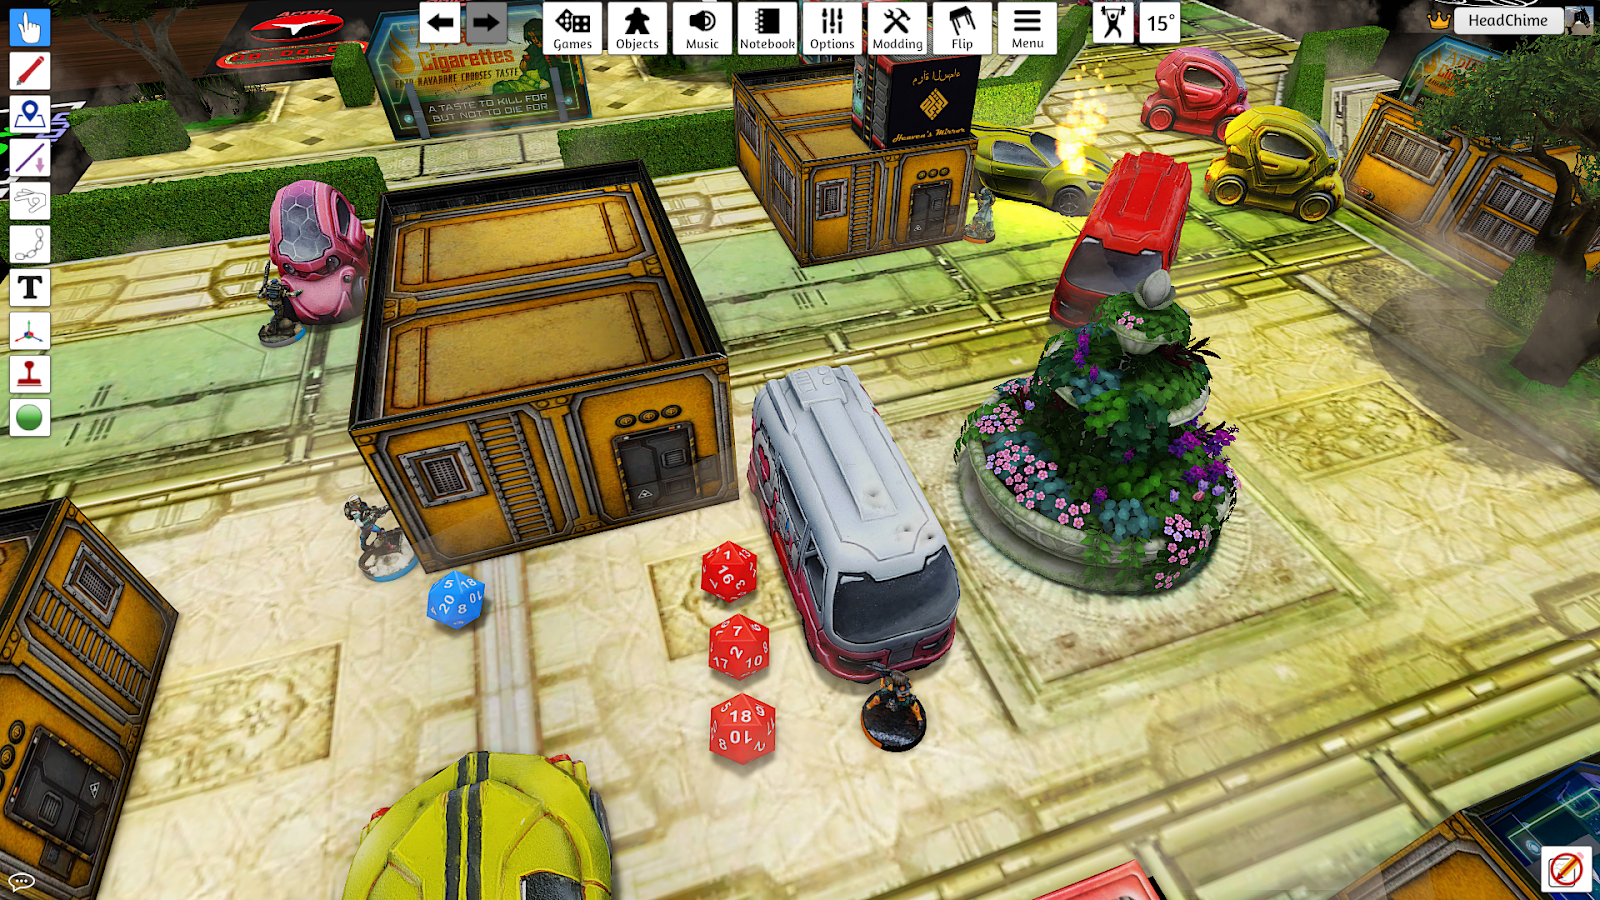
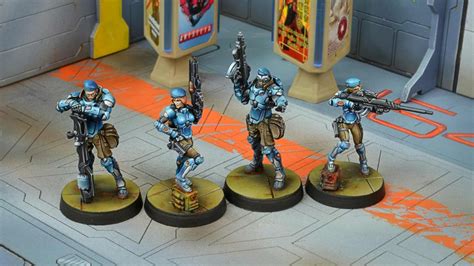
This is the PanOceania force:
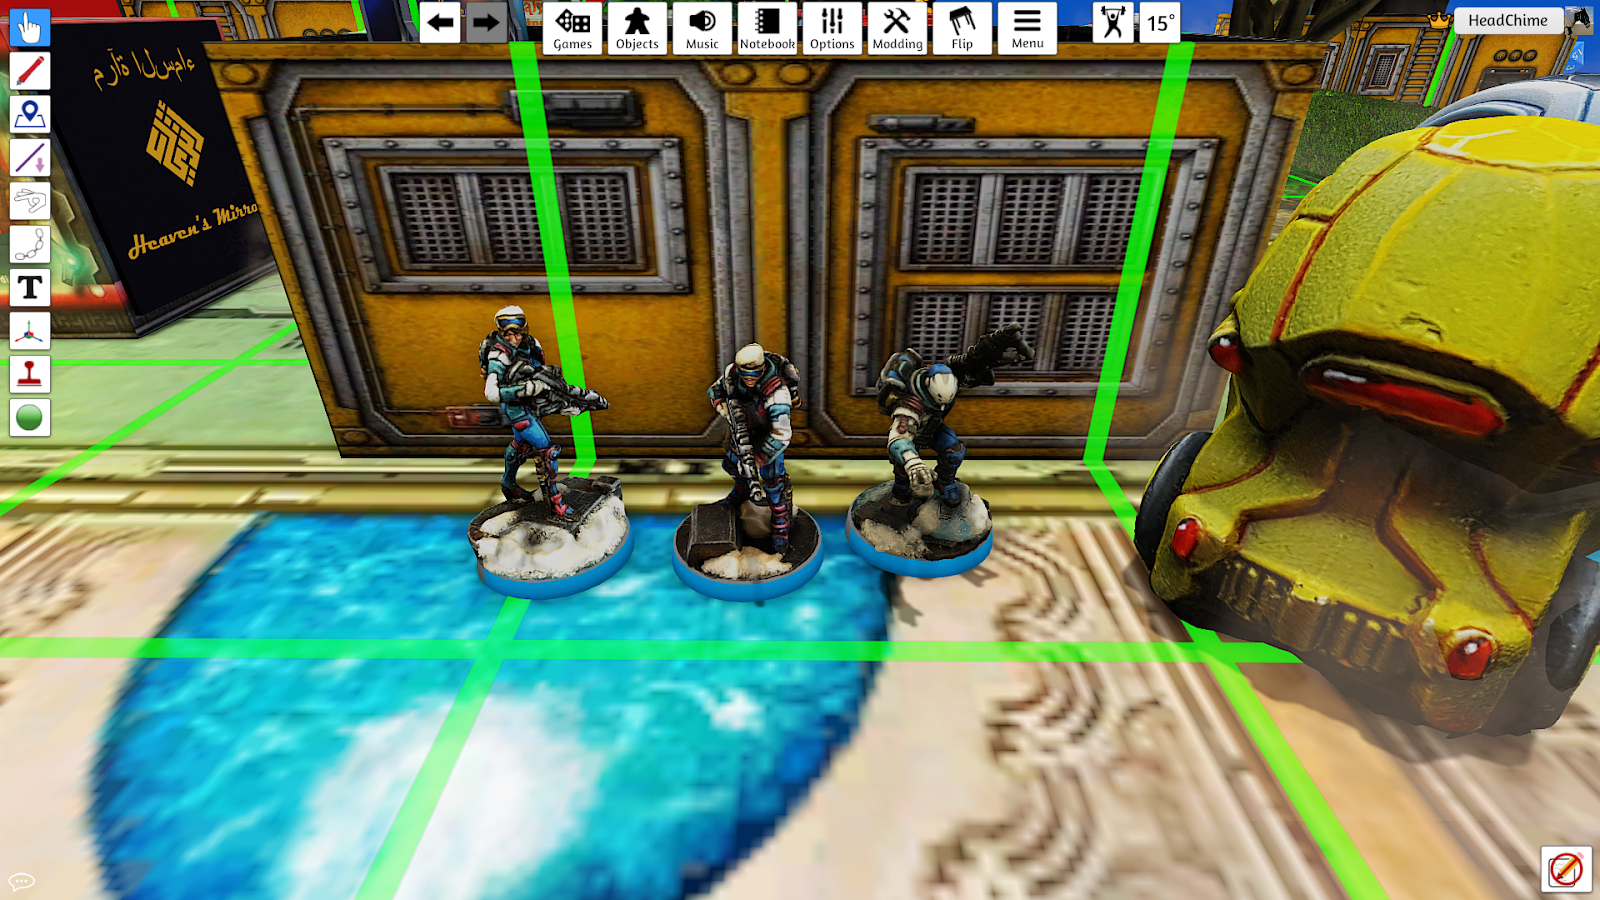
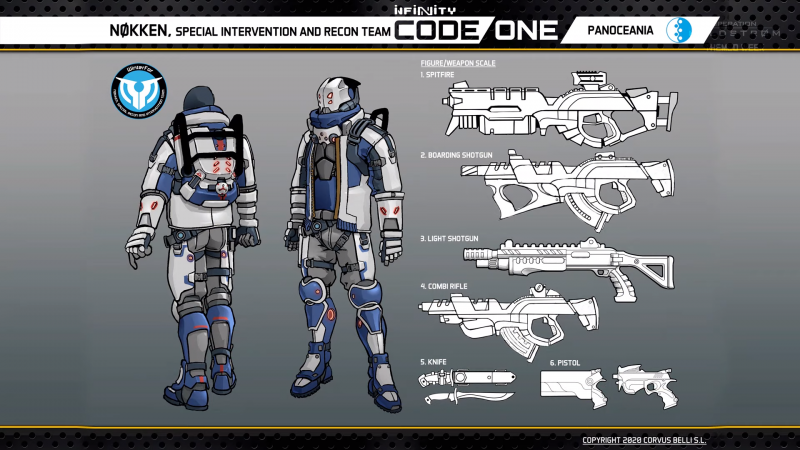
From left to right, troops are a Fusilier with combi-rifle, a Fusilier with combi-rifle, and a Nokken with boarding shotgun.
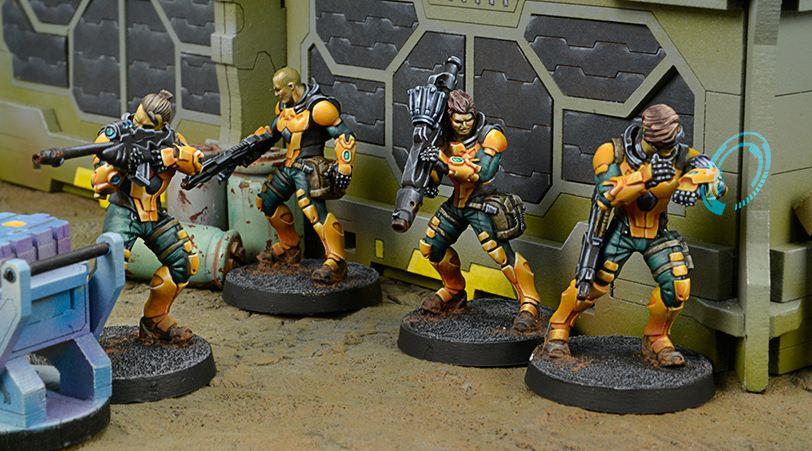
This is the Yu Jing force:

These troops are a Zhanshi with combi-rifle, a Zhanshi with combi-rifle, and a Guilang with boarding shotgun.
For the purposes of this game, the Guilang will not be using its camouflage skill.
Before the game begins neither side knows which models the opponent will be fielding. We are showing you these here, just for your own familiarity.
Starting The Game
Both players begin by telling each other which army they are playing. Note that this doesn’t include the details of their lists, just the name of the faction they are playing.
They then roll for initiative.
This is a face-to-face roll using their lieutenant’s WIP score. (Lieutenant will be abbreviated to LT from this point onwards).
For the purposes of this roll, the LT’s WIP score is public information – the players need to reveal this value to each other. However remember it is private information which specific troop the LT is.
PanO rolls a 10, and YJ rolls a 5. PanO wins!
The winner of the roll picks between keeping deployment or initiative. Keeping deployment means picking which side of the board to deploy on, and who deploys first or second. Keeping initiative means picking whether to take the first turn, or second turn.
The loser of the roll gets to make the decision that the winner declined. For example if the winner keeps deployment, the loser keeps initiative.
The PanO player chooses to keep deployment. They choose their deployment zone (which edge of the board they want), and they choose to deploy second. They want to deploy second because it allows them to see their opponent’s force and deployment before they have to do their own.
The YJ player is therefore given initiative. They choose to play first.
Deployment
In each player’s deployment phase they deploy all their models, except for one that they hold back as a reserve model.
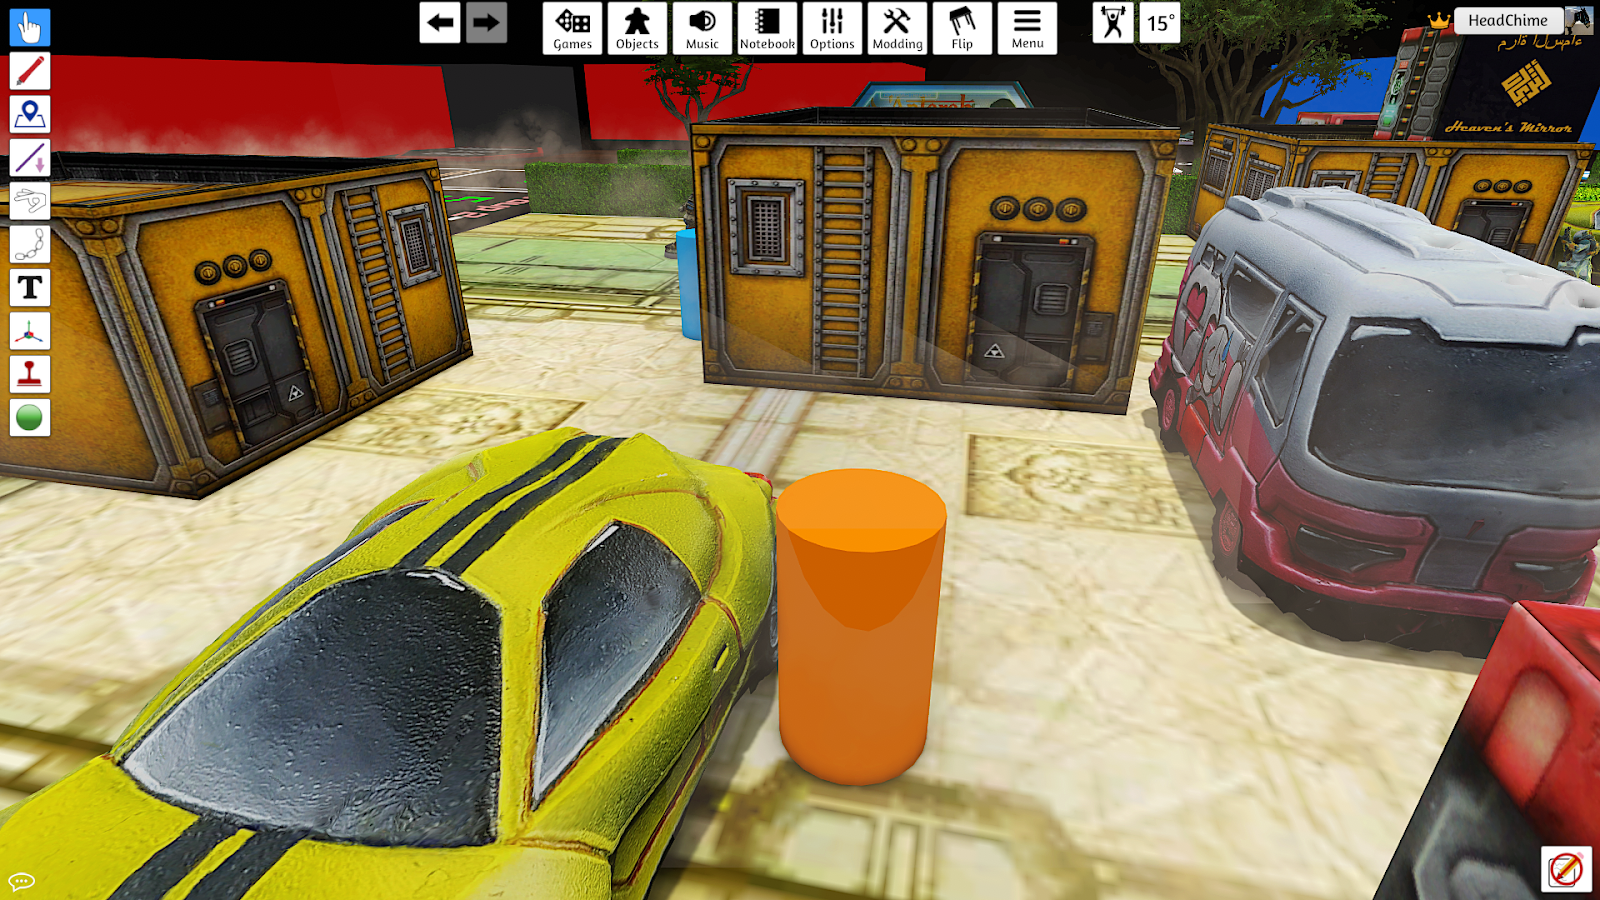
A normal game takes place on a 48” x 48” table, but for the purposes of this example game we’re using a very small play area.
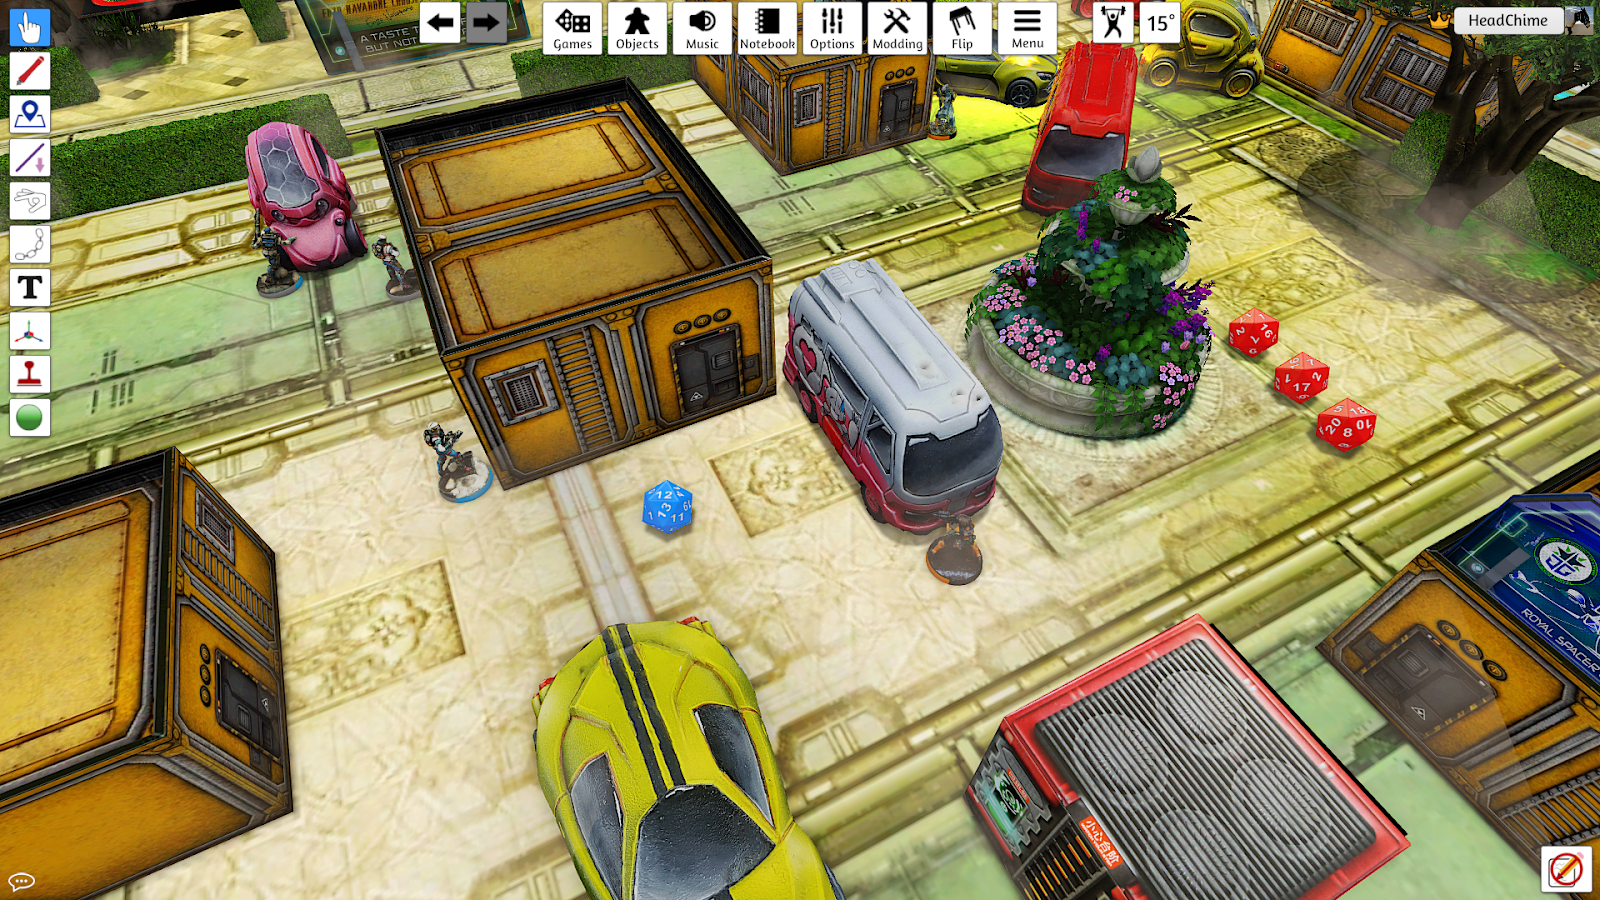
The Yu Jing player deploys both of their Zhanshi. They hold back their Guilang. It is at this point that the PanO player may ask their opponent for public information regarding the models on the table.
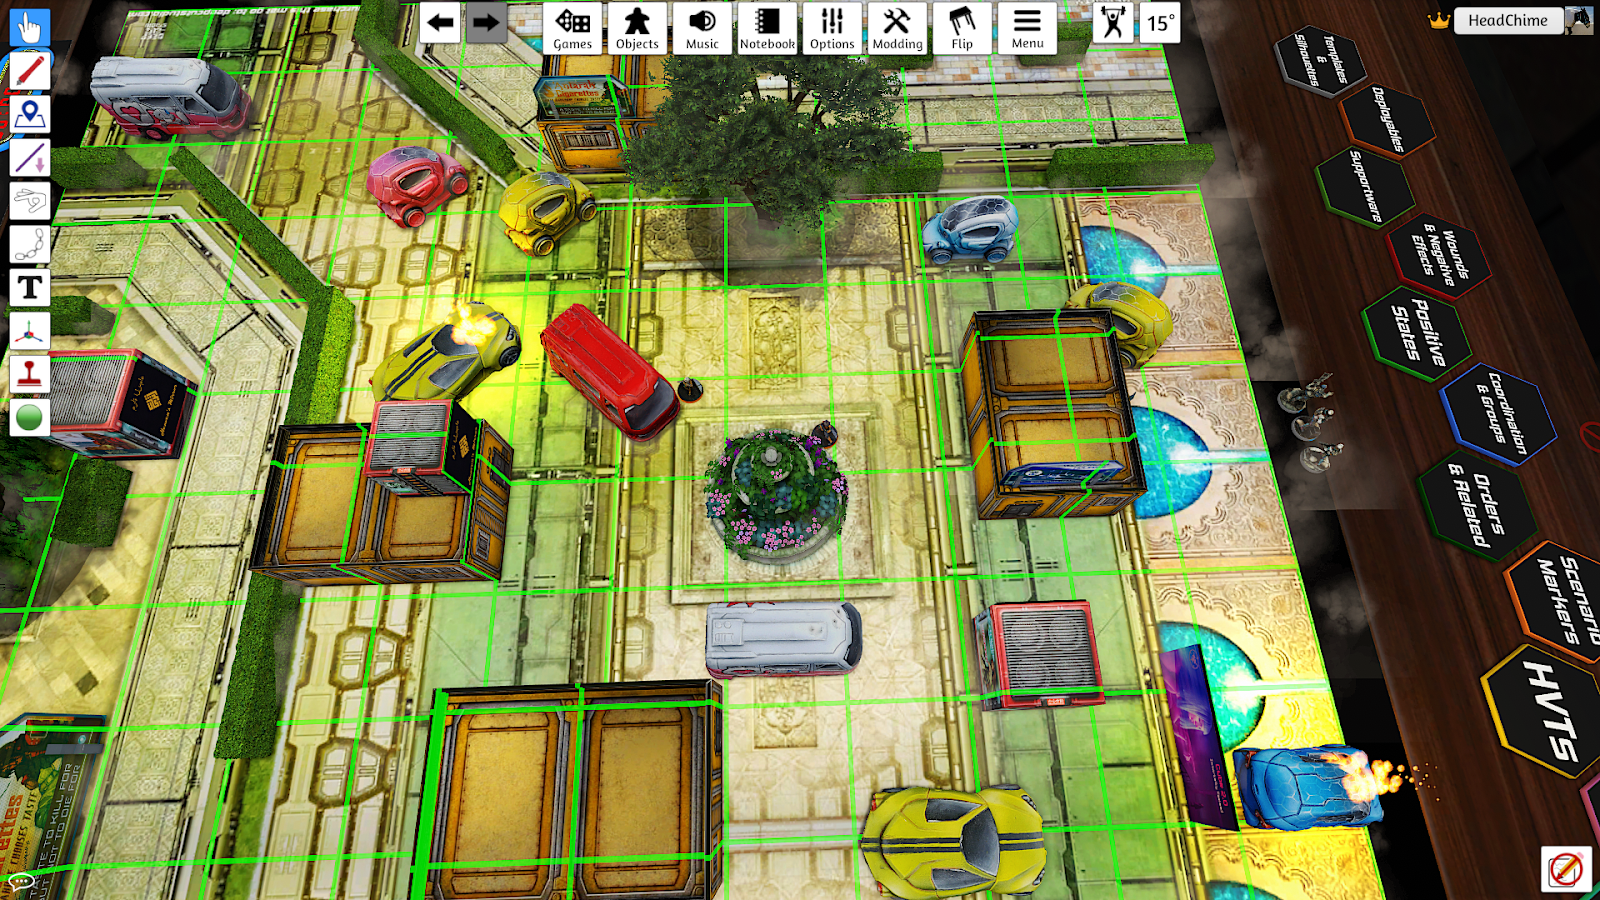
The PanO player then deploys both of their Fusiliers. They hold back their Nokken.
At this point, the YJ player typically asks the PanO player about public information regarding the models on the table. The YJ player then deploys their reserve. The Guilang.
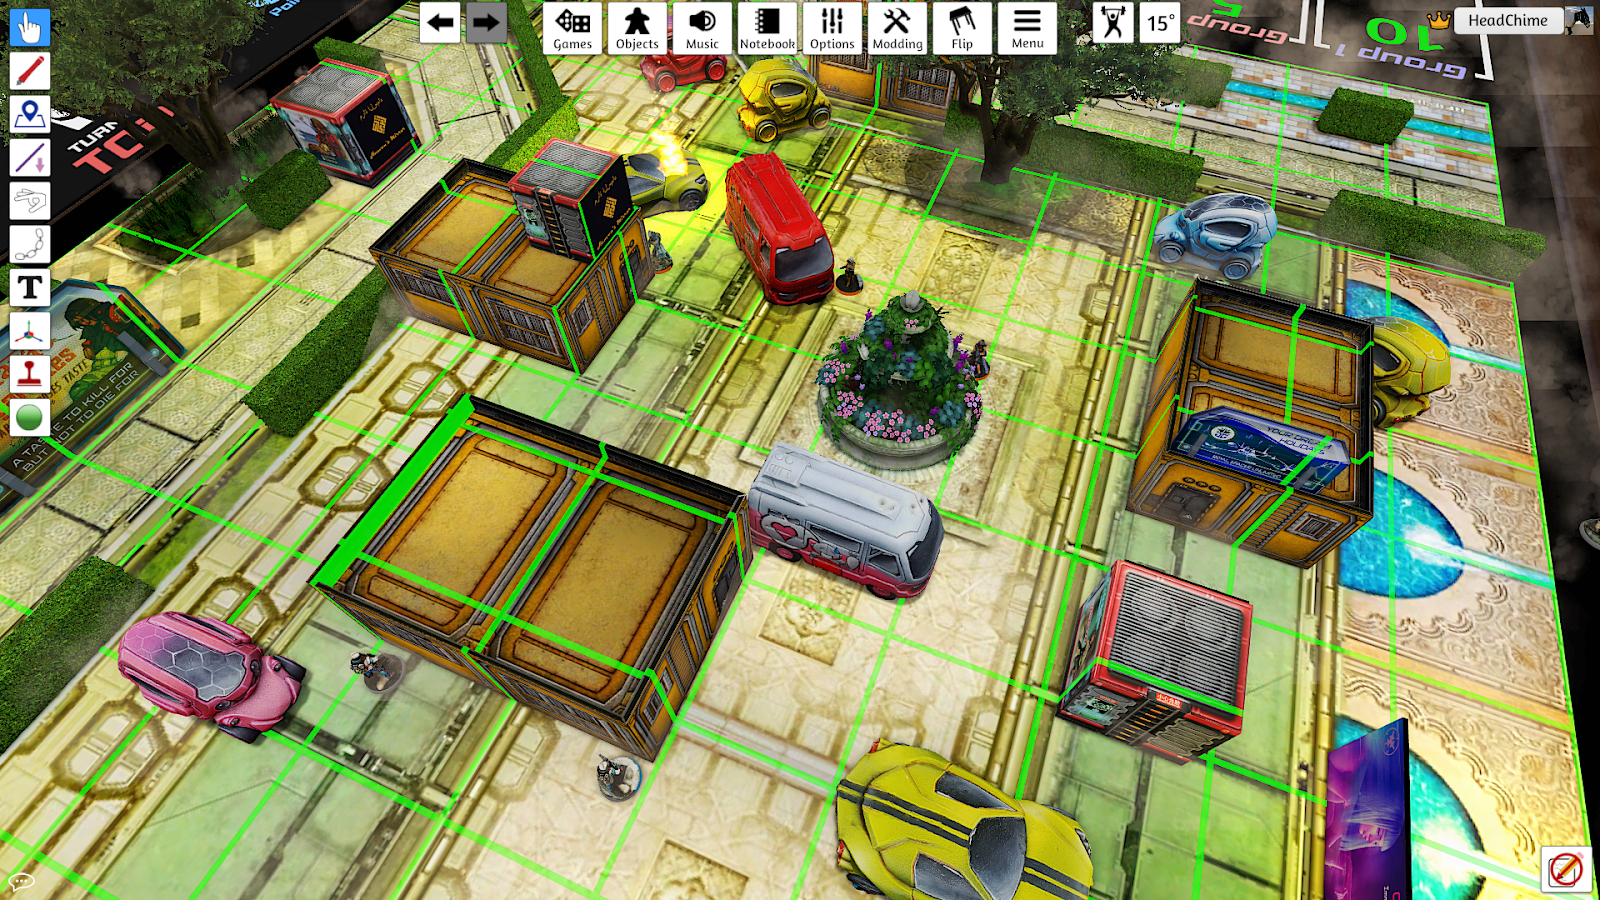
The PanO player then deploys their reserve model. The Nokken.
At a tournament, the players would now exchange “courtesy lists,” which have all public information about all the models that one might deploy on the table. Details that are hidden by a camoflague marker, the existence of off-table models, and private information are not shared at this time.
Round One
Turn 1 – Yu Jing
The game begins with the YJ player because they chose to play first during the initiative roll.
The turn begins with the Tactical Phase. During this phase, a number of checks are performed. For the purposes of a beginner game, the most important checks are whether your LT is alive and how many orders you have.
The Yu Jing player’s LT is still alive, so they are not in Loss of Lieutenant. They have three troops that give regular orders, so they have three orders total. Once they’ve counted their orders, they end their Tactical Phase.
The Yu Jing player then moves onto the Orders Phase. This is the main phase of the turn, in which orders are spent and dice are rolled.
The Yu Jing player has three orders in their turn. They can see that their opponent has left a Fusilier exposed on one side, so they plan to take it out with one of their Zhanshi!

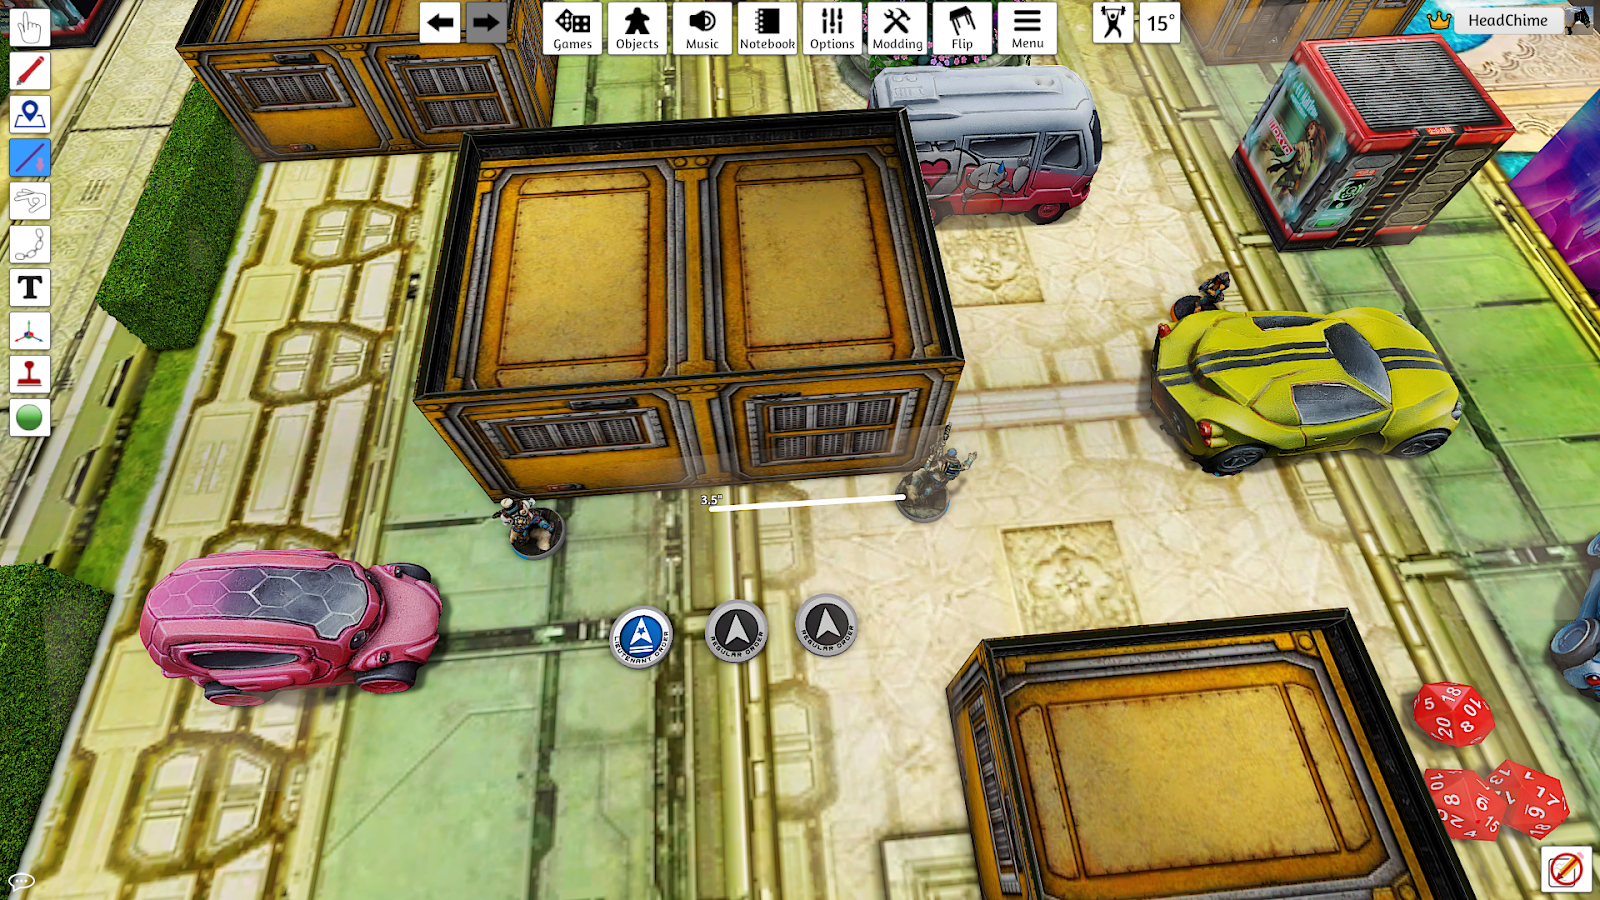
The YJ player spends one of their regular orders (represented here by it being greyed out, instead of coloured) and begins moving the Zhanshi. The Zhanshi moves 4”.

The PanO player checks whether any of their troops have line of sight of the Zhanshi. They do not, so no AROs are declared.
The YJ player decides to move their Zhanshi again, but is careful to keep it outside of the line of fire of enemy units. The Zhanshi can move 4” in the second half of an order, but chooses to not use it’s full move, in order to stay hidden.
The PanO player now checks to see if the second movement provoked any new AROs. The movement did not, so no AROs are declared.

That is the end of the first order. The Zhanshi declared a move and travelled 4”. This provoked no AROs because no opposing troops could see it. It then moved another 2.5” and tucked in behind some scenery. Again, no AROs were triggered by this movement. The order ends.
Remember the order sequence:
- The active player declares which troop is activating, and spends the order.
- The active player declares the first skill of the order. If it is a movement skill then they measure and complete the movement. Note that you may ask for Line of Fire of your opponent’s models before moving, or even activating a model! In fact you may ask “where can X model see?” or “what models can see this area?” at any time in the game!
- The opponent checks any AROs that might have been provoked along the entire movement path that the active troop took, and declares them. This means that AROs are still legal even if an opposing troop could see you at the start of your movement path, but not the end.
- The active player declares the second skill of the order. If it is a movement skill then they measure and complete the movement.
- The opponent checks for any new AROs that might have been provoked by the second skill, and declares them. For example, if the active troop moved again, they might have exposed themselves to the lines of fire of more reactive troops.
- The reactive player then checks whether all AROs are legal. For example, if they declared a dodge because they thought the active troop came within 8” of one of their units, they measure to check at this point. Note that this might mean measuring to a point that the active troop is no longer occupying. For example, the active troop might come closer to a reactive model and then move away. If the reactive troop declared a dodge in that situation, then they would want to measure the distance from the point at which the active model was closest.
- All non-movement skills are then resolved (shooting, dodging, etc.). If any shooting happens then ranges are measured, modifiers are decided, and dice are rolled at this point.
- Effects are then applied. If a troop took a wound then an unconscious or wound marker is placed next to it, if relevant.
- Guts rolls are then made, if relevant, resolved, and the order ends.
This might seem like a long sequence, but in the course of normal play an order can be resolved in just a few seconds!

The YJ player wants to get at that opposing Fusilier, so they spend their second order!
The Zhanshi declares a move and peeks around the edge of the scenery, so that they can see the Fusilier.

This time the PanO player gets an ARO, because their Fusilier can clearly see the enemy Zhanshi. They think about their choices. A Fusilier has a PH of 10, and a BS of 12. So if they shoot they will probably have one dice with a target number of 12, depending on range and cover modifiers. If they dodge they will have one dice with a target number of 10.
As their shot has a higher target number they decide to choose that.
Remember that attacks declared as an ARO have a burst value of one – so you only get to roll one die. Some troops in the game have special rules which allow them to fire more shots as an ARO, but this is uncommon.
The YJ player already knows what they want to do with their second skill – shoot! They declare this.
The roll will be a face-to-face roll between the Fusilier’s shot, and the Zhanshi’s shots. The distance between them is measured and decided to be 8.5”.
Both players check their weapon profiles. They see this:

At this range of 8.5” both of their combi-rifles grant a +3 bonus to BS. However they are also both in cover, which forces the enemy to take a -3 bonus to BS. Therefore, when the modifiers are all added up, both the Zhanshi and the Fusilier are shooting with their normal BS value. This is 12 for the Fusilier, and 11 for the Zhanshi.
Combi-rifles have a burst value of 3, so the Zhanshi has 3 dice, aiming for 11s or less. The Fusilier only has one dice because it is declaring an ARO, aiming for 12 or less.

Both players roll the dice….
The Fusilier rolls a 5. The Zhanshi rolls a 1, 7, and 18.
The 18 is excluded immediately because it’s a miss.
18 is above the Zhanshi’s target number of 11.
The 1, 5, and 7 are potential hits, but the players need to decide who wins the face-to-face roll. The highest successful roll is the Zhanshi’s 7, so that’s the ultimate winner. It’s going to cancel all of the Fusilier’s lower rolls.
If the Fusilier had somehow rolled multiple dice and scored multiple hits, the Zhanshi’s roll of 7 could potentially cancel every single one of them, if their values were less than 7. Of course the Fusilier only rolled one die because it only has a single burst as an ARO.
Both players check whether the Zhanshi scores any more hits besides the 7. They notice that it did score a 1, but the Fusilier beat this with a 5, so the 1 is cancelled.
Remember; even if a die is cancelled by a higher number (the Fusilier’s 5 vs the Zhanshi’s 7), it still cancels all of the opponent’s dice that are lower (the Fusilier’s 5 vs Zhanshi’s 1).
So after evaluating the face-to-face roll it seems that the Zhanshi has scored a single hit.
Now both players move onto saving throws! The damage value of a combi-rifle is 13. The Fusilier has a natural ARM value of 1, and is in cover. This gives a total ARM value of 4.
Cover reduces the damage of a weapon by (or grants +3 ARM, whichever works better in your mind).
Therefore, the Fusilier’s armour reduces the incoming damage by 4, resulting in a total damage value of 9 (13 – 4 = 9). The PanO player needs a 10 to negate the hit.
The value you roll on the armour or BTS save needs to exceed the incoming damage.
The PanO player rolls a 12 – the Fusilier lives!
It’s now time to do a guts check. Does the Fusilier roll to stay in place, or voluntarily move back and hide?
Remember a guts check is a roll that a unit makes after it suffers a successful attack. In a guts check you make a WIP roll if you want the troop to stand its ground, or you can voluntarily fail in order to move away from the attacker. Many troops have skills that let them automatically pass guts rolls.
The PanO player decides that it’s probably best to voluntarily fail the guts check in order to fall back. The Fusilier leaves the line of sight of the attacking Zhanshi.
Failing a guts check allows the troop to move up to 2”, in order to leave line of sight of the enemy, or get better cover (or both!). If neither of these are possible then the troop goes prone.

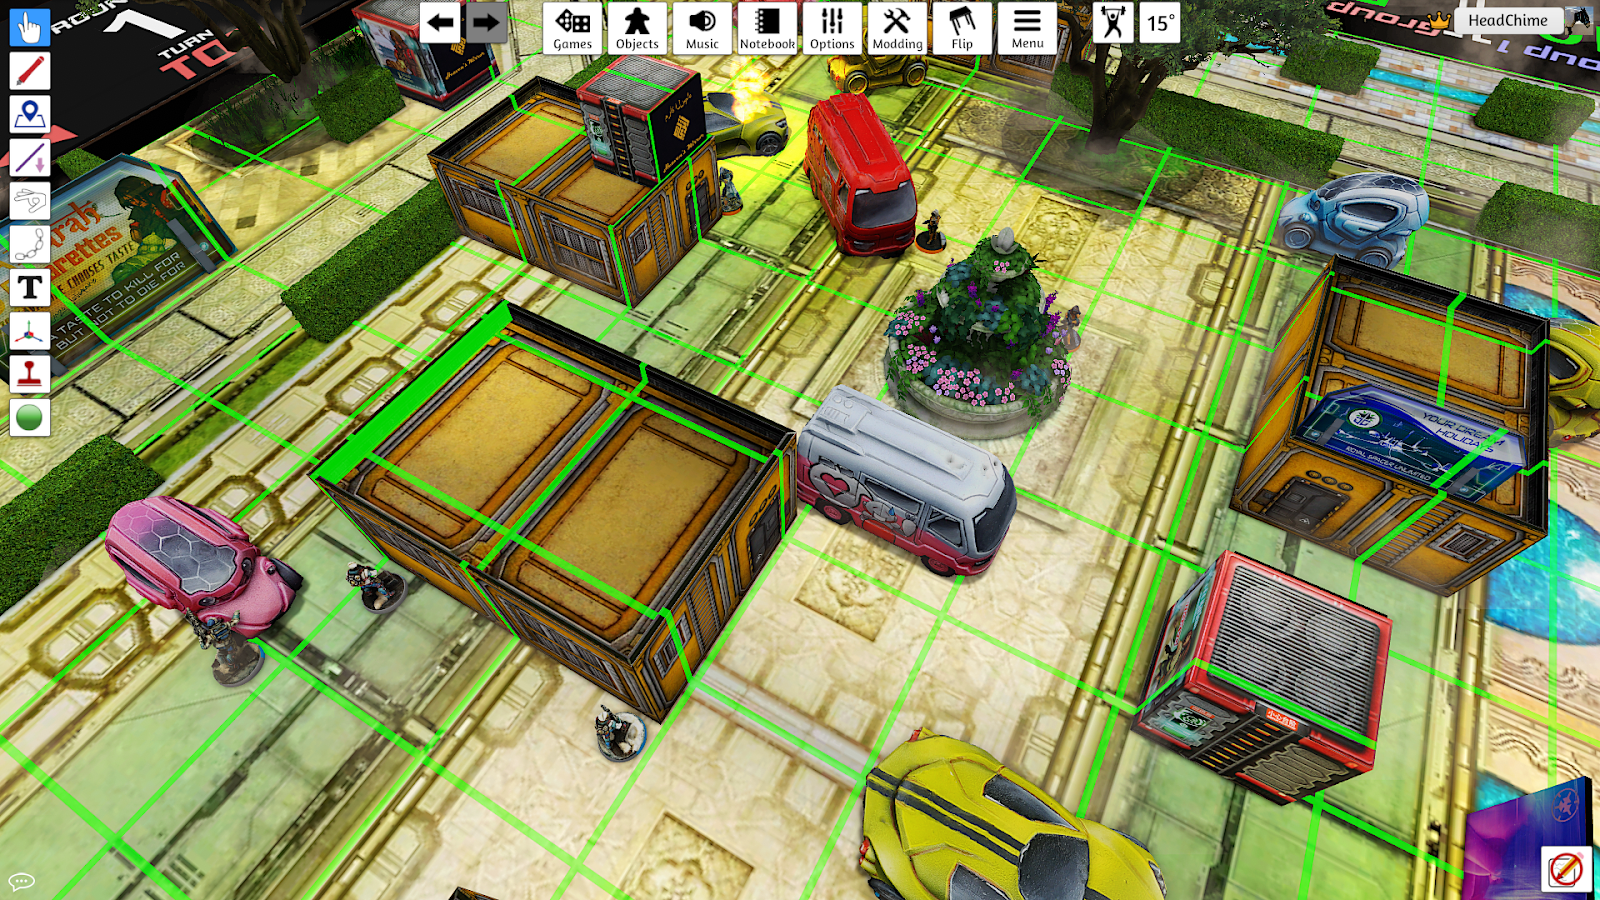
That’s the end of the YJ player’s second order. Frustrated that the opposing Fusilier isn’t down, they decide to spend their third, and last, order pushing forwards again.
The YJ player activates the Zhanshi and declares a movement, going 4”.
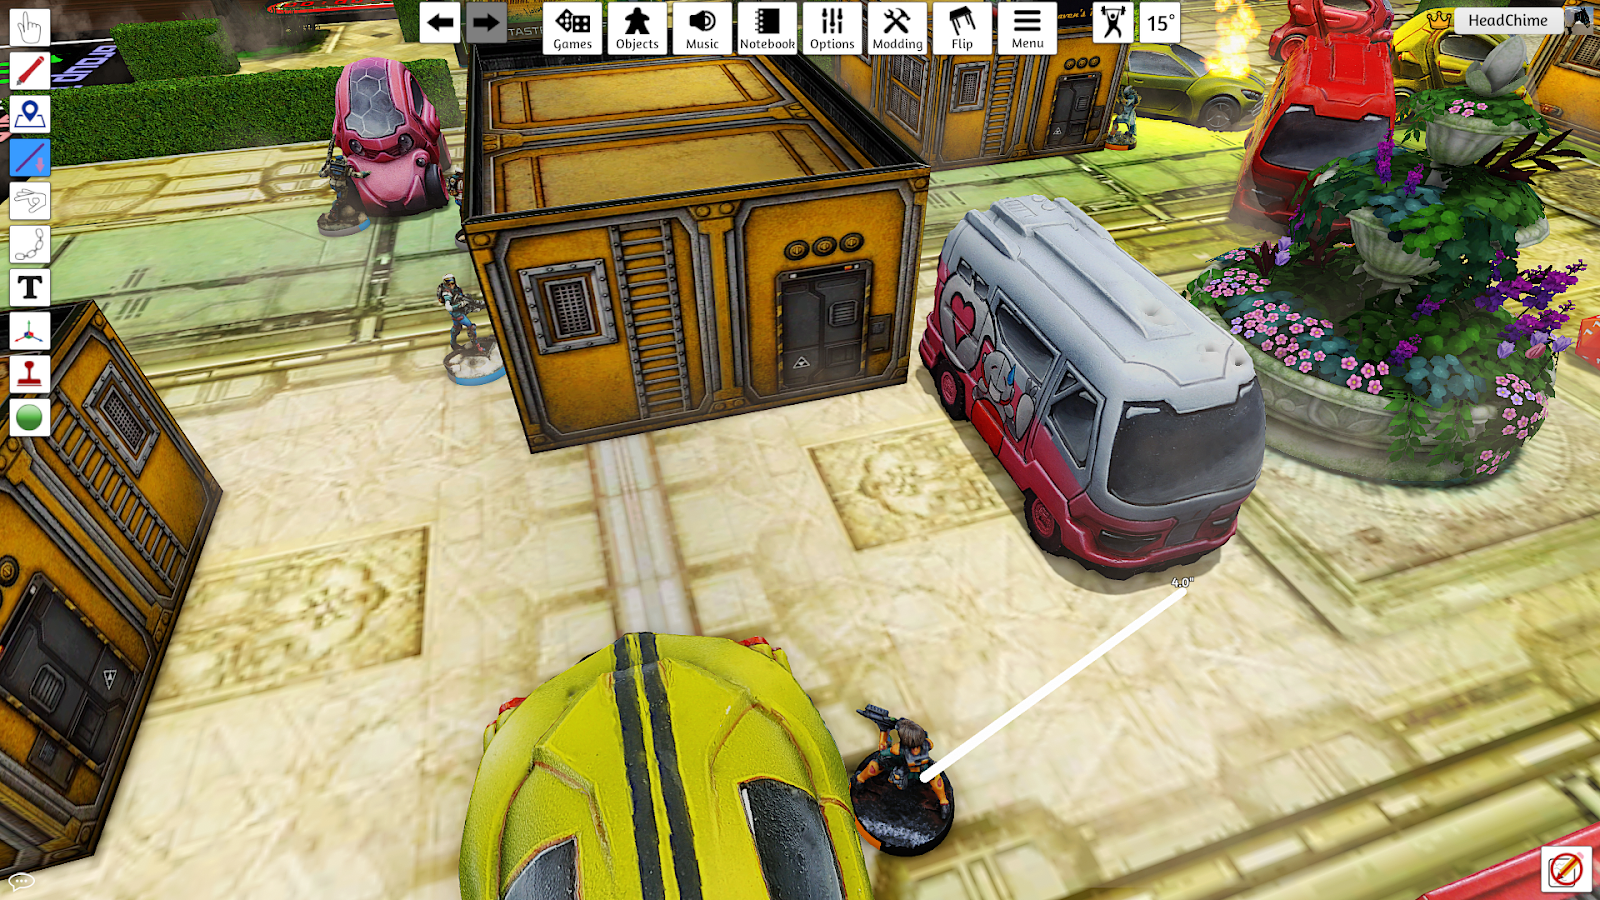
The Fusilier wants to declare a shot as its ARO, but neither player is sure whether the models have line of sight. They use silhouettes to check.
After swapping the models to silhouettes they’re sure that they have line of sight.
With this information the Fusilier declares a shot as its ARO, and the Zhanshi declares that it will shoot with its second skill.
Distances are measured, modifiers are calculated, and then dice are rolled. The Fusilier has one die on 12s, and the Zhanshi has three dice on 11s. The same as last time, because both models have cover and the models are in the same range band as before.

The players check the results. The Fusilier’s 3 cancels the Zhanshi’s 2, but the Zhanshi’s 5 and 11 go through. The 11 is a critical hit!
The PanO player now needs to make 3 saves against damage 9.
Remember a critical hit causes the target to need to make an additional save, so the Zhanshi’s normal hit and critical hit require three saves. The damage value is 9 because the weapon’s damage is 13, but the Fusilier has ARM1 and is in cover (13 – 4 = 9).
They’re looking to roll 10+ on their saving throws. The PanO player rolls a 1, 3, and 11. This means they fail two saves, and pass one. The Fusilier has one wound, so after taking two damage it dies.
This was the YJ player’s third and final order. They choose to not spend their LT order, because doing so would reveal their LT, and they do not want to do this on the first turn.
Turn 1 – PanOceania
The PanO player begins their turn with the tactical phase. They make the necessary checks and declare the following: they are not in loss of LT, and they have two regular orders.

The PanO player starts their order phase. Two orders isn’t a lot, but they think they have enough to do something useful. The YJ player still has a Zhanshi near the PanO player’s deployment zone, so they can try to deal with that.

The PanO player spends an order on their Nokken. They begin by moving forwards, being careful to stay out of line of sight of the Zhanshi.

They decline the second half of the order, because they fear that moving too far will let the Zhanshi see them.
To decline doing anything you declare the skill ‘Idle’. It basically means – the activated troop will not take an action. Why did the PanO player do this?
Remember that if you spend the second half of an order moving into line of sight of an enemy troop they will be able to shoot you as an ARO, but you will not be able to do anything because you have already declared both of your short skills!
The Nokken activates again, with a second order and moves forward.
This time the Zhanshi can definitely see, so it has the chance to declare an ARO. The YJ player asks the PanO player what skills the Nokken has before declaring their ARO, just in case there is something they should know. The PanO player responds, saying that the Nokken has mimetism-6.
Mimetism-6 is a skill which means a troop is difficult to hit. It has broken up its outline to make it harder to see either by good old fashioned grease paint and camoflauge pattern clothing or via some more high tech means. The overall effect is that all BS attacks that roll to hit against that troop take a -6 penalty to the target number.
Some troops have a piece of equipment that ignores this skill (a multispectral visor – basically technological improvements to vision like infrared vision or similar), and direct template attacks such as flamethrowers or chain rifles ignore it because they do not roll to hit! A cloud of napalm or a spray of shrapnel indiscriminately hits an area and no amount of fancy optical trickery will save you.
The YJ player knows that if they shoot they will likely be on 5s.
The Zhanshi has BS11, and will probably get +3 for range, -3 for cover, and -6 for mimetism-6 = 5.
However if they dodge, they will be on 10s. That’s a much better number, so they choose to dodge.
The PanO player decides to shoot with their second short skill. They measure the range, and determine the modifiers for their shot. They work out that their target number is a 15, and they have two dice. The Zhanshi has one die, aiming for 10 or less.
The range is 6.7”, so within 8” for range-brackets. At that range shotguns have a huge +6 modifier to hit, but the Zhanshi is in cover, so the Nokken has a -3 penalty. Their BS is 12. So their target number is 12 + 6 – 3 = 15. Shotguns have a direct template mode, or an alternative mode where you roll two shots to hit. The Nokken has chosen to roll to hit, so gets two dice.

The Zhanshi has a PH score of 10. It is not modified by anything. The Nokken’s mimetism-6 skill makes BS attacks against it take a penalty, but not dodges. So the Zhanshi has one die on a 10.
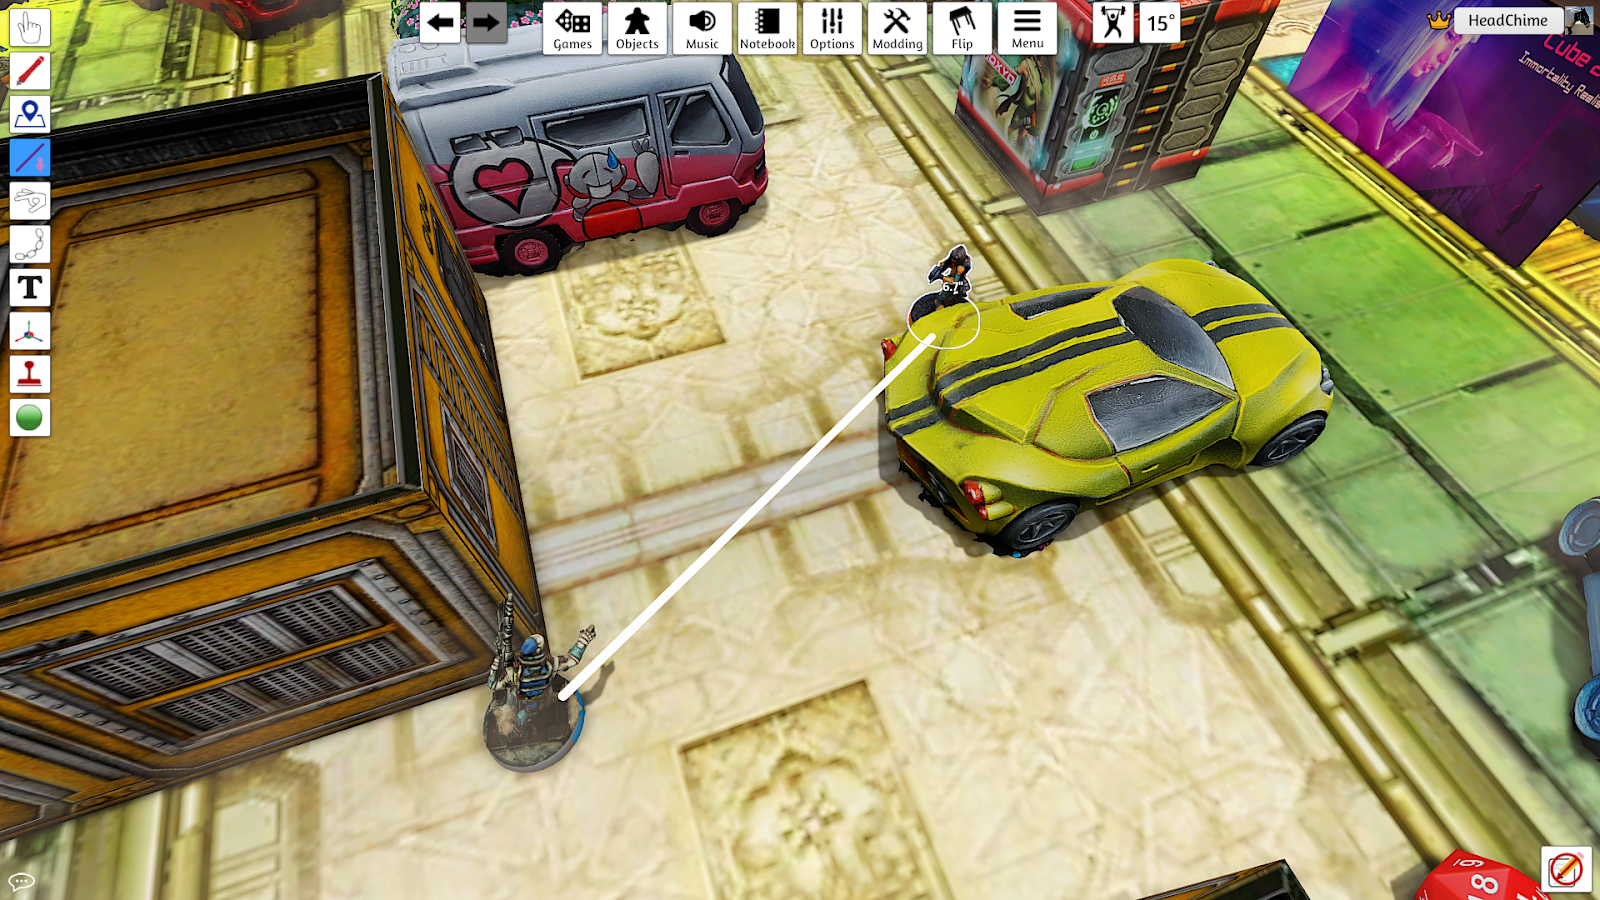
Dice are rolled. The Nokken hits on a 14, and a 13. The Zhanshi fails its dodge with a 19. This means the Nokken has two successful hits.

The Zhanshi is hit twice and therefore needs to make two saves.
The damage value of a boarding shotgun is 14, and it has AP ammunition, which means it halves the opposing troop’s natural armour value (rounding up).
The Zhanshi has an ARM value of 1, so the AP does not affect it (1 halves to 0.5, and then rounds up to 1 again). The Zhanshi is also in cover, so adds an additional 3 to that value, for a total of 4.
The YJ player rolls two saves needing 11+.

Damage 14 – 4 armour = 10 damage. Armour saves need to beat the damage, so rolls of 11+ are necessary.
The YJ player fails both saves and the Zhanshi dies.
The PanO player has spent both of their regular orders. They have their LT order left. They choose to not use it, in case the YJ player comes after their LT once it is revealed.
Round Two
Turn 2 – Yu Jing
In the tactical phase the YJ player declares that they have two regular orders and a LT order.
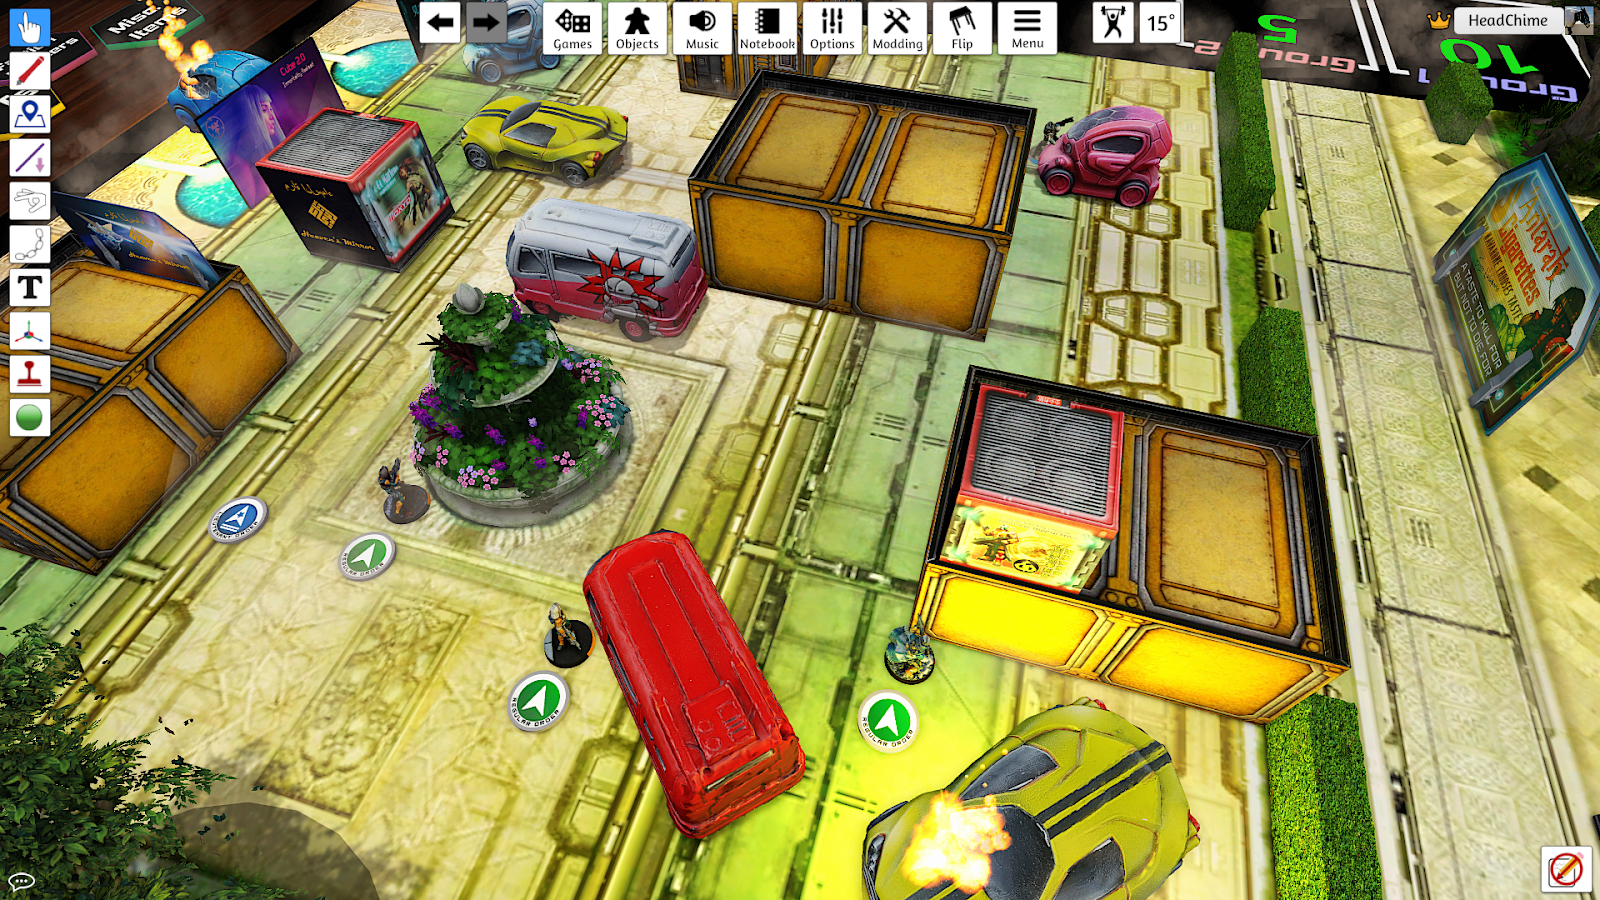
In the orders phase, the YJ player decides they will try use their Guilang to kill the remaining PanO Fusilier. They spend an order and move forwards.
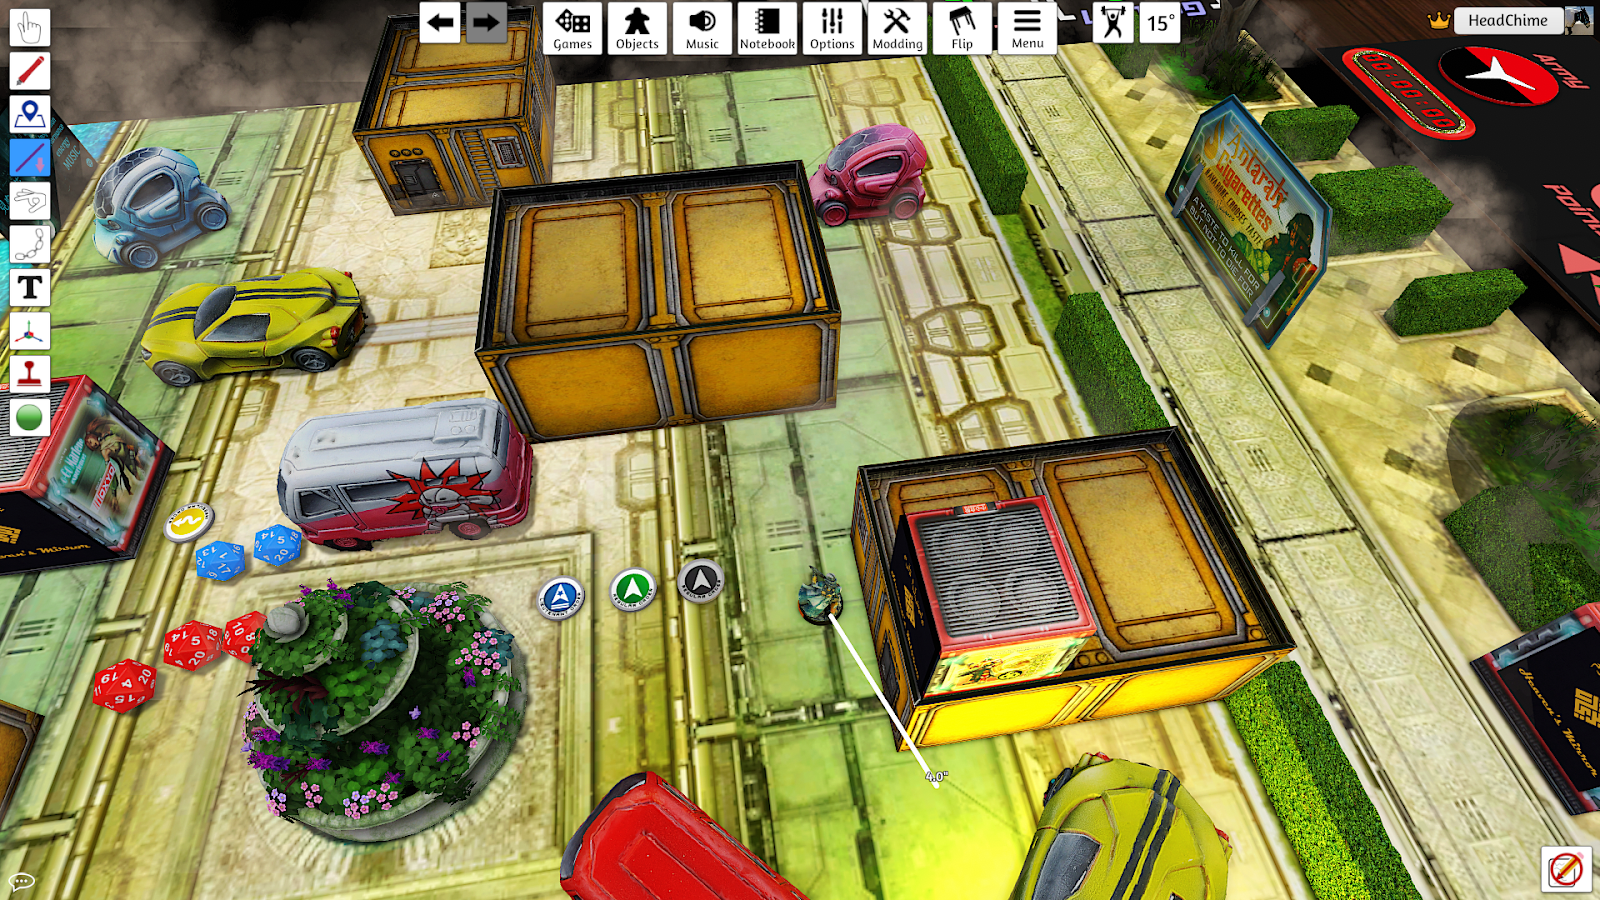
There are no AROs declared, so the Guilang moves again, with the second half of the order.

The Guilang has moved into the zone of control of the enemy Fusilier, with its second movement. This would ordinarily provoke an ARO, because you’re allowed to declare AROs against enemies who move within your zone of control.
A troop’s zone of control is an 8” bubble around them. To some extent it represents the troop’s awareness (i.e. what they can hear nearby).
However, before the PanO player declares their ARO, the YJ player informs them that the Guilang has a skill called stealth. The PanO player therefore does not get any ARO.
Stealth is a skill which, very simply, allows troops to move through the zone of control of enemy units without provoking AROs.
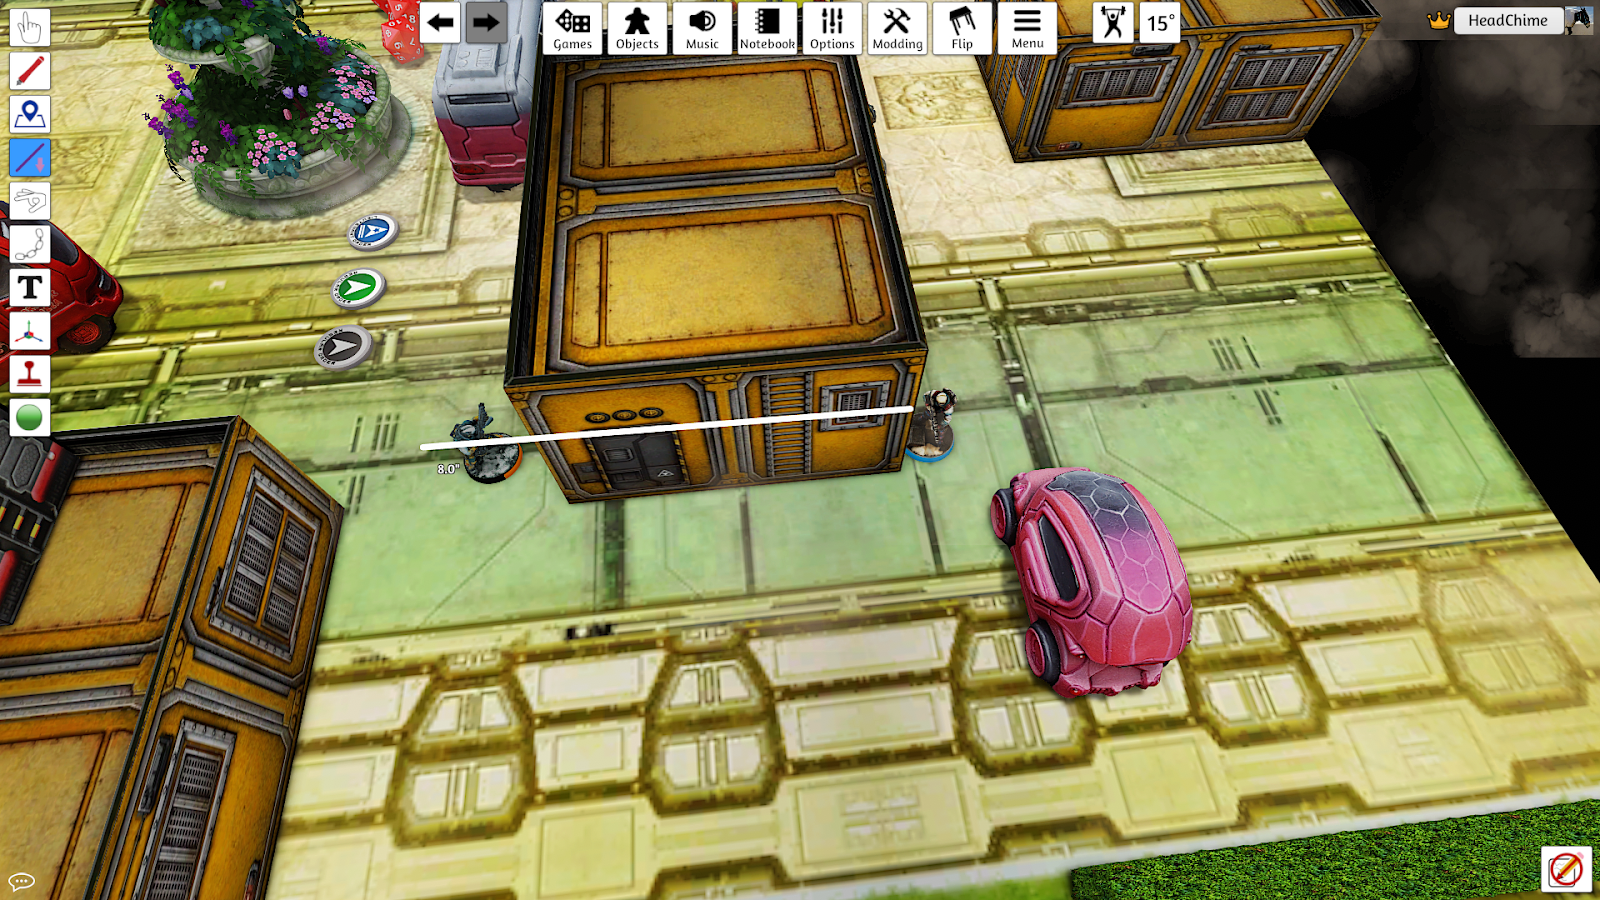
With the second order, the YJ player needs to take out that Fusilier. So they take a risk. They move out of cover, to make sure they can see the enemy.

The PanO player declares a shot as their ARO with the Fusilier’s combi-rifle.
The Yu Jing player wants to guarantee the Fusilier dies, so they’re prepared to make a risky decision. They declare that they’re shooting back with the Guilang, but they’re going to use the direct template mode on the shotgun, and not roll to hit.
This is a risky play because the Guilang will not oppose the Fusilier’s roll with its own shots. When you use a direct template, any shots against you become normal rolls, not face-to-face rolls. This makes you much easier to hit. But the advantage is that direct templates automatically hit without a roll! So this can be a high risk, high reward play. It is possible that both troops die here!
Had the Fusilier declared a dodge, then it would have had a chance to oppose the Guilang’s template, but shooting does not do anything against a direct template.
The Guilang places a template to check that the Fusilier is in range.
The template is definitely in range!
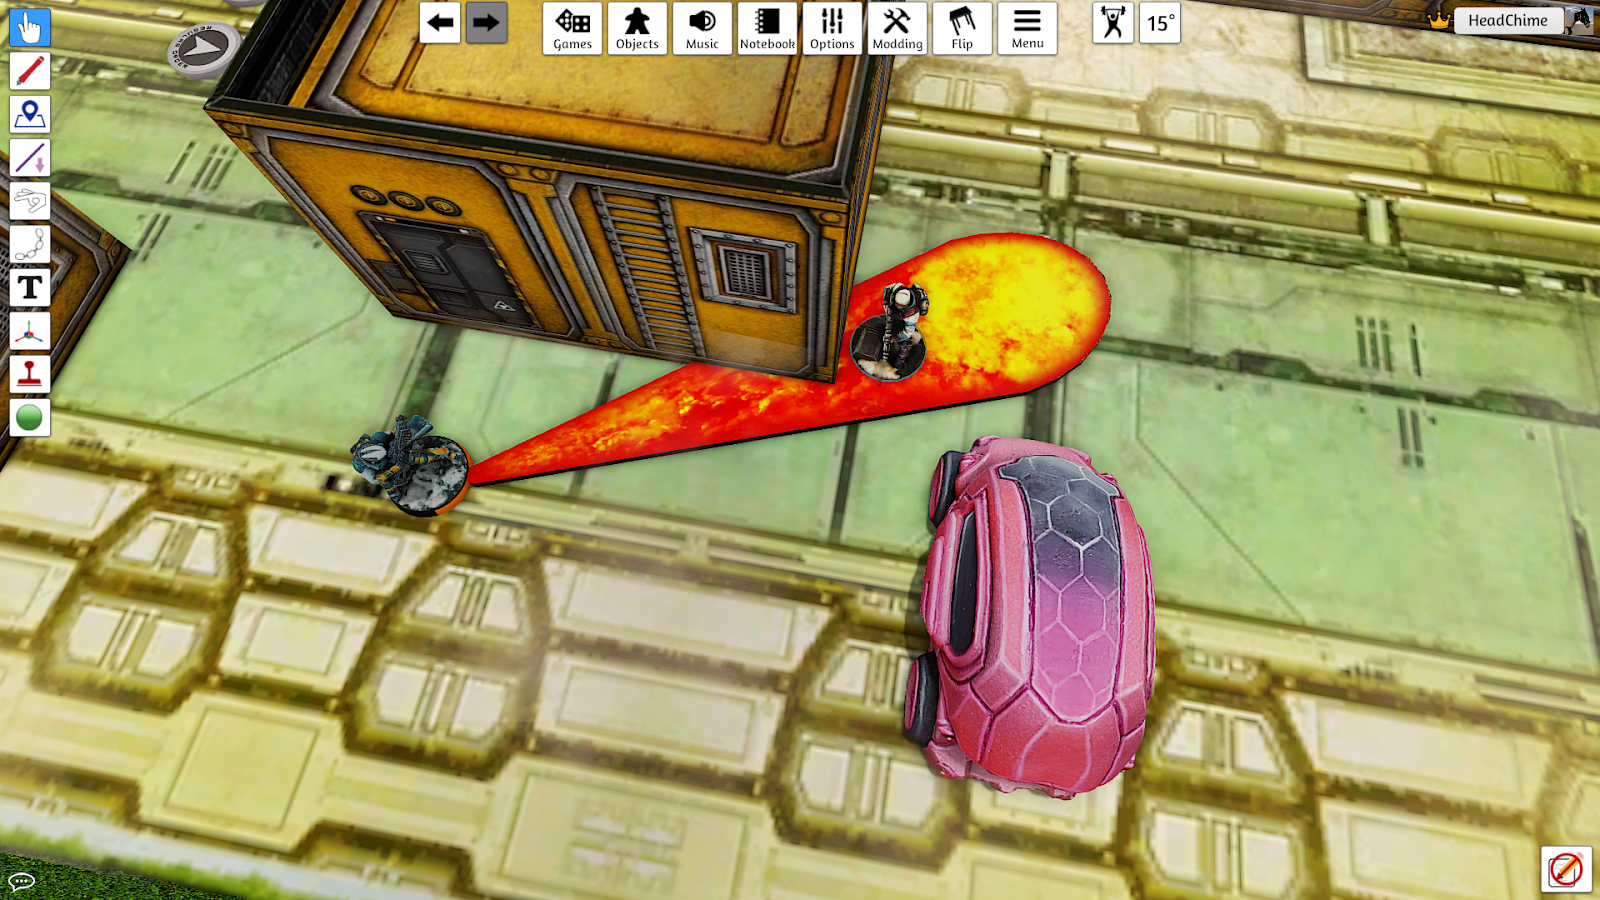
The Guilang automatically hits the Fusilier twice with two templates. The Fusilier needs to roll to hit the Guilang.
The boarding shotgun grants the user a burst of two in the active turn – even when using the templates!
The YJ player lets the PanO player know that the Guilang has mimetism-3, so any shots against it have a -3 modifier. The Fusilier is therefore aiming for 12 or less.
BS12 + 3 for range – 3 for mimetism = 12.
The PanO player rolls a 9, which is a hit.

At the end of the second skill, the Fusilier has been hit by two damage 14 templates. The Guilang has been hit by one damage 13 shot. They both have armour saves to make.
The Fusilier needs 14s to pass.
The shotgun deals 14 damage. It is reduced by 1 by the Fusilier’s natural ARM value. No cover bonus is added because templates prevent cover providing an ARM bonus.
The Fusilier rolls low and dies.
The Guilang needs a 13 to pass.
The combi-rifle deals 13 damage. It is reduced by 1 by the Guilang’s natural ARM value. The Guilang does not have cover, so no bonus is added.
The Guilang also rolls low and fails. It becomes unconscious.
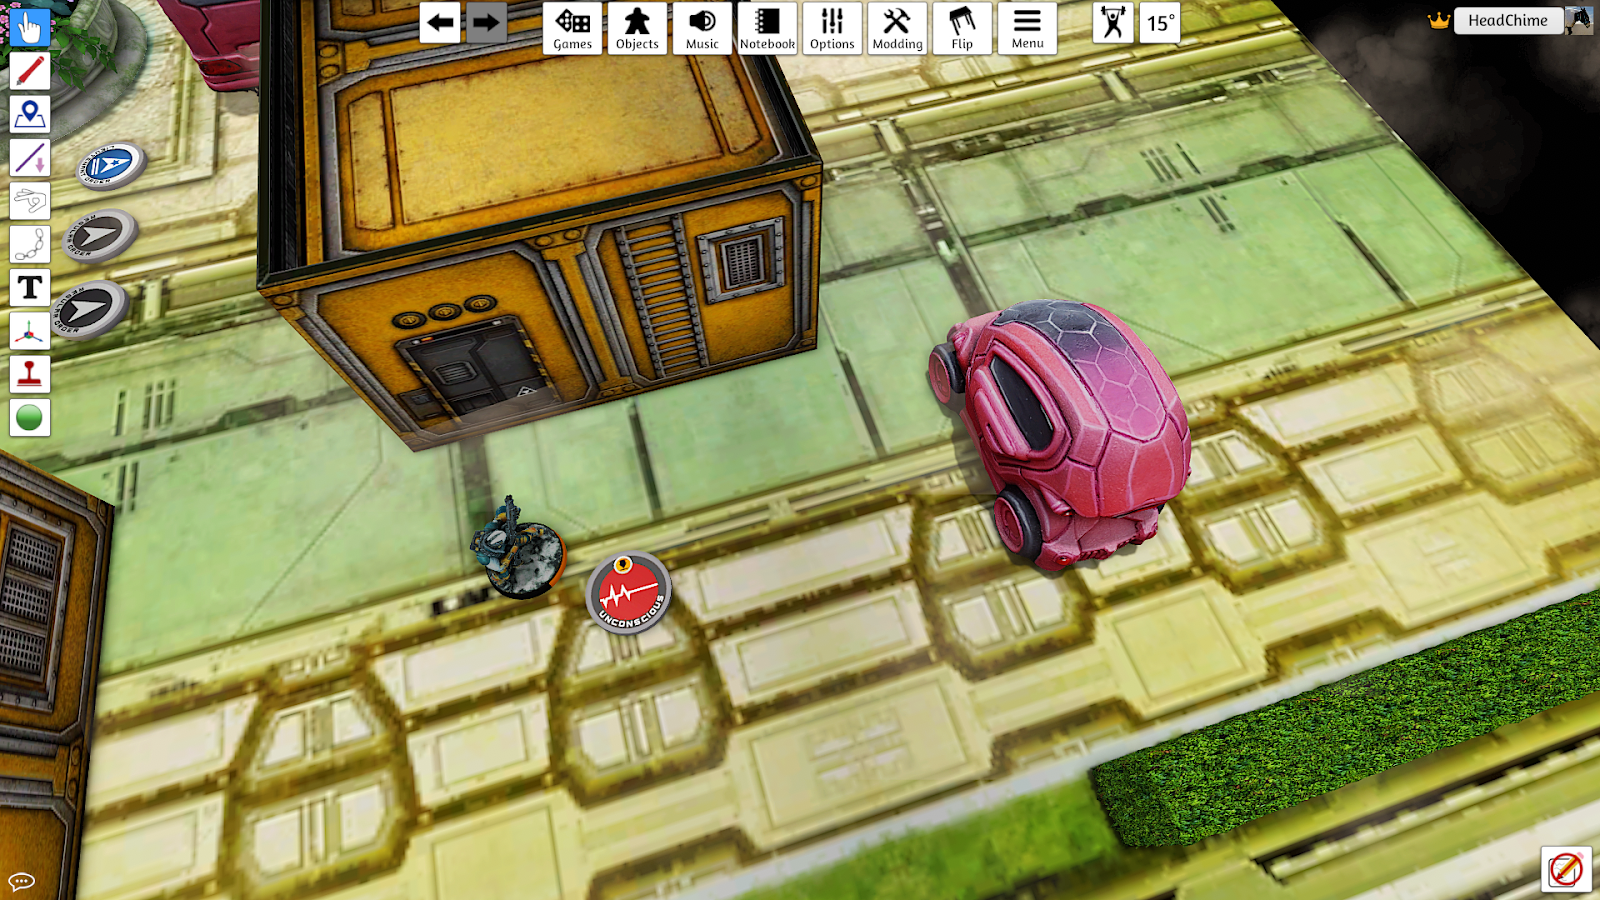
The YJ player has used both of their regular orders. Once again they choose to not spend their LT order. The turn ends.
Turn 2 – PanOceania
The tactical phase begins and the PanO player announces that they are in loss of LT.
They do not need to announce who their LT was – but for the sake of clarity it was the Fusilier that died in the fight with the Guilang.
As the PanO player is in loss of LT, their troops all become irregular.
They have one irregular order, which is generated by the surviving Nokken.
As both players have only one troop left they both decide to end the game because neither has enough orders to achieve anything else.
End Of Game
In a tournament setting, end of turn scoring would now occur. Some missions have objectives that players need to fulfil such as interacting with scenery elements, or killing opposing troops.
As this was a casual game, both players agreed that whoever killed the greatest number of points was the winner.
The PanO player killed a Guilang, and a Zhanshi.
The YJ player killed two Fusiliers.
The Guilang and the Zhanshi are worth more points than the two Fusiliers, therefore the PanO player killed a greater number of points than the YJ player.
The PanO player wins!
Pingback: Infinity The Academy – Basic: Example Game – Under Bourak's Sun