Bakunin vs Tohaa – Mindwipe
By Melanie
Overview
- Mission: Mindwipe
- Forces: Bakunin (Melanie) versus Tohaa (Erin) (300)
- Deploy First: Tohaa (Erin)
- First Turn: Tohaa (Erin)
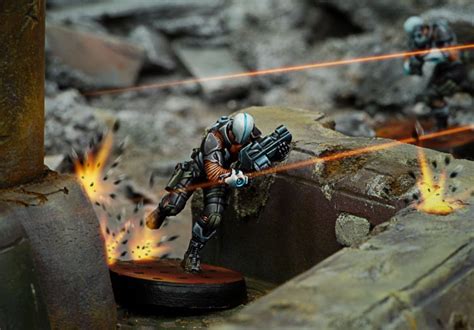
Camos, get in the AVA!
GROUP 1
9
GROUP 2
MODERATOR Combi Rifle / Pistol, PARA CC Weapon(-6). (0 | 9)
PROWLER Spitfire, Nanopulser, D-Charges / Pistol, CC Weapon. (1.5 | 39)
ZERO (Minelayer) Combi Rifle, Shock Mines / Pistol, CC Weapon. (0.5 | 20)
BRAN DO CASTRO Combi Rifle, E/Mitter / Pistol, DA CC Weapon. (0 | 33)
2
2
DAKTARI Combi Rifle ( | MediKit) / Pistol, CC Weapon. (0 | 14)
REVEREND CUSTODIER (Hacker, Hacking Device [UPGRADE: Carbonite (+1 B)]) Combi Rifle, Pitcher ( ) / Pistol, CC Weapon. (0.5 | 30)
MORLOCK Chain Rifle, Smoke Grenades / Pistol, DA CC Weapon. (0 | 6)
5 SWC | 300 Points | Open in Infinity Army
To fit with the Bromad mission, I took max AVA of Zeros and Prowlers. I also took Bran Do Castro since he’s a “Triple Zero,” and it felt fitting. I figured having lots of camo and hidden deployment would make it difficult for my opponent in the midfield, and with all the prowlers being specialists and having D-Charges they could complete both parts of the ITS mission. I had Morlocks and Bran with DA CC weapons and two hackers that could accomplish the objectives as well. I felt good with 7 troopers that could activate the console and 7 that could destroy the server.
Mindwipe
GROUP 1
HATAIL AELIS KEESAN (Hacker) K1 Combi Rifle, Nanopulser, Flash Pulse, D-Charges / Pistol, CC Weapon. (0 | 29)
SUKEUL Heavy Machine Gun, D-Charges / Pistol, Breaker Pistol(+1B), CC Weapon. (1.5 | 34)
MAKAUL Heavy Flamethrower, Contender, Eclipse Grenades / Pistol, DA CC Weapon. (0 | 13)
GAO-RAEL Sniper Rifle / Pistol, CC Weapon. (1 | 33)
KAELTAR (Chain of Command) Light Shotgun, Flash Pulse, SymbioBomb ( | SymbioMate) / Pistol, PARA CC Weapon(-3). (0.5 | 21)
GROUP 2
GAO-TARSOS (Paramedic) Combi Rifle, D-Charges ( | MediKit) / Pistol, CC Weapon. (0 | 31)
LIBERTO (Minelayer) Light Shotgun, Shock Mines / Pistol, CC Weapon. (1 | 8)
DIPLOMATIC (CC Attack [-3], Specialist Operative]) Nanopulser, Flash Pulse, Pheroware Tactics: Eraser / Pistol, CC Weapon. (0 | 5)
TAQEUL (Lieutenant [+1 Order]) Spitfire, Nanopulser, Pheroware Tactics: Endgame, Pheroware Tactics: Mirrorball / Pistol, CC Weapon. (1.5 | 41)
SAKIEL (Forward Observer) Combi Rifle, E/M Grenades, Flash Pulse, D-Charges / Pistol, CC Weapon. (0 | 18)
KRAKOT RENEGADE Chain Rifle(+1B), Grenades / DA CC Weapon, Heavy Pistol. (0 | 14)
CLIPSOS (Minelayer) Combi Rifle, Shock Mines / Pistol, CC Weapon. (0.5 | 25)
6 SWC | 300 Points | Open in Infinity Army
Thanks for taking the time to read my battle report! As a note, we’re both fairly new to Infinity and consider ourselves still learning. Throughout, I’ll use the abbreviation (HD) to indicate hidden deployment. Unfortunately, our table is slightly smaller than 48”x48”. This makes it a little more cramped, but you do what you gotta do… Ignore the messy garage in the background…
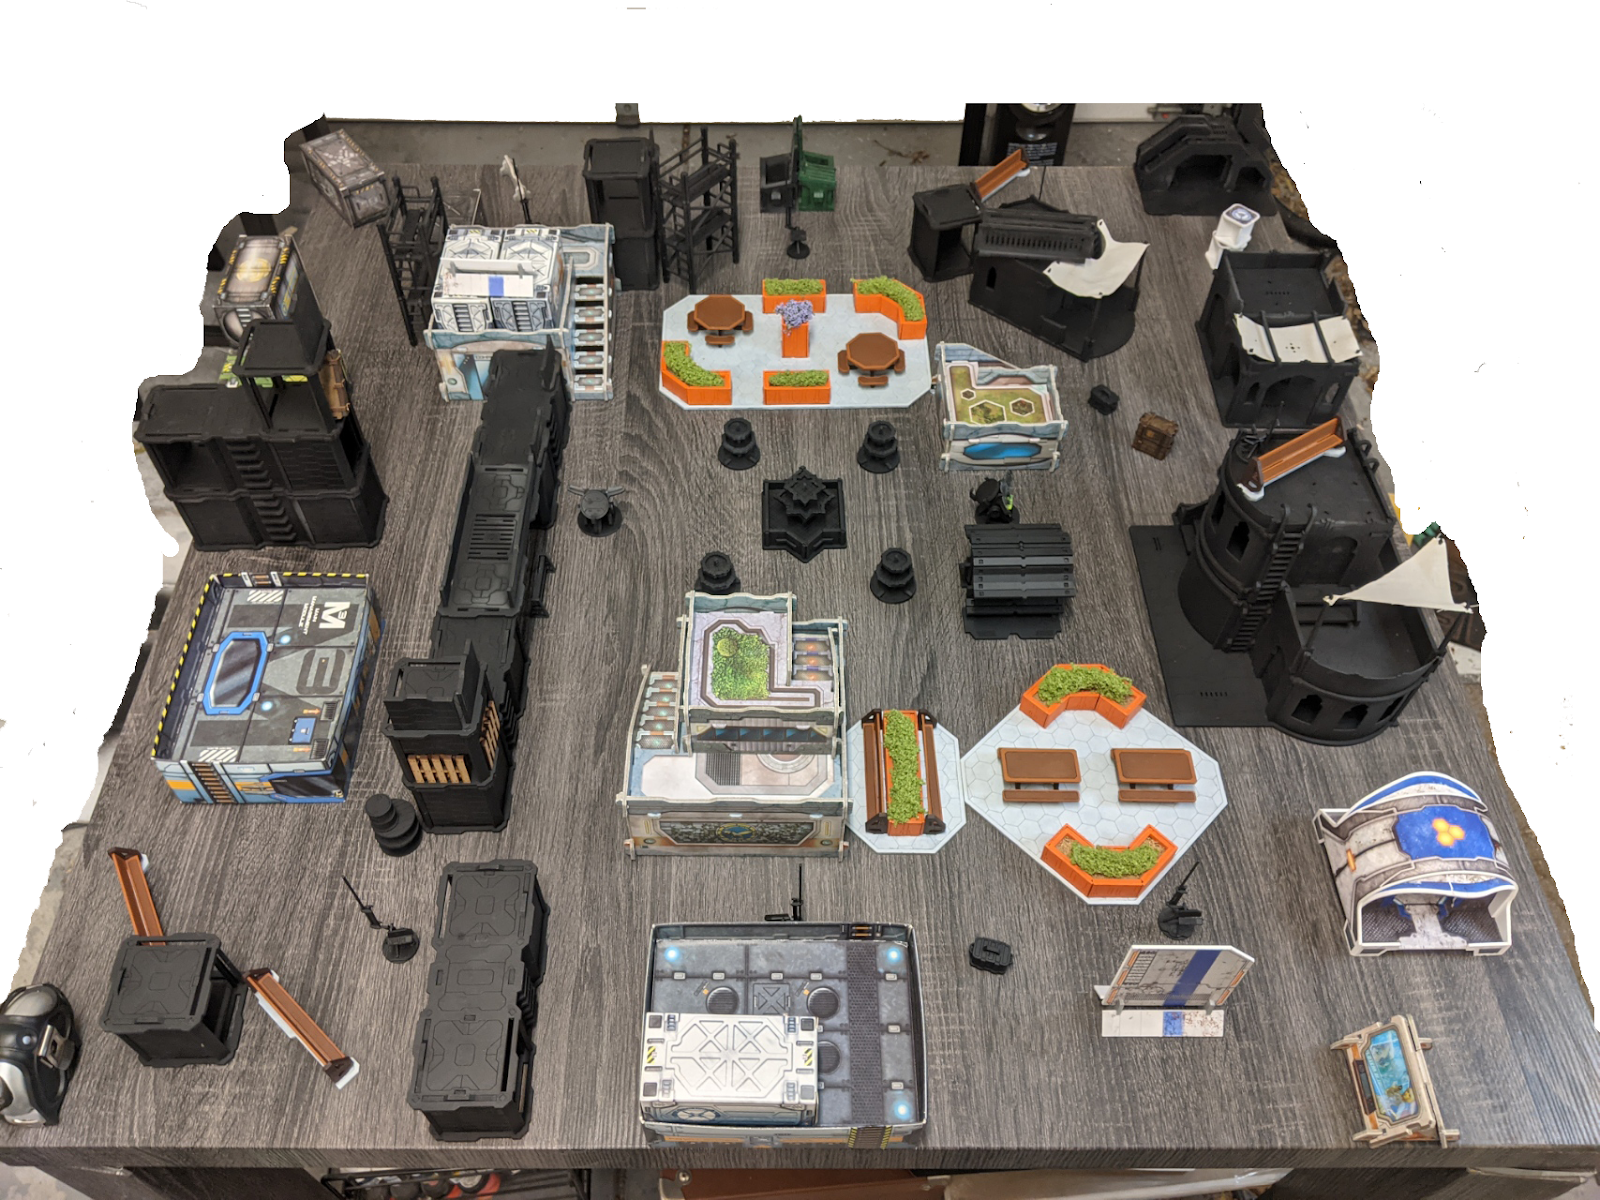
This was our table! We wanted to go with mostly a city board with more industrial/shipping style on the left side. The left side was meant to be more like a maze with smaller corridors, while the center was meant to have some cover but more open space. The narrow alley up the right side of the board served as an easy spot to hold, but with a little smoke or the right weapons could open a backdoor into a deployment zone. For the mission, each deployment zone had 3 servers in it, and there were 2 consoles on the midline of the table.
Deployment
Erin deployed first as Tohaa. Her army was made up of three triads: Aelis Keesan, a Makaul, and a Sukeul at the far left; A Gao-Rael and two Kaeltars in the center; and a Taquel Officer, Makaul, and Sakiel on the far right. She used a Libertos and Clipsos (in hidden deployment) with mines in the midfield.
The Aelis Keesan triad was going to be her main offensive push, and through a combination of eclipse smoke and narrow pathways it would be easier to push forward. In addition, her sensor ability would be able to reveal mines and other hidden units. The Gao-Rael had a sniper rifle and was used as an ARO piece to watch the middle of the board (and both consoles). On the right side, there was a maze of shipping containers and she decided to use her Taquel Officer because it would be easy to get enemies in her zone of control. The Libertos was held in reserve and was planned to dodge through mines to set them off.
I deployed second as Bakunin. Bran Do Castro failed his infiltration roll and ended up walking in on the far left of my deployment zone. His main goal would be to tag a console in the middle before moving toward the servers with DA CC. The Moderator in the center was my lieutenant, and all the other moderators had combi rifles and were meant to watch the servers while serving as cheerleaders. The Morlocks were at either side of the table, with the goal to push forward with smoke and use their DA CC weapons against the servers if they had to.
The Zeros on the left and right side were minelayers, and were supposed to clog up the midfield against Erin’s push. The Zero toward the center was a hacker, and was going to be used as an alternate to tag a console.
The three Prowlers were each meant to hold a portion of the board while being ready to jump into a specialist role if needed. The one toward the center had a boarding shotgun to watch the middle, while the left was to watch the path up that side. The one in the bottom right had a spitfire and was meant to guard the servers.
The Reverend Custodier was the special hacker for the mission, and I figured she could use her pitcher to mess with any hackers on the enemy’s side, tag a console, or destroy a server. Her mimetism (-6) would help her move across the board if needed.
Turn 1
Top of 1 – Tohaa (Erin)
Before anything else, I used a command token to remove two of Erin’s orders. She then immediately started pushing up the left side of the board. She saw my camo token and used her Libertos to dodge by the mine on that side of the board before heading for the middle. The Aelis Keesan’s triad moved up the board’s edge protected by eclipse smoke. A few orders later, and she used sensor in a protected location to reveal my two Zeros. The hacker was quickly shot unconscious, allowing the triad to move up to the console and claim it without issue.
With the midboard seemingly cleared and many of her orders used, she moved the triad to protect the other console. Fortunately, I had a Prowler waiting near the fountain in the center of the table with a boarding shotgun. She had great saves, and only the Makaul went unconscious.
The Libertos wasn’t having that, though. Running back up the stairs, it shot back with a light shotgun. The first shot completely missed, but Erin used a command token to convert the Diplomatic Delegate’s irregular order into a regular one. That order landed an exceptionally lucky shot with the light shotgun and knocked the Prowler unconscious. What was left of the triad in the middle was in a much less perilous position.
The Taquel Officer’s triad moved forward to attempt to hold the right side and shoot the unconscious Prowler dead (I had my Daktari ready to go to heal him, and Erin didn’t want that). My mine placed under the bridge helped to hold them back for a short while.
Bottom of 1 – Bakunin (Melanie)
On my turn, I was in an ok position, but I also needed to make up some ground. My Morlocks had to move first due to impetuous, and were meant to use smoke to move up the board and try to use their chain rifles. That would also put them closer to the servers, and I hoped that either of the ones at the side were where the rogue AI was so they’d be close. The first was killed while trying to use smoke. The second tried to move up the opposite side of the board as bait to burn off the Taquel Officer’s symbiomate protection with her chain rifle. I was going to use one of my Prowlers in hidden deployment to spitfire the Taquel to death afterward. Unfortunately, a series of bad rolls ended up with that Morlock dead and the Taquel’s symbiomate still intact.
Back in the midfield, I was particularly worried about Aelis Keesan’s position in the center, and her nasty hacking and sensor that could see through all of my hidden deployment. She also was close to the server with the rogue AI and could use her D-Charges to take it out. I shot a repeater and used carbonite and oblivion to lock her down.
Next, I had to deal with the Gao-Rael sniper holding down the center of the board. I had wanted this Prowler to take out the Taquel Officer (and whatever else came up that firelane), but a spitfire in its good range band seemed like it could work against the sniper. An order and some good rolls later and the sniper was dead.
I had gotten the sniper out of the way, but now I was low on orders. I wanted the Taquel dead because she had been causing me trouble. I also wanted to tag the console before the end of the turn, but I only had two orders left. After much deliberation, I settled on moving the Prowler off the shipping crate and used one order to move him to a position where he would be in a good range band for his spitfire. The last order of my turn was shooting the Taquel with my full burst… only to either miss the shots or have her save against them.
Turn 2
Turn two started decently for both of us. Tohaa controlled one of the consoles in the middle and knew which server to destroy, but I had locked down a bunch of Erin’s strong units and killed several others. My goal for this turn was to hopefully use the Prowler with a spitfire in the middle to either (hopefully both!) take out the Taquel or claim the console. I wanted to get the Prowler with the boarding shotgun back to consciousness to finish cleaning up Aelis Keesan’s triad and then move on toward the servers. I had my Daktari safe (and I thought) only one order away, and figured at least some of my orders would go toward healing my fallen troops in the middle.
Top of 2 – Tohaa (Erin)
Erin had other things in mind. The Taquel ended up retreating and dodging back behind shipping crates and out of my reach. Then she sent her Makaul on a suicide run to take out my Zero and Prowler covering that side of the midboard. She used a flamethrower to hit both at once. My Zero deployed a mine in ARO to hopefully prevent her from moving anything else up that side of the board for a little while, and my Prowler unsuccessfully attempted to dodge. The Zero was still there, and while not great as a defensive piece, he had at least a combi rifle to attempt to hold things. He couldn’t tag the console, though, which is really what I needed at this point. Instead, the Taquel Officer managed to discover and shoot the mine, and on the next order my Zero didn’t dodge well enough and quickly met his end. The Taquel then moved into a position where she could hold the inner firelane, meaning my Daktari would take some AROs to get to my troops in the middle.
I was certain I was still going to have to use my Daktari to bring up one of my Prowlers on my turn, but I had realized at the end of turn 1 that we had put one of the upper levels of buildings on backwards. That left the stairs inaccessible, and meant that to get my Daktari up to shoot them with a medikit I was going to have to climb.
Of course, there were other things going on at this point. A Gao-Tarsos walked on with parachutist very close to the server with the rogue AI. I assumed something along these lines was coming, so I had several Moderators within line of sight to the server (though prone). I had a Prowler in hidden deployment waiting to sweep the back line with a spitfire, and my Reverend Custodier was just on the other side of the server, so I had some back up. I figured I could hold the Gao-Tarsos off for a few orders until my turn, at which point I could pop up all my moderators and finish him off. Unfortunately, the Gao-Tarsos landed very close to the server, and I wasn’t going to be in a good range band with my spitfire before he got to the server. Erin chose to walk him between the building and the table edge skirting the Reverend Custodier’s line of fire, and he managed to dodge my Moderator’s ARO. I should have revealed my Prowler at this point and started shooting at the Gao-Tarsos, but I would be right in his line of fire and I didn’t want to take those shots and immediately lose the Prowler. He used his next order to kill the Moderator and move closer to the server, and only when he used an order so my Prowler would be out of line of sight did I reveal. I shot him in the back and managed to hit, but the Gao-Tarsos placed a D-Charge at the same time. The hit bounced off the Gao-Tarsos’ armor, and the D-Charge’s explosive ammo killed the server in one order.
Bottom of 2 – Bakunin (Melanie)
It wasn’t looking good at this point, but I still had a few things I could do. I only had 3 orders for group 1, and 4 orders (and the hacker special irregular order) for group 2. I started by moving Bran Do Castro up the left side of the board, sneaking around the Taquel’s line of fire. My goal was to stay out of her zone of control / pheroware range and be able to shoot her in the back with a combi rifle. I used a full move to get in the right position and was hit with eraser from the Sakiel’s symbiobomb at the end of my move. I got isolated and basically couldn’t do anything else with group 1; I only had a Moderator and a Prowler left. The Moderator was completely out of position to do anything useful, and the Prowler was all the way in the corner of the board.
Part of the problem was the Gao-Tarsos was in the middle of my deployment zone and could basically see all of my units. I had two orders left with my Prowler, so I started shooting at him with my spitfire. Both burst 4 orders only took off his armor, and I was left with no orders in Group 1 and a still deadly Gao-Tarsos. I had 4 orders left in Group 2, and the piece that would still be able to accomplish things was the Reverend Custodier. On her first order, I finished off the Gao-Tarsos, and moved forward. I managed to not get hit by the Sukeul’s ARO, and moved up to the corner of the building and fired at (but still couldn’t finish) the Taquel Officer. I figured I could try to get to the console with the Reverend Custodier’s mimetism (-6) and use her special order token from the mission to get a few things done. As a hacker, she had a bonus on attempts to take the console, so I figured I might be lucky and be in a decent enough position by turn 3 that I could catch up. Unfortunately, the Sukeul managed to hit this time, and the Reverend Custodier took a wound… before I used her special order. That left me with two orders.
Basically, that meant all I had left was my Daktari. The Taquel Officer was waiting to shoot her if she moved out of cover, though. I used my first order to move into position and fire a combi rifle, taking off the taquel’s armor. The Taquel’s ARO missed, and I used my last order to (finally!!!) take her down.
Turn 3
Top of 3 – Tohaa (Erin)
I conceded at the beginning of this turn! My forces were tattered and clearly defeated, and there just weren’t enough orders left in my two order pools to get my necessary pieces across the board to where they needed to be for the objectives. I also was in retreat at that point, so that made it even worse.
For Group 1, Bran was still isolated, so that’s an irregular order for his reset but nothing to the full order pool. I had two Moderators, so that’s 2 orders, and 1 Prowler for a total of 3 orders. Group 2 had 2 Moderators and a Daktari for a total of 3 orders, as well. In group 1, the Prowler was deep in my back field and wouldn’t be able to reach the console to activate it (and definitely not the servers in Erin’s back field!). The Daktari could have made it to the console (though would have to pass some dodges), but then I’d have no one that could destroy the servers and would be out of orders.
Post Game Analysis
The final score was Tohaa (Erin) 9, Bakunin (Melanie) 0 — Ouch!!! I got absolutely destroyed. That being said, I had a lot of fun! I made a ton of mistakes, but felt I learned a lot about playing in general and especially how my camo and hidden deployment works.
First, the mistakes:
I feel like the biggest one was that I didn’t focus on the objectives enough. This seems like a very obvious mistake (and I knew to avoid it going in!), but during the course of the game Erin had a lot of the objectives locked down and I would have to take some risks to actually move my objectives forward. I played it too safe; I tried to clear the areas but should have taken a few of those risks to actually accomplish my goal. The biggest point this came into play was with the Prowler at the end of turn 1. I really should have gone for the console instead of (not) taking down the Taquel. By the time I actually felt like I could move forward and take the objective on turn 2, a lot had fallen apart, and by turn 3 it was literally impossible to accomplish any of them.
I probably should have taken a forward observer Zero instead of one of the minelayers. My goal was to have as many camo tokens as possible in the midfield while still having at least one that could accomplish objectives. I should have used a specialist Zero with infiltration to start really close to a console to just take it turn 1. One of the minelayers worked decently and held down the left side of the board for a while, but instead of holding down the other side of the board, the one on the right did literally nothing useful the entire game. My max AVA of Zeros functioned basically as speed bumps. I had hoped the minelayers would do a little bit more and the hacker would be able to take the console.
Then I just made a bunch of small mistakes with cover and deployment. I’m still working on figuring out what works best, but I figure I’ll learn to do better over time.
Also, don’t fail your infiltration roll and don’t be in a position where that will really hurt you… Most importantly, don’t put stairways on the board backward unless you have climbing plus.
On the brighter side, my Prowlers were really strong! Having max AVA of them gave me hidden deployment all throughout the table. It’s also nice to feel like I keep having tricks and traps to spring throughout the game. I really enjoyed having a ton of camo and hidden deployment to control the midfield.
On Erin’s side, a lot went right! The Taquel Officer proved to be really strong and happened to be incredibly resilient to everything I threw at her because of poor rolls. The Gao-Rael sniper held down the middle well and forced me to deal with it. Aelis Keesan’s sensor quickly crippled my zeros on one side of the board, and then proved to be powerful as the game moved on until I locked her down.. And the Gao-Tarsos might have been the MVP… sneaking through the defensives in my deployment zone and destroying the rogue AI.
Overall, the game was a good way to get some more experience with cover, deployment, and using camo/hidden deployment. Prowlers are wonderful, and I’m definitely going to consider using them in my lists more often. Isolation and Immobilize are really strong, too! Aelis Keesan only managed to get out of it by critting on a 2. I like the Zeros, a lot, even though they weren’t the stars of the game by any stretch of imagination. I think in future lists I’d think a bit harder about which profile to take, but I still enjoy using all the camo in the midfield.
Thanks for taking the time to read all this!
Pingback: Mission 031 Report: AVA’s the Angle – Bromad Academy