Pics Or It Didn’t Happen Battle Report
By Obyiscus
Overview
- Mission: Superiority – Top Table of a Local 3 Round Event
- Forces: Torchlight Brigade vs Combined Army (300)
- Deploy First: Combined Army
- First Turn: Combined Army
Lists
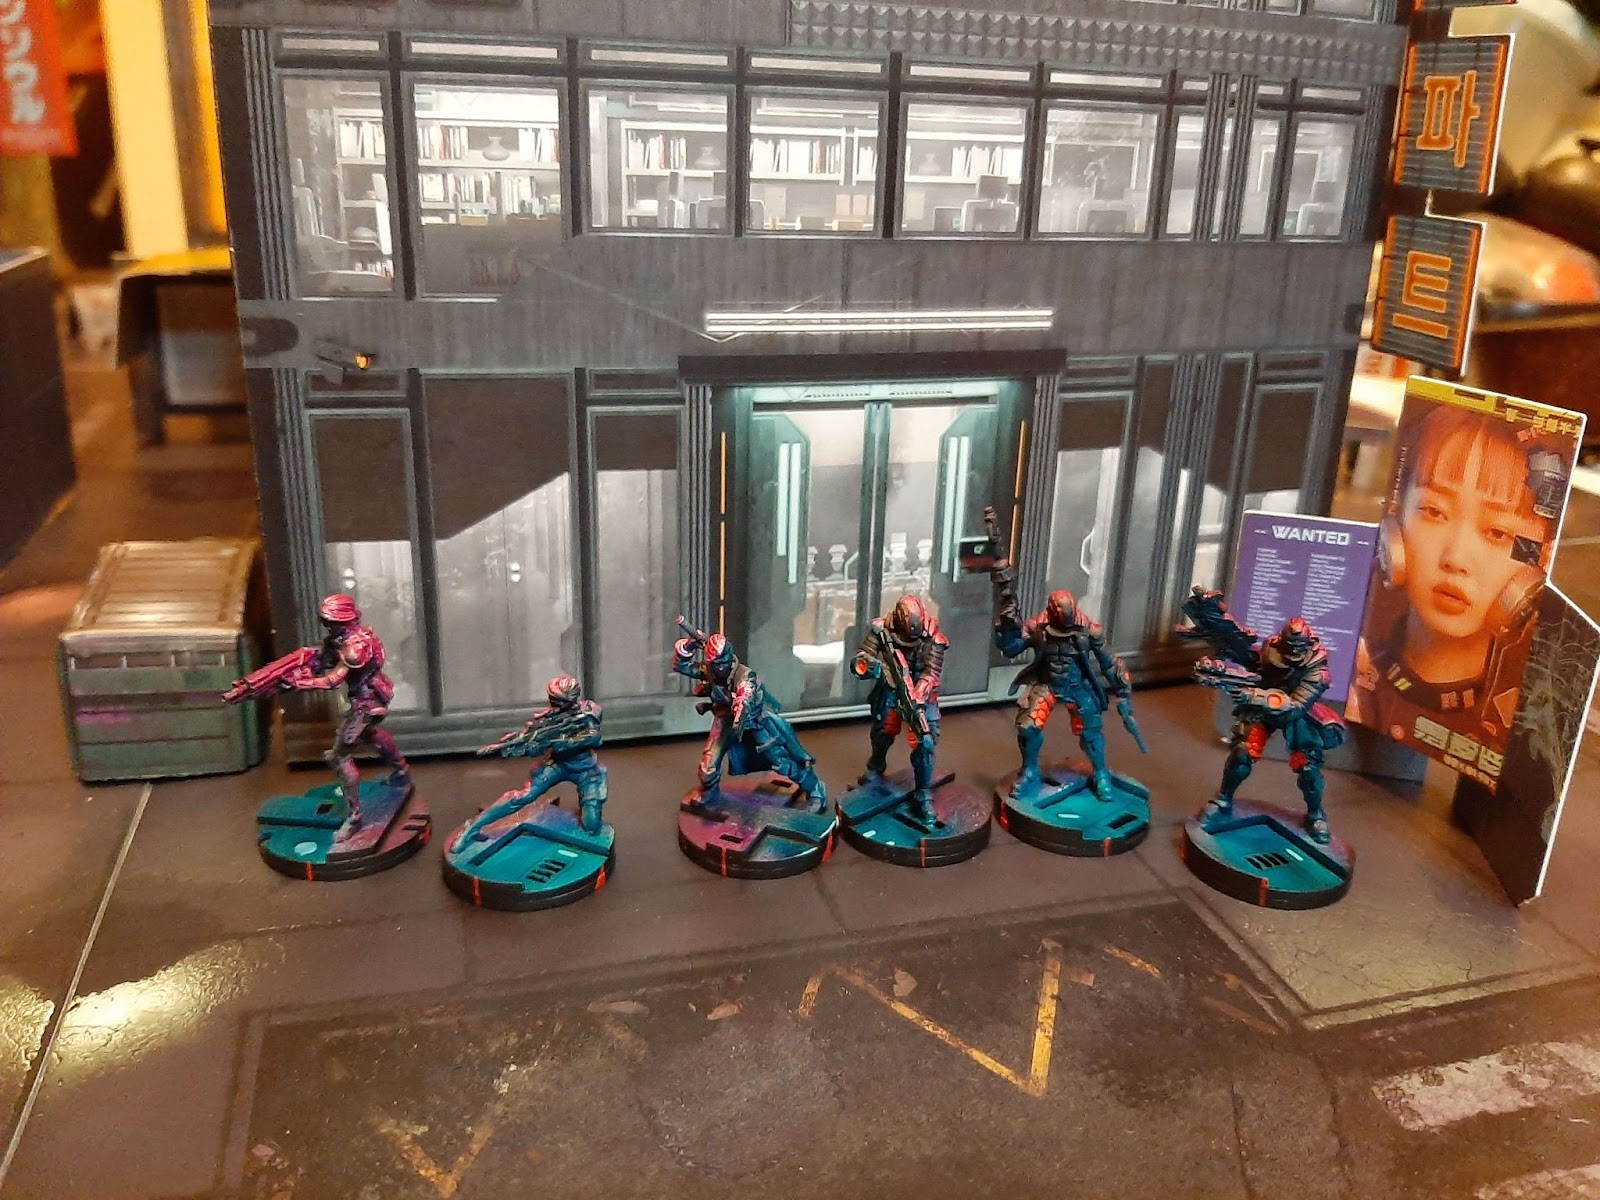
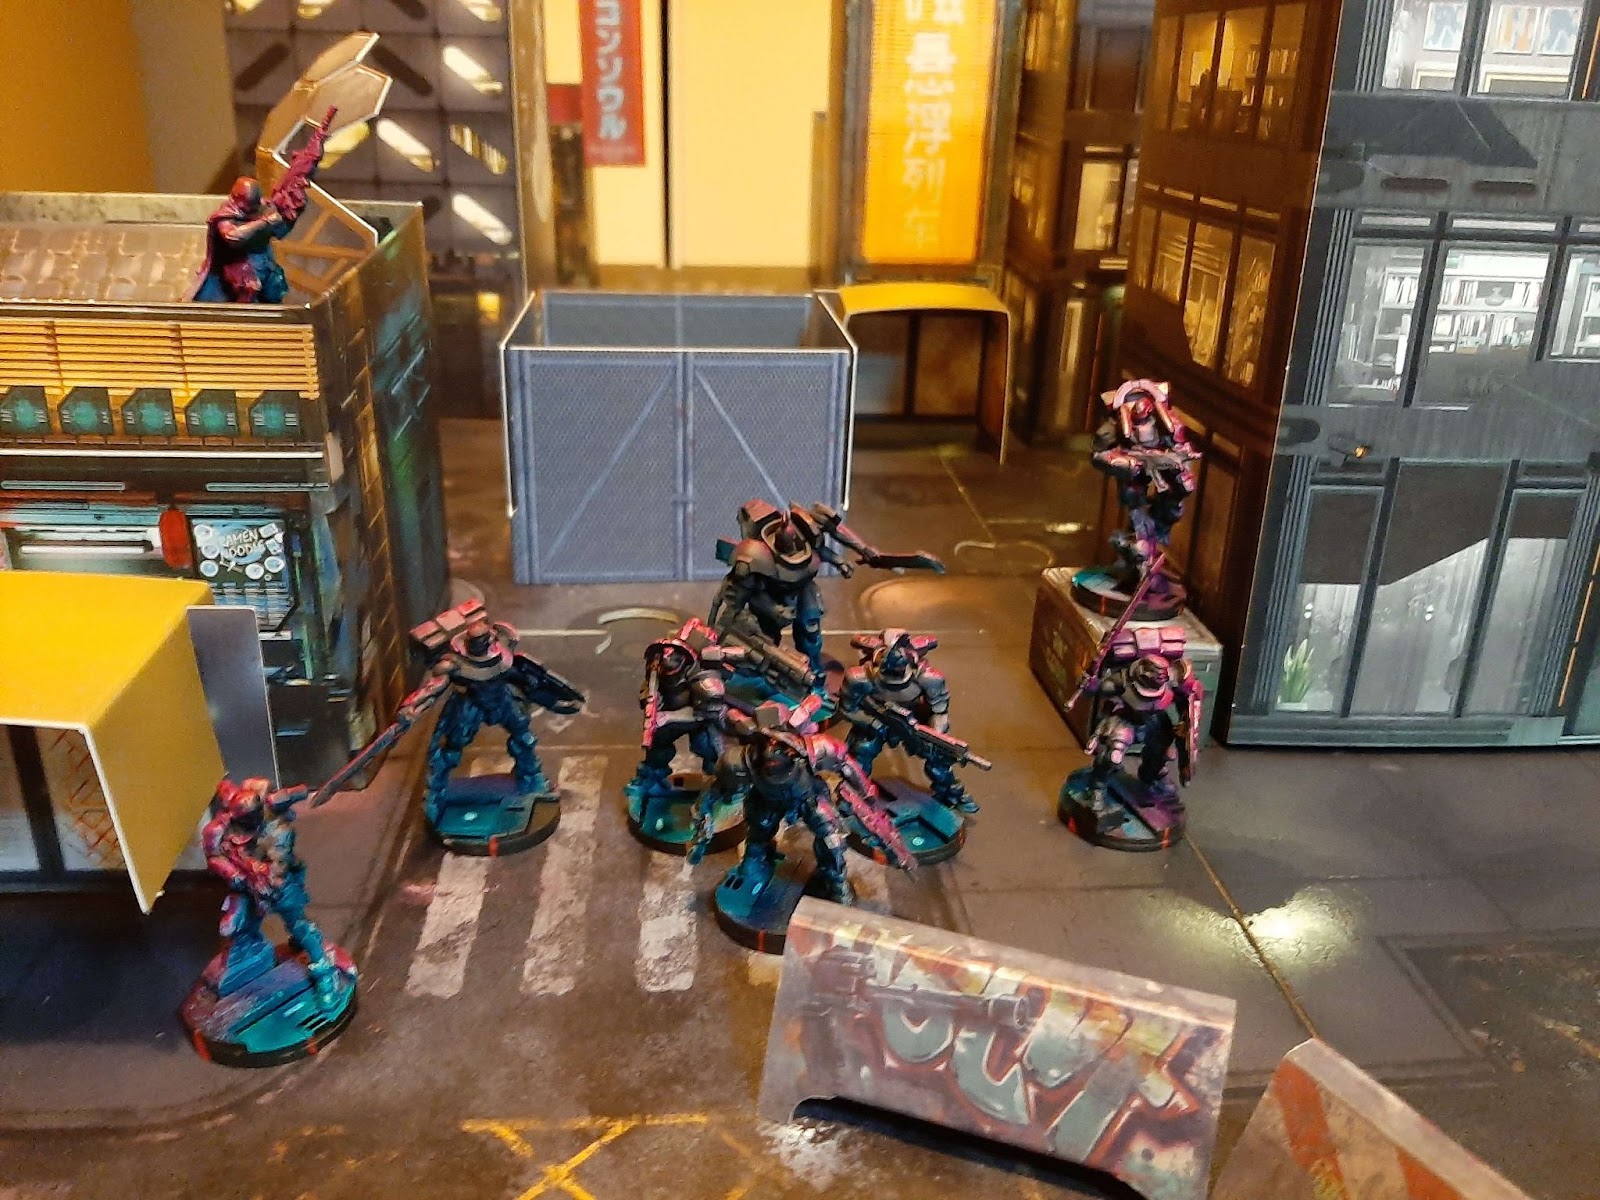
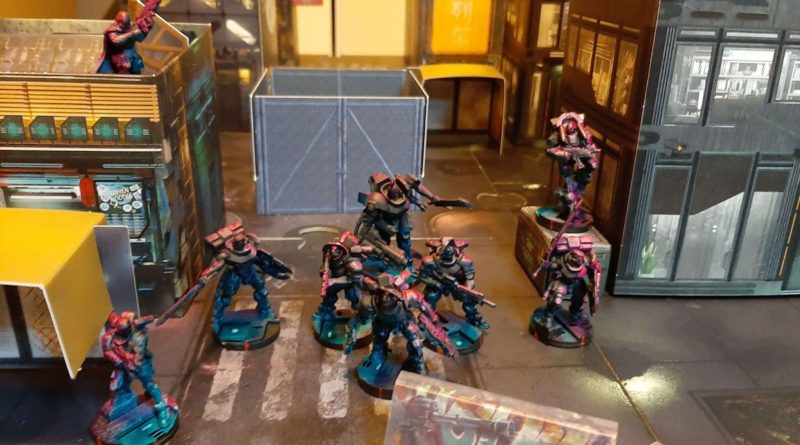
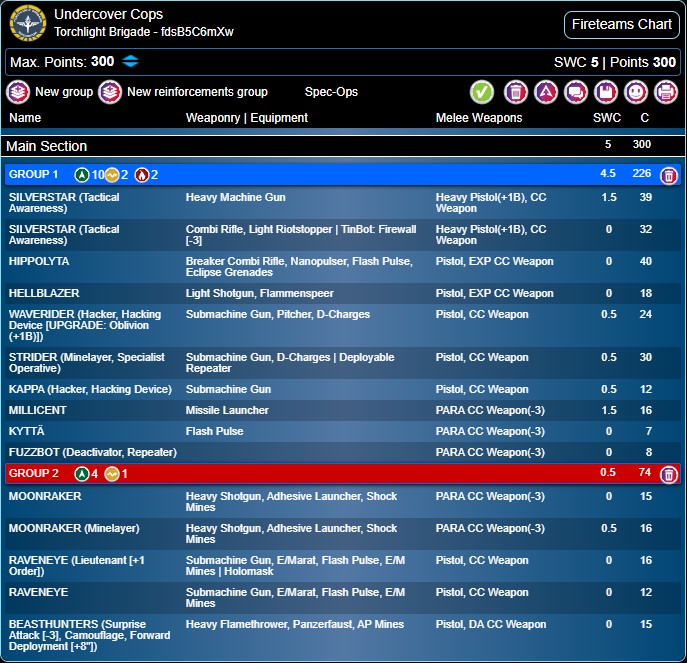
Torchlight Brigade (Undercover Cops):
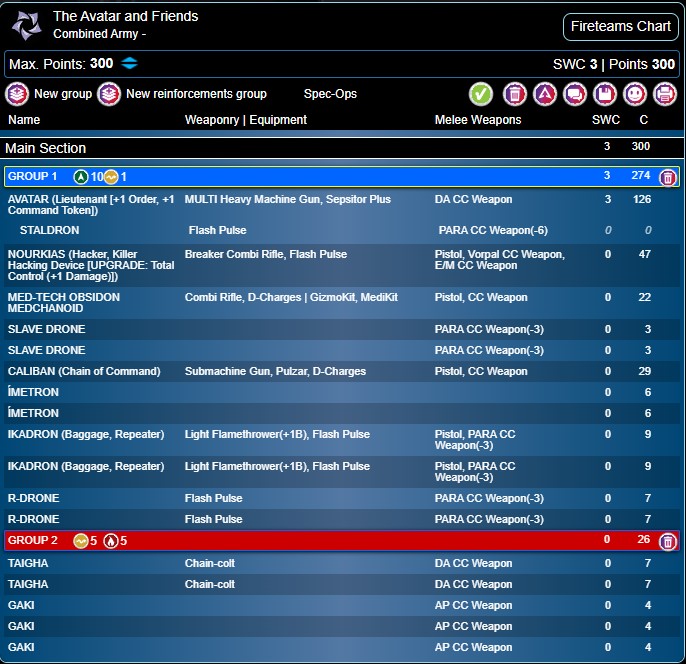
Combines Army (The Avatar and Friends):
Deployment
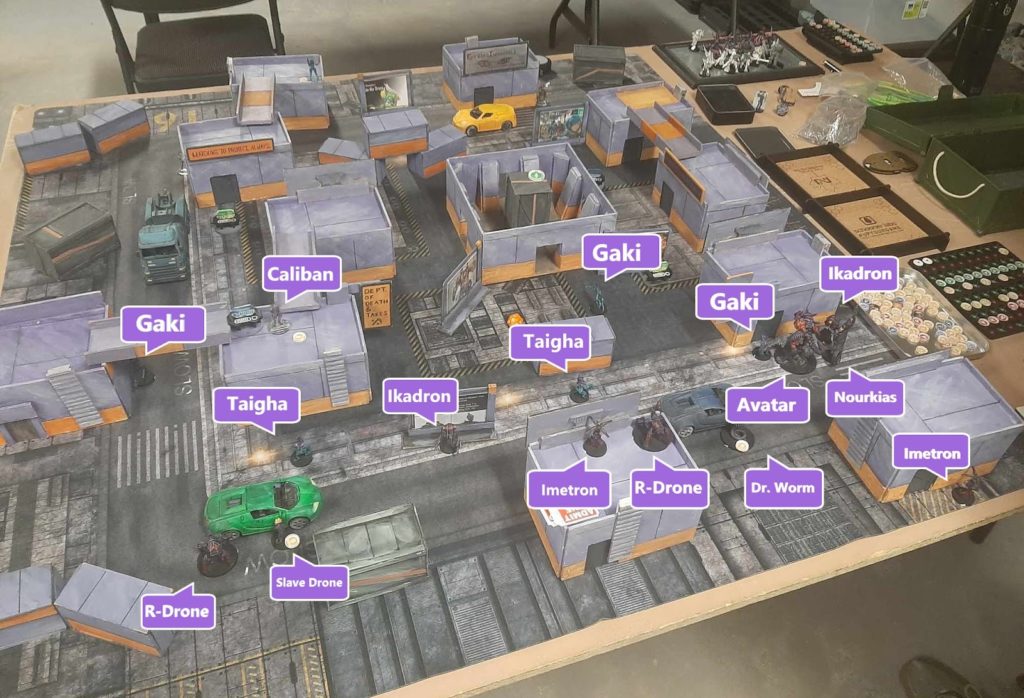
Combined Army Deployment
My Opponent started by spending a command token to hold a 3rd model back, choosing to holdback his Avatar, Nourkias, and the Caliban. He then proceeded to deploy the rest of his force fairly evenly spread across the deployment zone with Gakis and Taighas ready to advance up all across the battlefield. He made sure to have an Ikadron on either side ready to move up and add 29 pts to his near zones. Finally he deployed his R-Drones watching some lanes, and deployed Dr. Worm and his Slave drone on opposite side of the field (choosing to have Dr. Worm stay on the side where he could more easily move up and press a button.
He ended up deploying the Caliban prone beside the button on his left, and Nourkias and the Avatar on the far right flank.
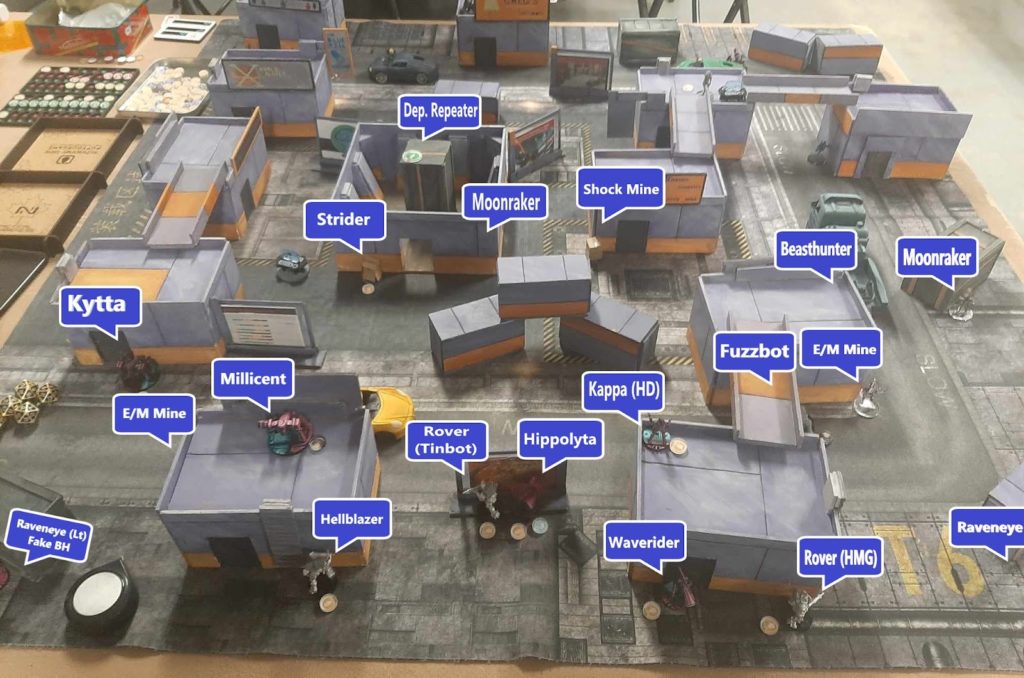
Torchlight Brigade Deployment
I counter deployed by putting my Kytta and Fuzzbot on alternate sides of my deployment zone up as far as they could; the goal being to have repeater coverage across my DZ to defend against the Avatar and whatever he sent forward. I choose to holdback my Dep. Repeater Strider to allow me to place his repeater in the best position possible. I deployed my core team far back and centrally located as I needed to keep them safe and have them available to advance in either direction (as I didn’t know where his threats would be coming from yet). In particular Hippolyta was deployed where she could be the leader and throw smoke either way, I expected the eclipse smoke to be crucial.
I then filled the midfield with camo in the form of moonrakers and my beasthunter, prepared to delay the best they could. I placed my non-lt raveneye behind some boxes on my right flank with his mine joining the clump of camo on my right. I then deployed my Raveneye Lt posing as a 9pt Beasthunter with his E/M mine masquerading as the Hunter’s AP Mine. Since my Beasthunter was in the same group the order count would work out.
Finally, I deployed the Strider and his repeater on my left flank to threaten Nourkias and the Avatar’s advance.
Turn 1
Top of 1 – Combined Army: Nourkias the Reckless
My opponent began by advancing a bunch of his impetuous models up the field using their impetuous and irregular orders. I was worried the Gaki near the objective room would run up the crate and destroy my repeater but instead it pinned in my Moonraker that refused to reveal. His Caliban revealed and pressed the button he was hiding behind.
He then began his main push. Nourkias began advancing towards my DZ, luckily for me he didn’t impersonate first. He then made his first error. Nourkias moved towards the building the Kytta was hiding behind, not quite getting far enough to see it. In doing so he triggered an Oblivion from my linked Waverider who could ignore his stealth with sixth sense. At the same time the Strider revealed to shoot with his SMG, forcing a hard choice. Nourkias chose to dodge, provoking a further aro from my Kappa hacker.
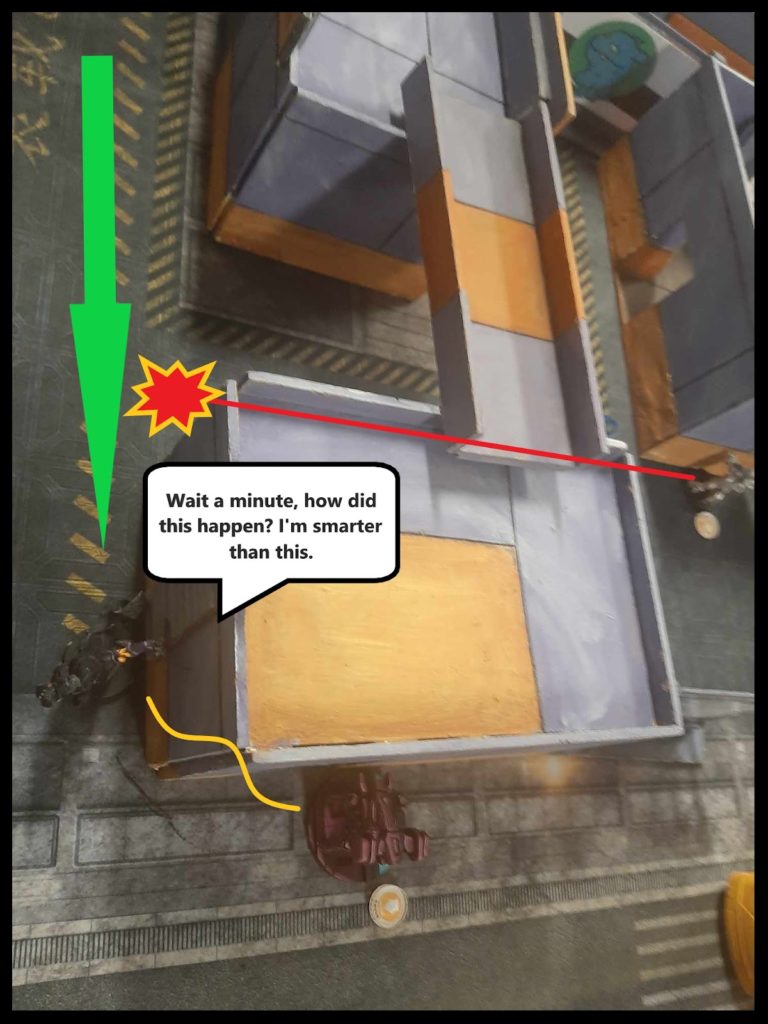
Lucky for Nourkias he got out of it without any negative effects and dodged around the corner to nearly engage the Kytta. The analysis paralysis caused by the multiple AROs took quite some time to resolve (delays like this one led to us only making it to the end of round 2).
Nourkias then activated again and moved into the Kytta to destroy it. In doing so he provoked his AROs yet again and triggered the E/M mine. As a result, Kytta died and Nourkias was left bricked. At this point Doctor Worm moved up and failed to press the button before pulling back (leaving him in the open)
With his last order the Avatar moved up, eliminated the Strider that had revealed, and then entered suppression.
Bottom of 1 – Torchlight Brigade: Advance and Neutralize
I began by using my fireteam to eliminate a few of the warbands that had moved up on my right flank. In doing so some members fell out of the team, but due to their 6-2 move I was able to move back together and reform the team. I then moved up carefully avoiding the Avatar’s line of fire and eliminated the bricked Nourkias.
With these issues dealt with I went about trying to deal with the Avatar. I knew that attempting to kill it would likely be ineffective so I decided to instead neutralize it. I began by moving my Raveneye up behind the building where Nourkias had been. I gauged correctly and was able to move to the corner just outside of the Avatar’s LOS and ZOC and place an E/M mine that was just within template range.
I then fired repeaters from the Waverider (2 18s are very reliable) both within 8 of the Avatar. One of which was just by the button in my near left quadrant. I then reactivated the fireteam with the Waverider once against the leader. It was when measuring his hacking range that I realized that the Avatar looked to be just outside of 8 of the entire button on my left (which meant that I could press it outside his ZoC…if I could prevent him from seeing me. The Waverider attempted to Oblivion the Avatar. The Avatar reset, triggering the E/M mine. He won the face to face…and saved against the E/M. I placed another mine, and tried again. This time he lost the face to face but passed the saves from both the Oblivion and E/M mine. I tried again, this time with no E/M mine…third time was the charm, and the Avatar was isolated.

I’ve faced Avatar’s enough to know that they will reset if given the chance, but luckily I had Hippolyta. I quickly launched eclipse smoke (one on a 20, one on a 13) to block the Avatar’s sight. The team then moved up, staying out of 8 of the Avatar, and gunning down the Gaki in the room, and Dr. Worm.
I pulled back a bit outside of the Avatar’s line of fire, and hoped to survive.
Turn 2
We quickly scored the round. My opponent had his left quadrant, and his right quadrant. I had my right quadrant, but he had the Avatar in my left quadrant. We scored him the 2 points and he began thinking through his turn. At this point I believe he made the mistake of forgetting he had CoC and played his turn in LoL.
While he was working out his plan I realized that my models were more expensive than I thought. I had the Moonraker (minelayer), Hipployta and the two Rovers in my left quadrant. I asked my opponent how many points the Avatar was worth. 126…my 4 models, 127. We switched the points so it was 1-0 (he had one button pressed).
Top of 2 – Combined Army: A Hope and a Prayer
My Opponent’s turn largely came down to 2 rolls, his two attempts to reset his Avatar. Thanks to my repeaters both were opposed and ultimately he ended up being targeted as well. The only thing of note in my opponent’s turn aside from that was moving some things into zones, running a taiga up behind the avatar and berserking into Hippolyta (resulting in luckily just 1 wound), and moving his Caliban across to press the button in his right hand quadrant.
Bottom of 2 – Torchlight Brigade: Closing it out
I began once against by cleaning up the remaining warbands that had pushed up and in doing so moved a right flank Moonraker up and into his left hand quadrant.
The fireteam then proceeded to do its work. Once again Hippolyta threw smoke to block the Avatar’s view. This is where the cool moment(s) occurred. My fireteam then proceeded to quietly move up, just outside of the Avatar’s ZoC (except with the 3 stealth models in the team). The Waverider pushed the near left console just under the Avatar’s nose (well about 8.6 inches away), avoiding an ARO reset.
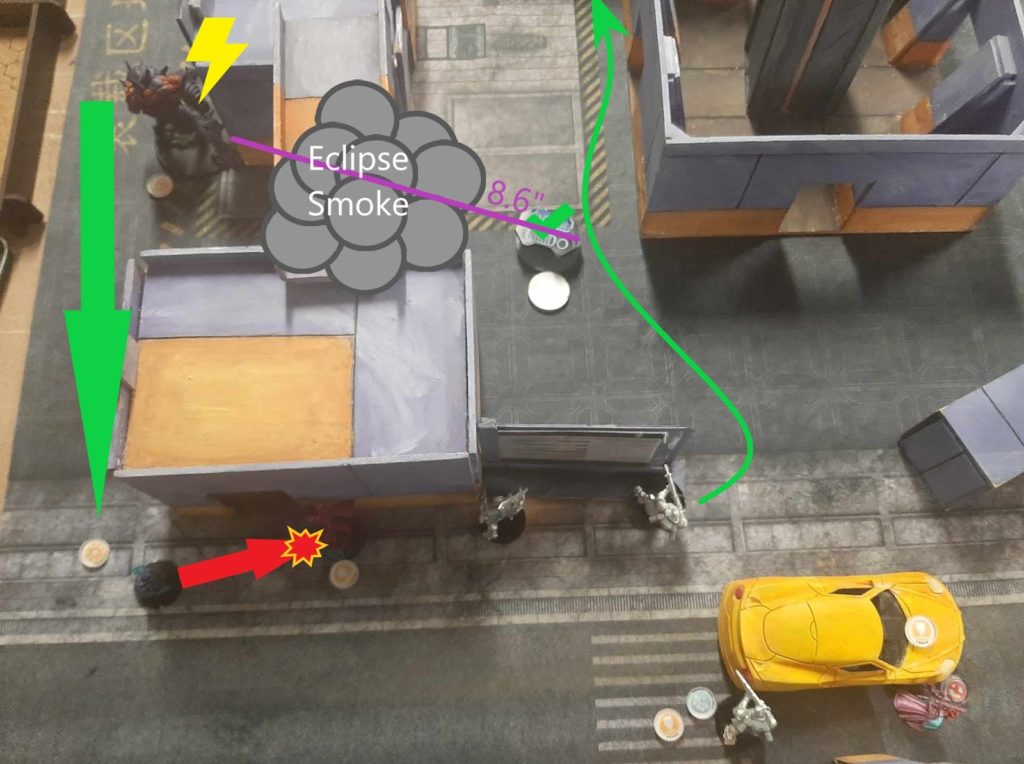
Knowing that we had hit no new rounds I moved up my models to hold zones, ensuring that Hippolyta (my Key Ops) had enough bodies with her to outscore the Avatar. My non-Lt Raveneye moved up and pressed my right hand quadrant’s button. Finally with my last order my waverider moved up and pressed the button in my opponent’s right hand quadrant, but failed rolling 2 20s.
At the end of the round I held 3 quadrants to my opponent’s one, and had my Key Ops dominating
Final Score
Torchlight Brigade Victory (5/246-2/186)
Post-Game Analysis
The Cool Moment
While some may not find it the coolest moment, for me the moment of my fireteam quietly sneaking past the fearsome Avatar, blinded by smoke, and pressing buttons just outside of his ZoC was great. It brought up thoughts of Sci-Fi horrors where the humans are just trying to get what they need to escape from the effectively unkillable Alien monster.
Honourable Mention Moment
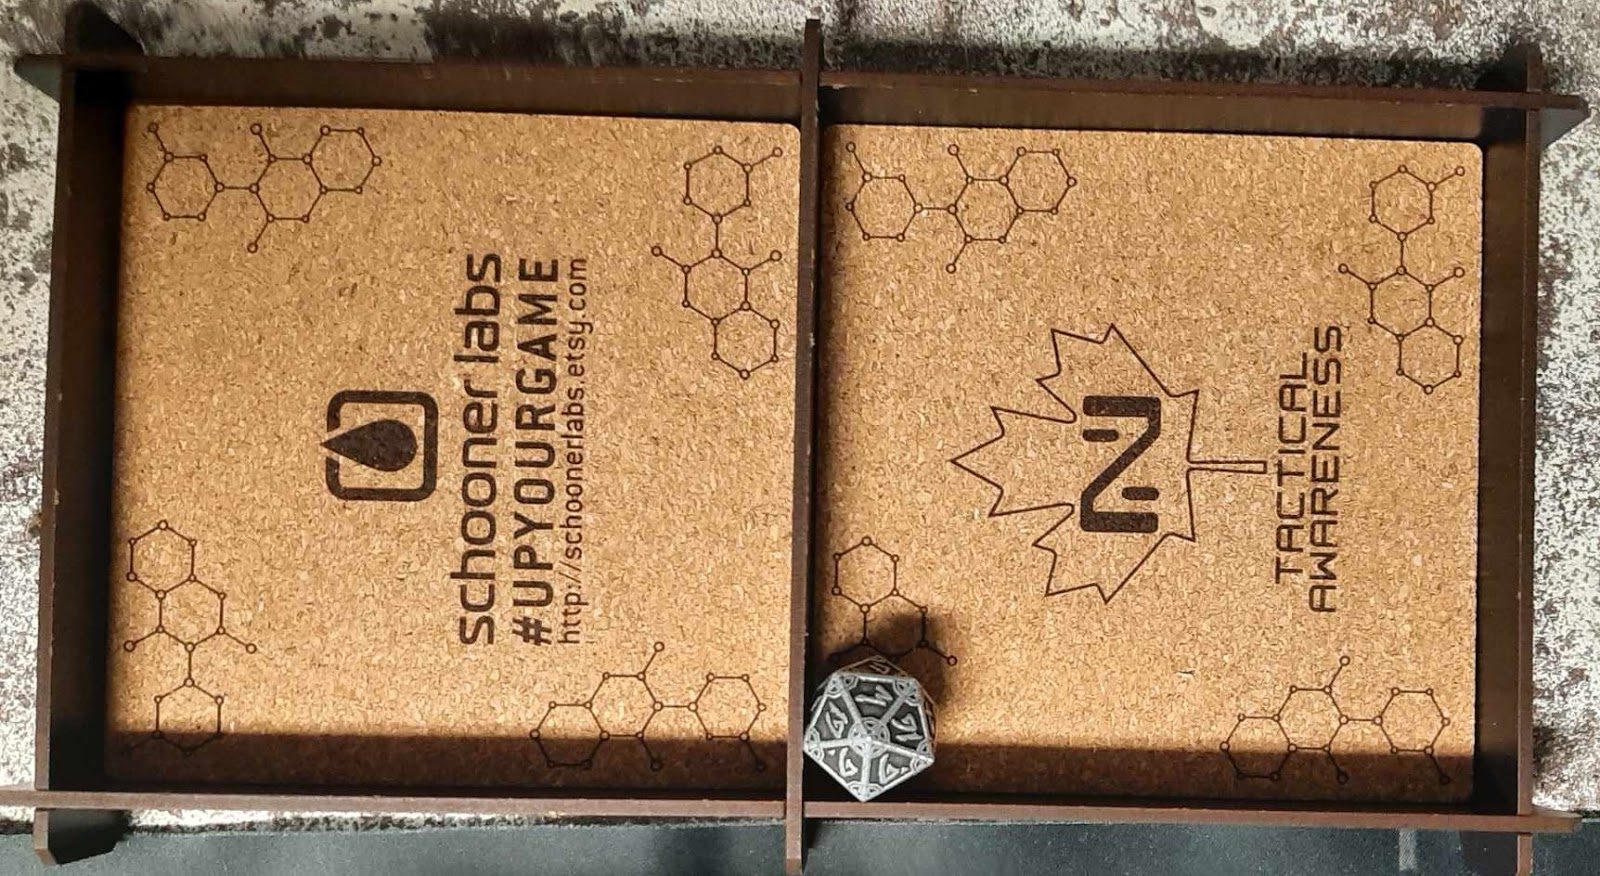
As an honourable mention, at the previous local event another amazing moment occurred that I had to share…
Yes a perfectly cocked D20 where it was equally showing 5 faces. What was the roll for? I don’t know. Did it end up being a success or failure? Who cares. My opponent and I will always remember the perfectly cocked D20 (and both pictures to show it to people.
Tabletop Ready Pics A Week Later
I was lucky enough to get Torchlight Brigade early, and was able to run them at this event at the end of the week they had been added to army. As part of getting them early I agreed to get them to a tabletop level to do demo games on behalf of our local Warcor. Here are the models not in bare silver.