Saturation or when only half of the bullets reach the target
By CrazyNomad
Overview
- Mission: Looting and Sabotaging
- Forces: Corregidor versus Combined Army (300)
- Initiative won by: Combined Army
- Deploy First: Combined Army
- First Turn: Combined Army
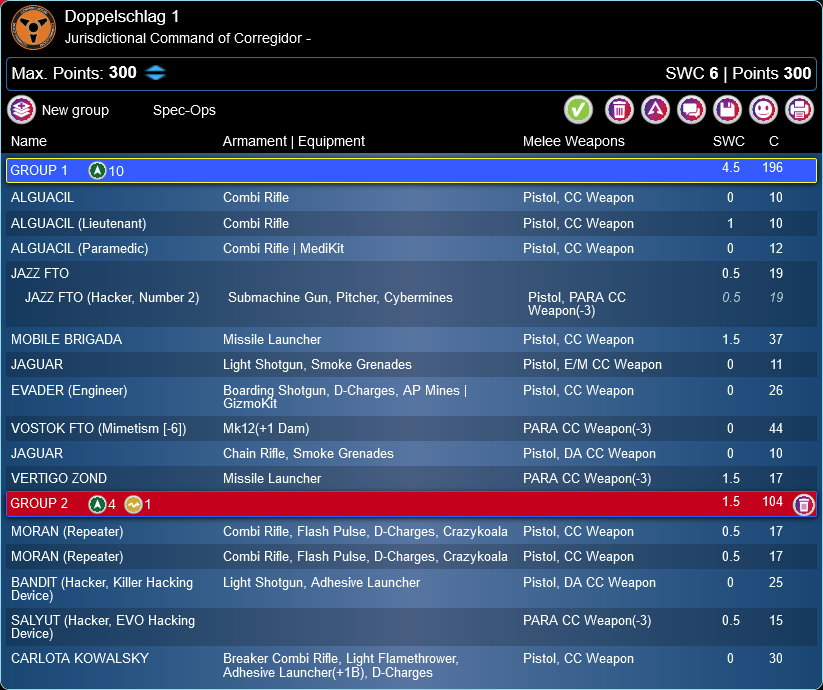
Corregidor List:
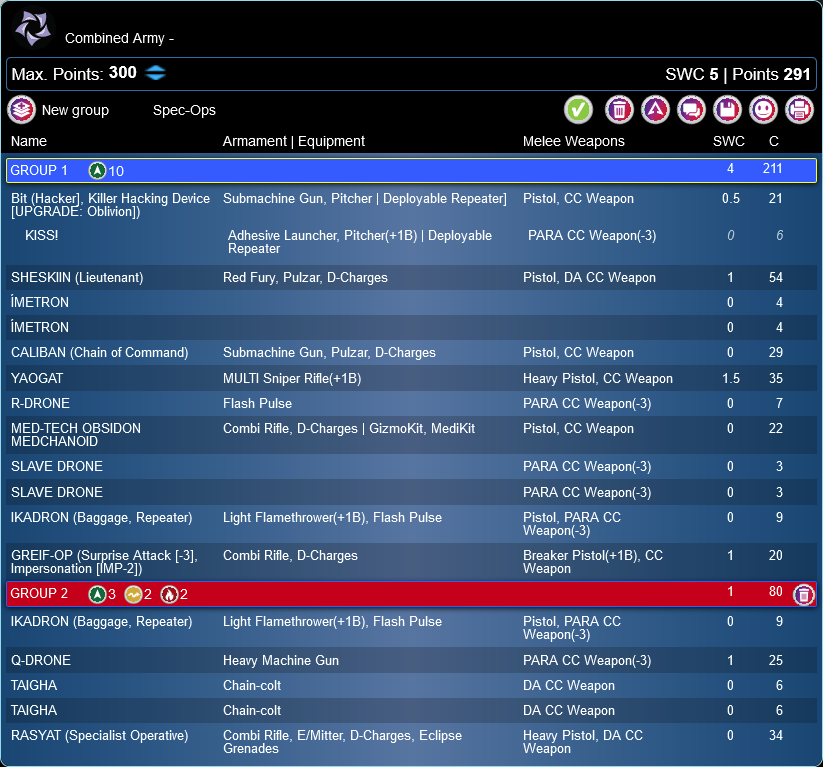
Combined Army List:
Deployment
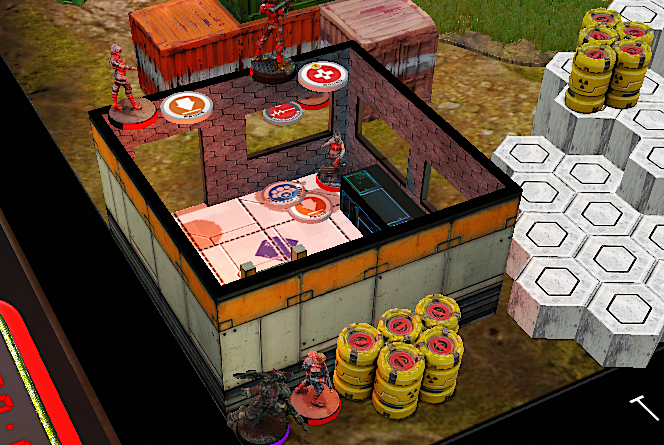
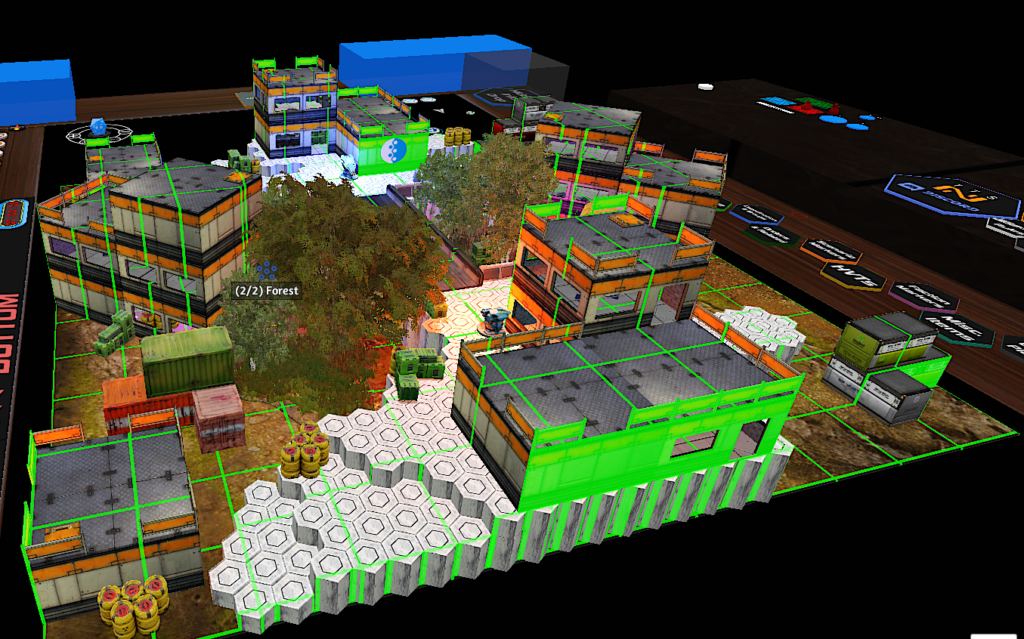
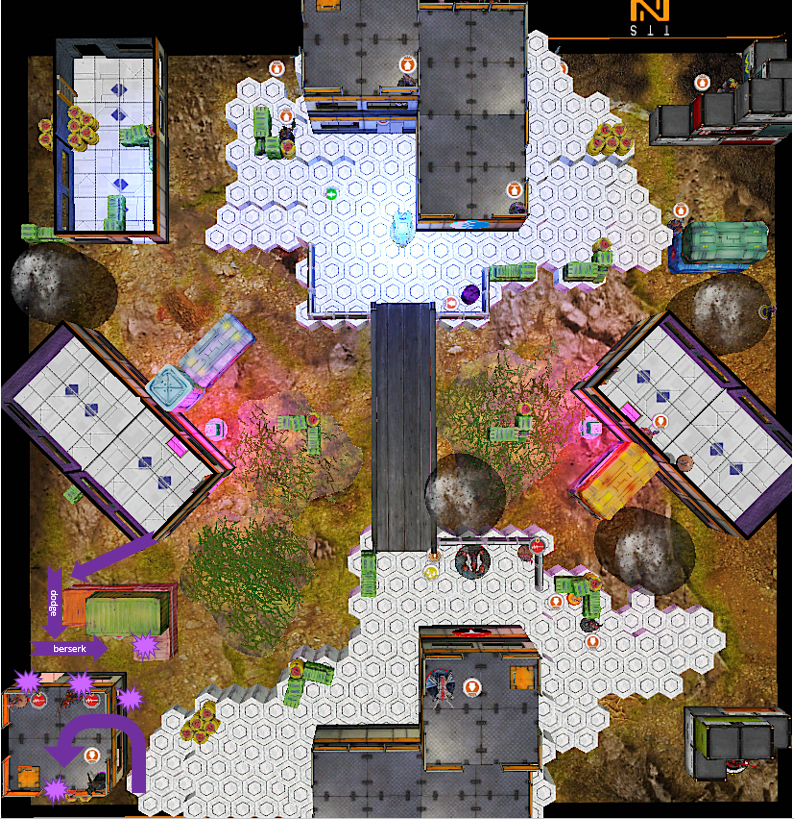
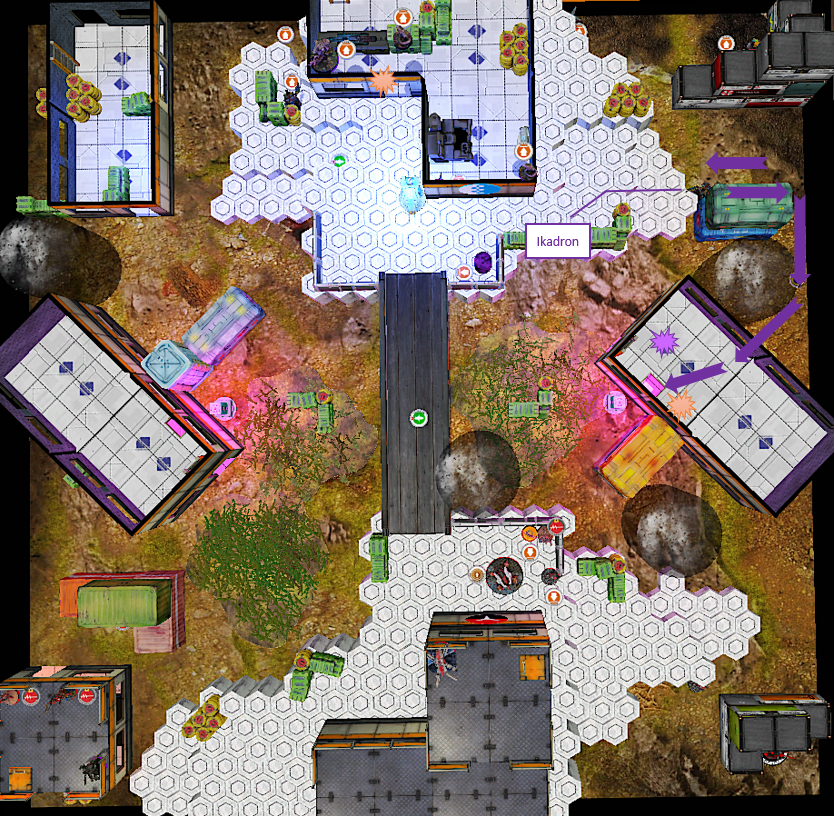
This map is dominated by an elevated building in the center of each deployment Zone and multiple forests in the center of the map. The forest have special rules and we consequently agreed to ignore any additional LoS blocking by the textures:
Saturation Zone (-1 Burst). Troopers with Jungle Terrain (or Multiterrain) get a +3 MOD to PH for the Dodge.
This leads to a very open center of the map. As a side note I would like to mention that we both didn’t optimize our lists for that map. We decided to play the mission, created the lists (like a RL tournament) and then picked the map that worked for us.
Additionally, to the already existing Saturation zones we had to place two more each. Where I placed mine on the flanks of my opponent, hoping to mainly stop his movement. Since I’m playing a sector it feels like the -1 burst hurts my link teams in ARO more than the attacking vanilla faction.
My opponent placed his zones in the center leaving nearly no fire lane that is not influenced by any Saturation.
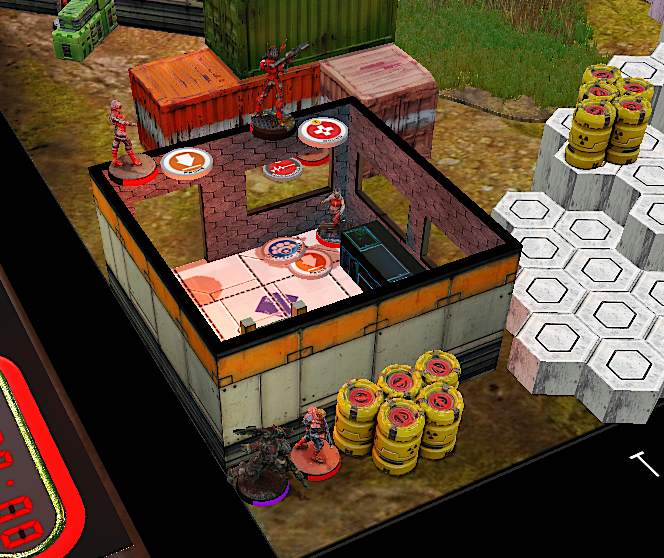
My Classified was Mapping which would be doable with a Moran or my Bandit who can both also damage the console. So, I’m well prepared on that point.
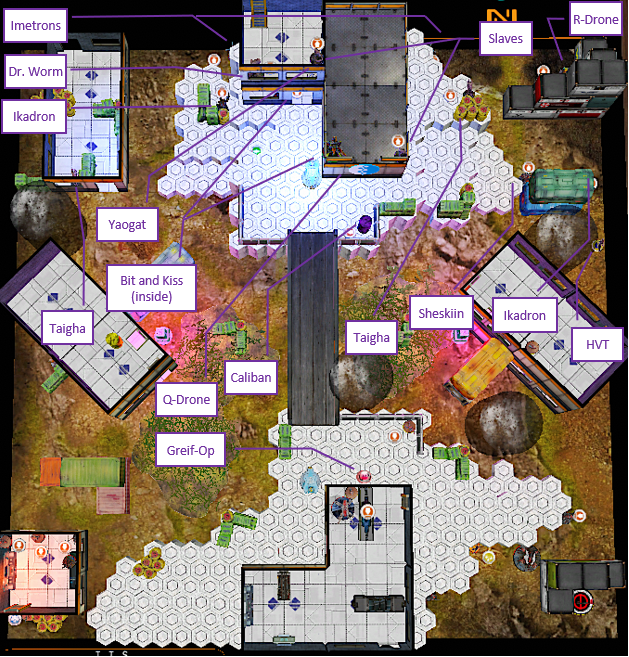
The Combined Army covered the center with a TR Bot and Sheskiin in my right flank. Some Taighas, Dr. Worm to heal and a lot of ARO cheerleaders. There was an open area in the deployment zone on the left flank that I might be able to use for Carlotta.
The Combined player did spend a Command token to hold back two units. One Impersonating Greif-Oerator (“only” Impersonation L2) and a Yaogat Sniper which looked extremely well for that Map with the forests providing Low Vis (which he ignores due to MSV2) and the huge open area that he can cover with his Sniper Rifle. And in ARO he would be on B1 anyways.

The EVO is hiding and the last Jaguar is defending the Back with his Chain Rifle. The Vertigo has a place where it is basically hiding in total cover but just looking at a small spot in front of the core link. This way it provides some minimal ARO in case I don’t need its guided missiles but my opponent has to take a lot of risk and effort to kill it. My Moran is on the right flank and the Bandit on the left. Both on the first floor, to make it harder to reach them but still quite easy to reach the Panoplies. My Bandit rolled an HMG on his Booty, so here we go, this will be fun.
I decided to deploy my defensive Core on my left flank because the building looked good for splitting the models on different layers / floors and thus avoiding templates. The TR Bot didn’t look too dangerous, my ML would probably outclass him in a direct F2F and the Mobile Brigada is ARM 8 in cover. If it gets too hot, the mobile can fall prone and still see the console and below the bridge do cover long lines but is not attackable from the building anymore.
My Haris was on my right flank where the Vostok has a good spot to shoot enemies only in good range but be in total cover if shot and falling prone. The other Jaguar finds an advanced position while the Evader is in total cover ready to repair the Vostok if needed.
I did hold back my second Moran, expecting an Impersonator and the Moran is a good counter deployment. Unfortunately, I wasn’t able to lock him up to the wall because there were too many units watching the Greif. But I placed my Moran in a way he can watch the Greif and have a Crazy Koala right behind his back behind the wall in case he reveals.
The overall strategy is to provide only minimal AROs (Strong Mobile who can fall back; Vostok on good range with mod stacking) where my enemy might have to work to get them.
Talk about why you deployed the way you did. We don’t necessarily need detail down to “I put this Morlock behind this tree,” but talk about the shape of your deployment, your flanks, anticipated paths forward, things like that.
Turn 1
Top of 1 – Combined Army
I spend a Command Token to take two orders from the group with the Greif and all offensive Stuff. Group two “only” has the Taighas. The one on the left flank uses its impetuous order and irregular order to move till the center line staying in the building. The other one stays hidden, in fear of the Missile Launcher.
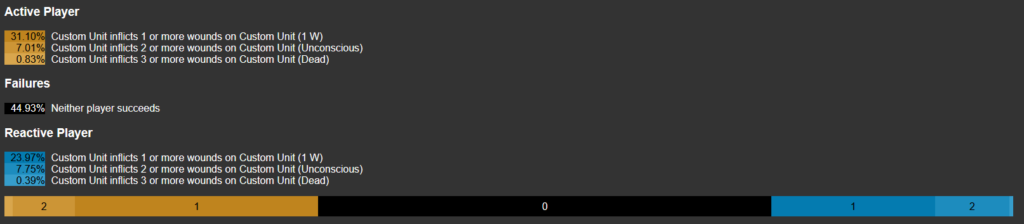
My opponent’s first regular move is to attack my Mobile Brigada and I declare to shoot back. The measurement reveals the range is slightly above 40”. With the forests this makes 1 dice on 7 (13 – 3 range – 3 cover – 3 low vis + 3 core) vs 2 dice on 12 with DA. Puh, the zones add up more than I expected. I end up getting one hit, which the Brigada tanks.
I decide to stay to drain more orders from the Aliens. At least until I get one wound, then I can fall prone and still cover the bridge. I’m ARM 8 and as we know from my D&D group “What can possibly go wrong, we are practically gods!”.
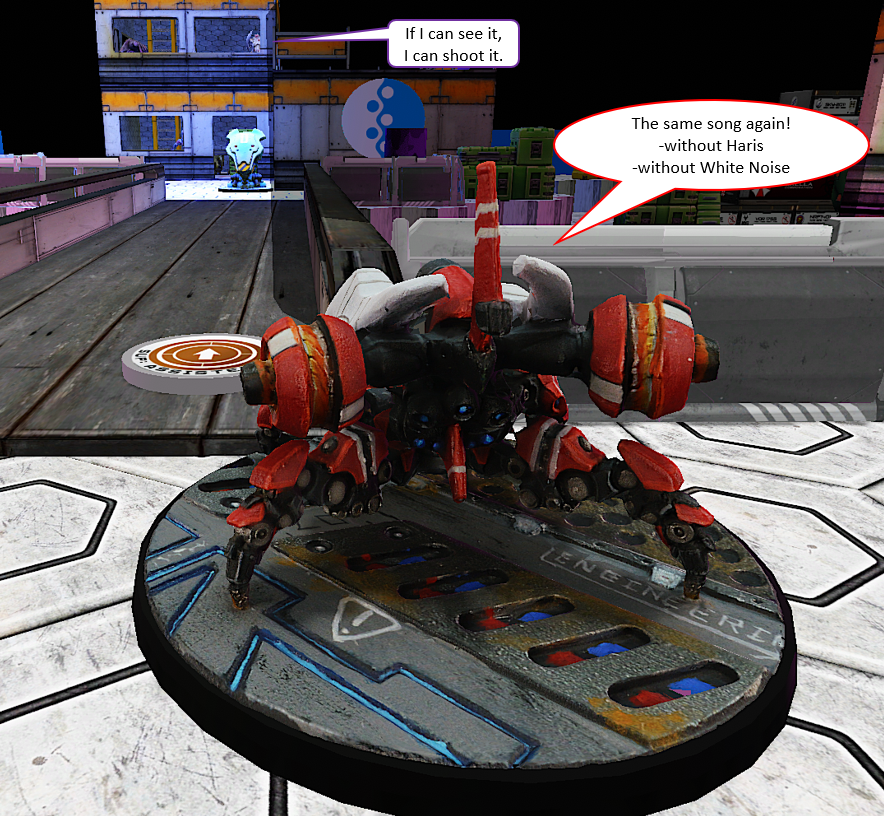
The Combined Army decides the Mobile has to go, so “The same Song again!”. Mobile dodges this time. This is on one dice as well but with better value. That should be doable:
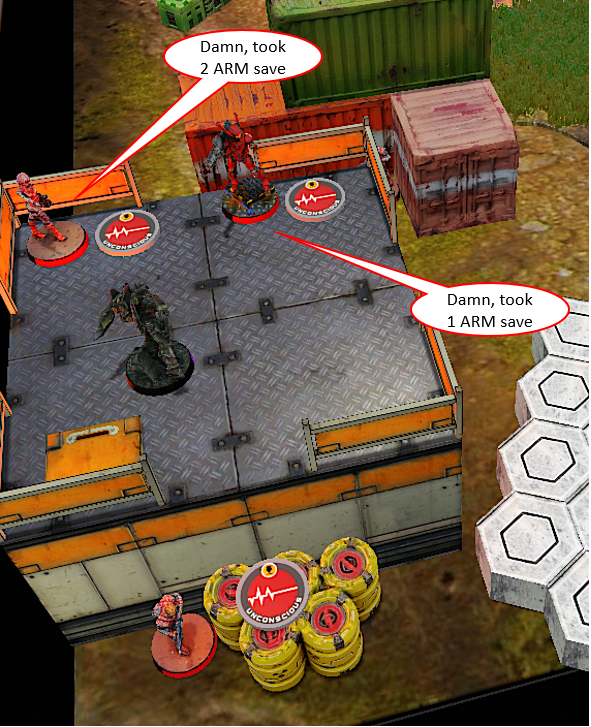
I roll a 4 and have to roll two saves -> 3 and 5 -> Unconscious. Hmm Ok, even 13% chance can happen, but that is not godlike ?.
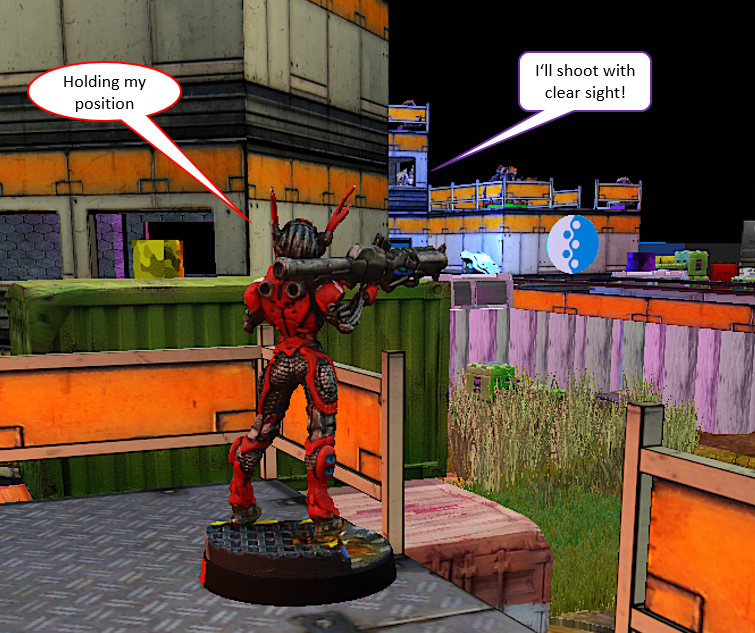
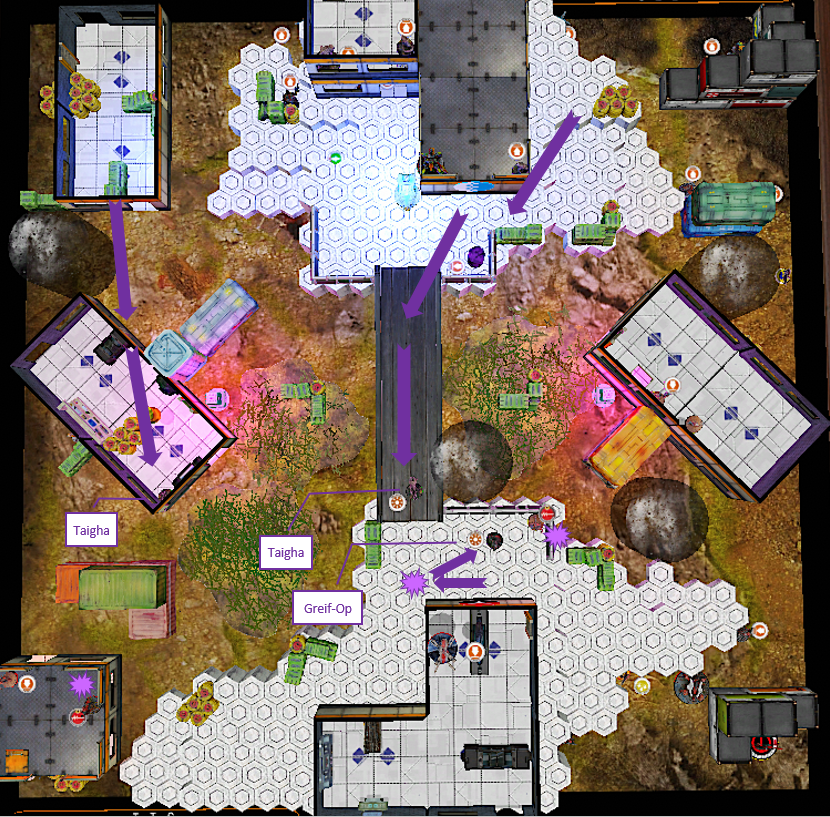
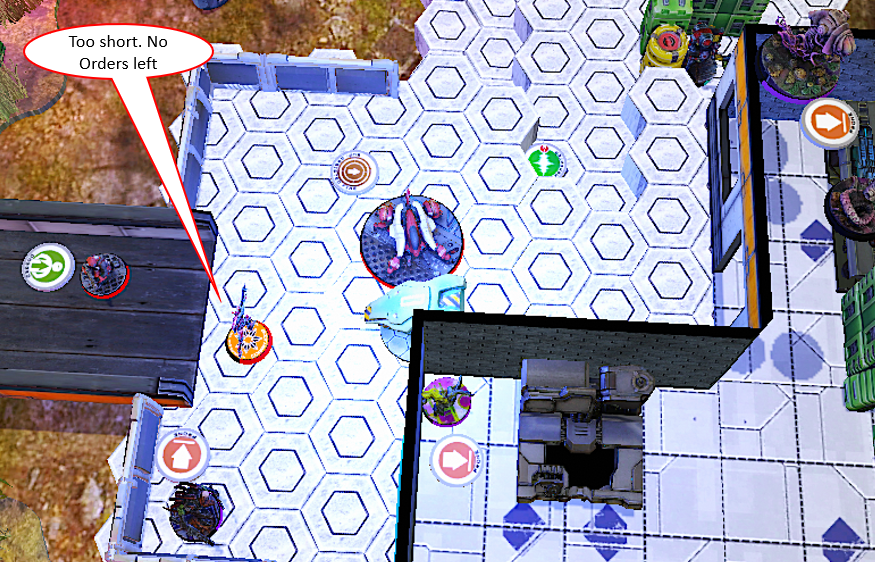
Now the Taigha on the right flank moves across the Bidge, fails the dodge against the Crazy Koala but tanks the armor save. The Greif moves close to console and reveals to declare a shoot against the Moran who prays for luck and shoots back but gets killed. At least the Taigha and the Greif get targeted.
After killing the resistance, the Greif takes care of the Mission. I get lucky here and the Console tanks a lot of D-Charges armor saves. It takes the aliens 3 Orders to remove it.
The Greif finally moves next to the unconscious Moran to avoid Missiles and then the first turn is over.
Bottom of 1 – Corregidor

Ok, I just lost one order in each group, that is OK. autopilot on:
- Paramedic revives Mobile – Check
- Reform Core Link – Check
- Start killing the whole with the Missile Launcher step by step – Oh Wait
Reviving a unit makes it stand up… and as John wrote in the mission description: “If you can see everybody, everybody can see you!”
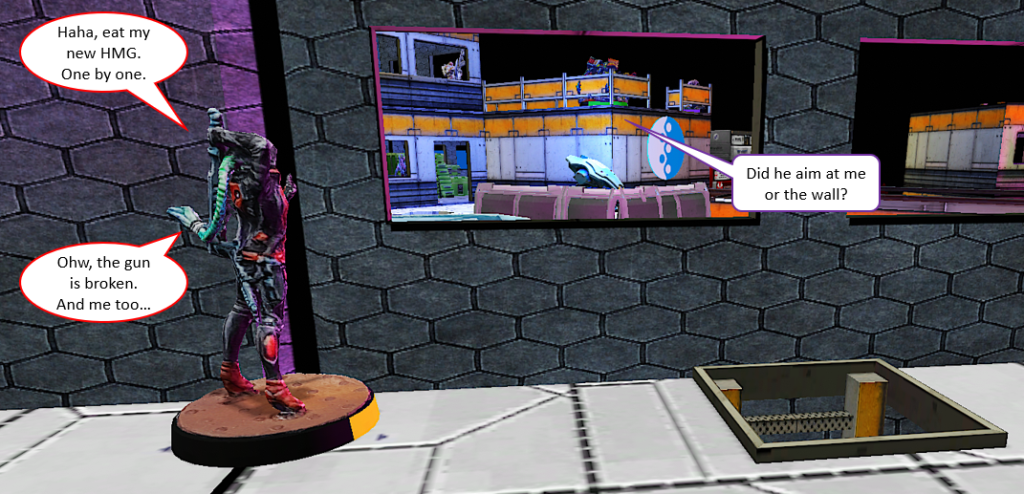
Ok, then plan B. My Bandit got an HMG, right? That’s more fun anyways ?!
- Move in total Cover, to prevent the Sniper and the TR Bot to ARO (I feel observed, but at least this Fish Bowl has some walls of stone).
- Slice the Pie and Kill the TR Bot
- Kill the Sniper with the high burst
=> Execute.
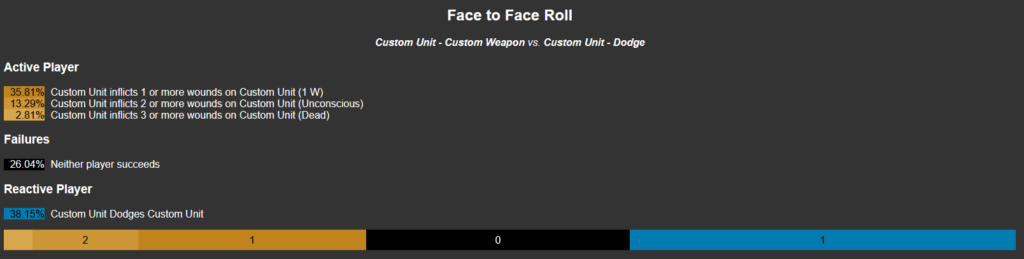
Hmm, I should have known better. When I got a cool tool, that was already more luck than I deserved. The Bandit manages to get to step 2, which is 4 dice on 9 (12 -3 cover -3 mim +3 range) vs 4 dice on 5 (11 -3 cover -3 mim -3 surprise +3 range)
Looks like the rifle scope from the looted weapon was damaged. I fail all 4 hits, take two and the Bandit dies completely.
Ok, ok. The Dice Abide once said “It’s easier to accept these things, if you just consider the game just got harder. Then we proceed with plan C.
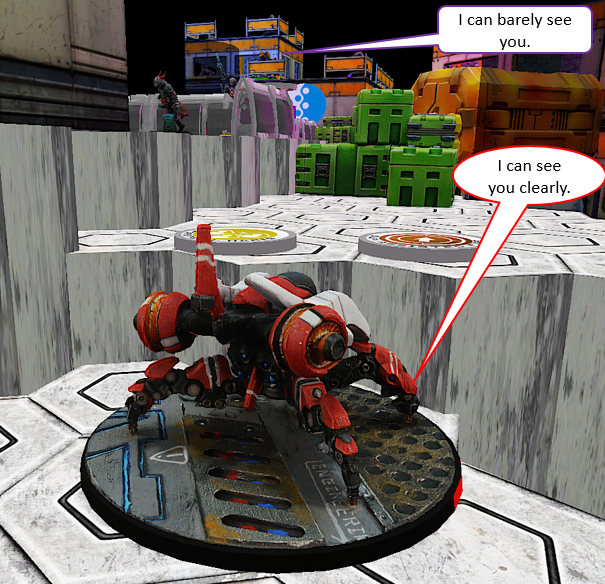
Fortunately, the Building with the TR Bot is blocking the LoS between the Sniper and my Vostok. Hence, I will rely on Marksmanship, Mimetism -6 and hope for the best even in suboptimal rangebands.
First order is the EVO BOT buffing the Vostok with Marksmanship. Then it slides sideways to gain LoS with the TR Bot. 4 Dice on 9 (12 (-3 mim, we missed that) -3 range) vs his mighty dodge on 10. But the bot takes a Crit and 3 hits and is removed.
From there the Vostok can slice the pie and then remove the Greif and the Taigha hitting both on 18.
But now things get tricky again. I don’t want to risk a shootout with the sniper out of cover and in bad range. The Solution is White Noise, but the Mobile Brigada is still visible by the Sniper. I decide to take the coin flip and move the Brigada in total cover blocked by the building on the left flank. This brings me closer to the Sniper as well to gain good range. It’s 1 dice on 13 for me vs. 1 dice on 12. And if I hit, the Sniper problem is solved as well. Otherwise I’m still having ARM 8. What can possibly, … nah, that didn’t work the last time.
-> We both fail our roll which is OK for me.
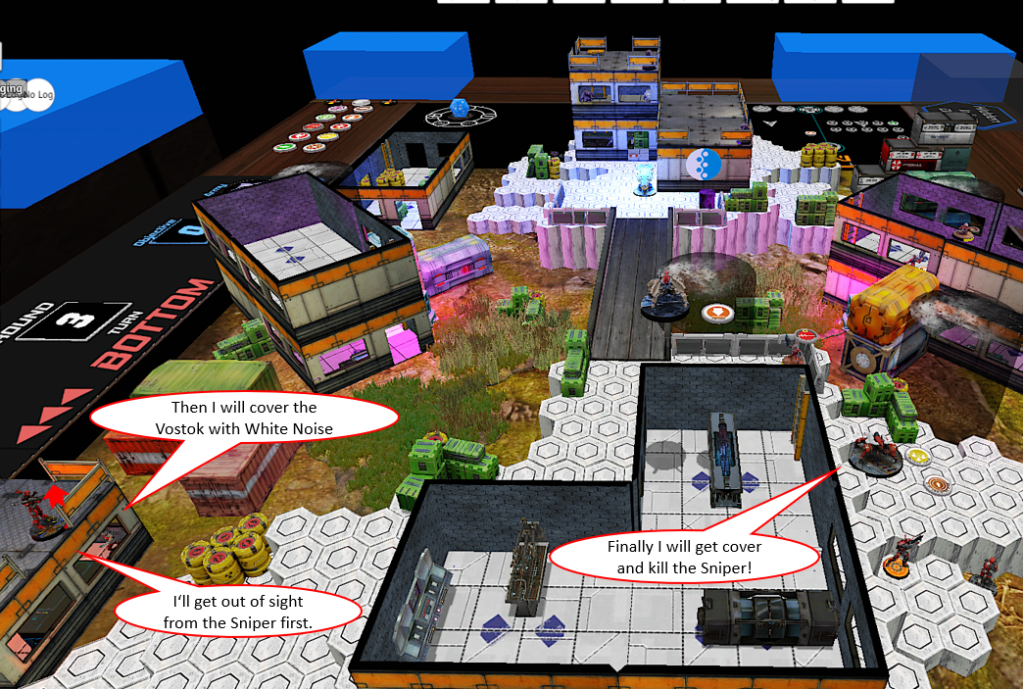
The plan evolves and Jazz places White Noise (needing two orders), the Vostok is getting into position and there is one final order to try to kill the Sniper. 4 Dice on 9 vs dodge on 12. But my bot is not successful because he fails all hits.
My Turn is over. It feels like I did a lot of stuff, but didn’t archive enough. The Sniper is still there, there is a second Taigha on the centerline. And I didn’t take a lot of orders from the Combined Army.
Turn 2
Top of 2 – Combined Army
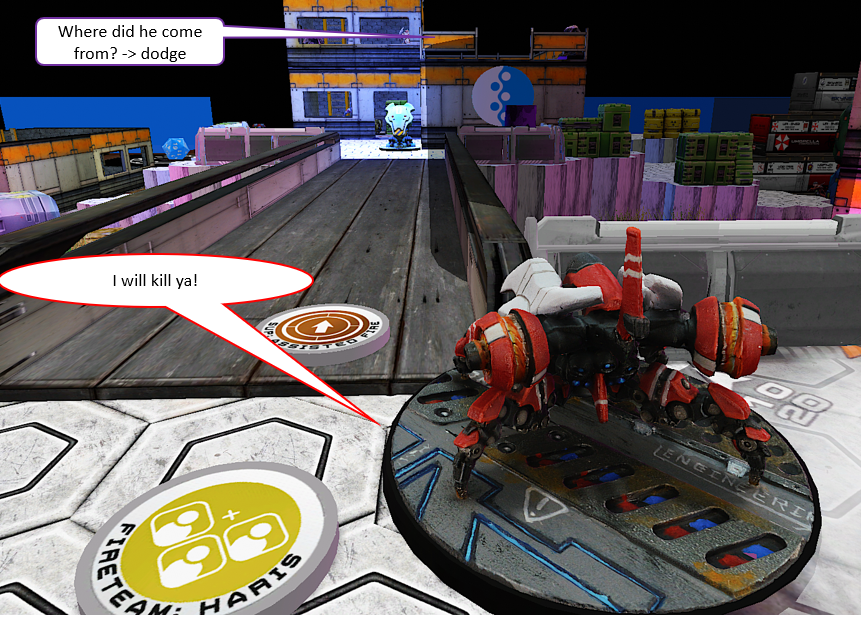
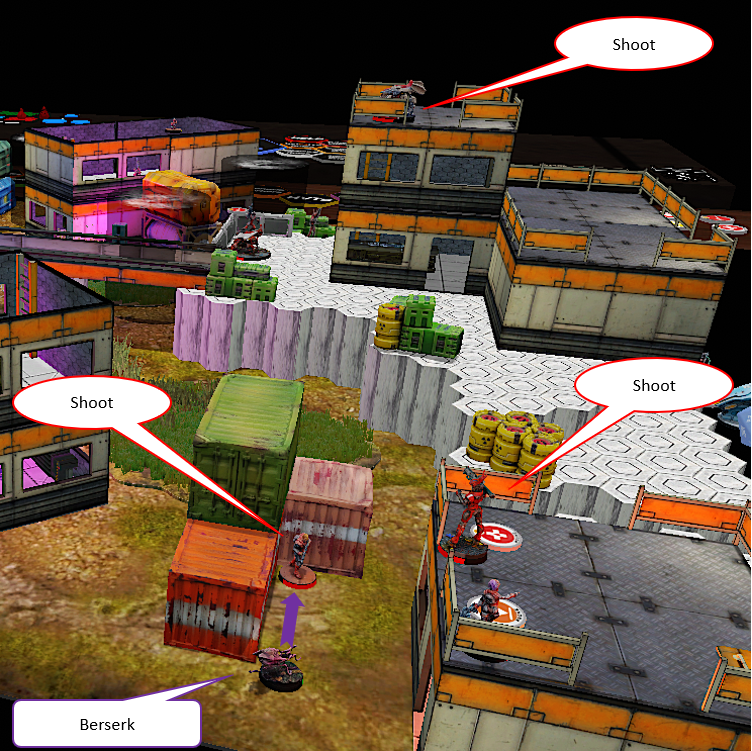
During the tactical phase Combined moves an offboard unit from group 2 to 1. Then the Taigha goes after the first Alguacil with berserk and gets destroyed by the AROs of the Alguacil, Mobile Brigada and the Vertigo.
And now things get really nasty. The aliens find the spot that is not covered … right next to my Lieutenant … that opportunity was my fault.
The Rasyiat plows through my core link. And there is nothing else but luck to stop him in close combat. After his D-Charges sliced my Lieutenant and Jazz (finishing the Classified Predator with the bonus point) he moves on the roof of the building and splitting the burst between the Paramedic and the Brigada. Both of them shoot back but both fail and die to the Combi Rifle shots failing the armor saves.
That was a rough turn for me.
Bottom of 2 – Corregidor
Ok, I’m in LoL now. But there is one goal. Kill the sniper and establish an overwatch with my heavy guns. I decide to keep my last two Command Tokens to reform the Haris that will break and to bring Carlotta into group 1 if I can push her in my final turn. I considered bringing her in on the left flank just to disrupt my opponent and have the order on the table in the final round. But then I decided to keep her. Maybe there will be a better slot in the final Turn.
But for now, my second Turn. I need to take some risks now and decide to stand up with the Vertigo, shoot the Sniper and end in a position watching over the whole table (especially the Rasyat in case he does any move, grrrr). Either things work now or I’m screwed anyways, but for now we both fail.
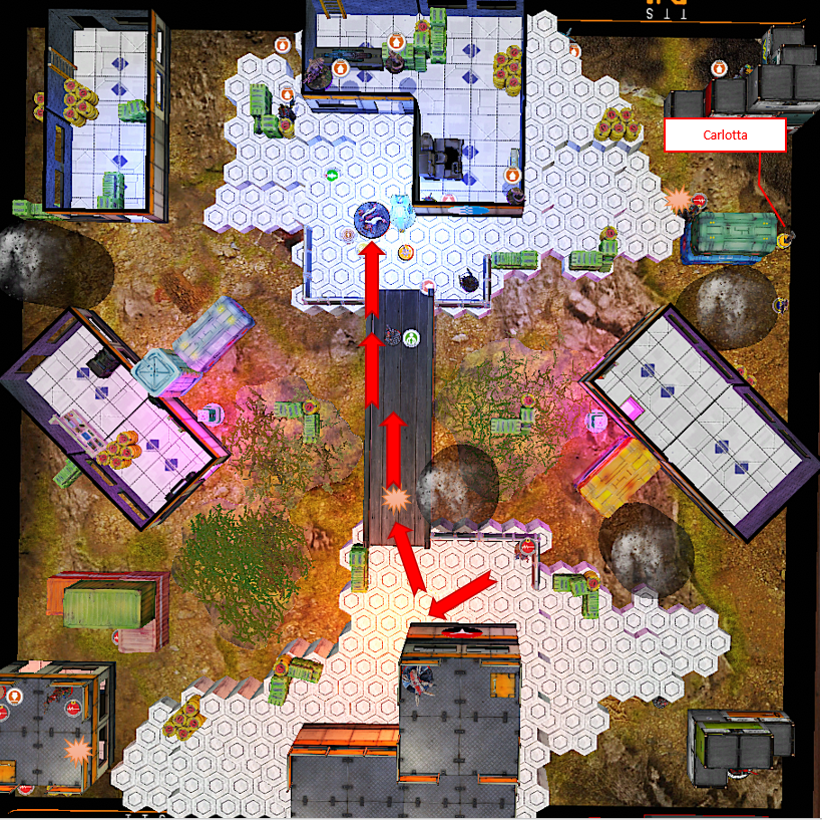
Ok, then the Vostok has to do the work again. The bot slides sideways to gain LoS with the Sniper, which breaks the Haris. It is 3 dice on 9 (12 -3range) vs 1 dice on 12. I finally need to get some luck. I finally do succeed and remove the Sniper from the boards.
The other units from the Haris (Evader and Jaguar) use their irregular orders to follow the Vostok. The Moran on the right flank repositions and places a Crazy Koala to put pressure on Sheskiin.
I picked my Chain Rifle Jaguar with DA CCW as my new Lieutenant. And I’m done. Not too bad for LoL. It doesn’t feel like I wasted too many orders, even though the moves would have been more efficient without LoL. I established some board control. But I’m worried if I will have enough orders in my final turn.
Turn 3
Top of 3 – Combined Army
The first goal for the Combined Army is to do some damage. Objective wise everything is done.
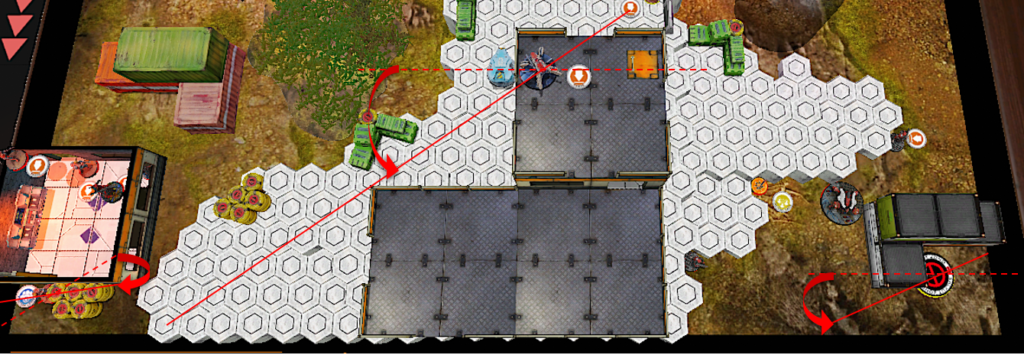
Bit is activating and Kiss with her, shooting pitchers on the bridge and one lands. Now Bit is activated again to hack my Vostok with Oblivion. Since I’m allowed to measure the hacking area, I know the pitcher is 7” away from my Vostok. The Vostok declares a reset but has to make two BTS saves which both succeed. Since I made a Save, I decided to fail guts and leave the danger zone, but now standing in the open.

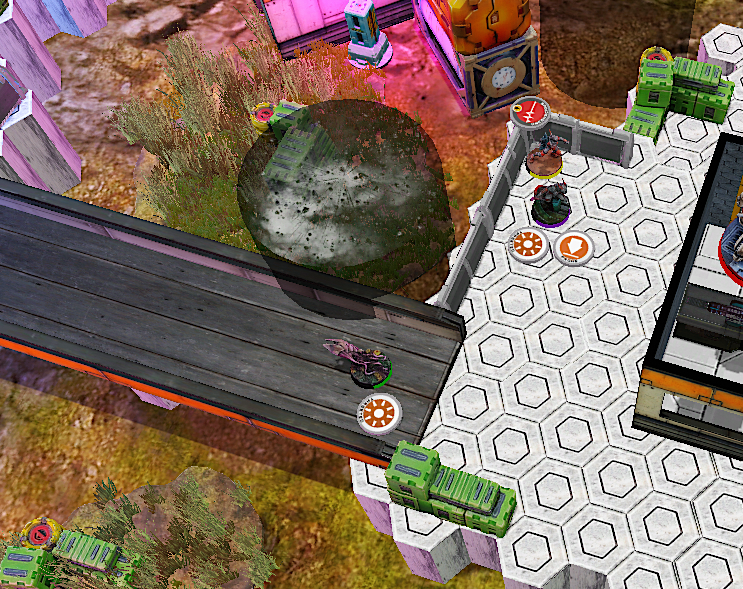
For the next Attack Sheskiin moves forward, into the right building dodging both Crazy Koalas. On the ladder he kills the Moran with the Red Fury. Entering the first floor he gains LoS to the Vostok and the Vertigo. This is when I realized I forgot to recreate the Haris at the end of my turn ☹. But since Sheskiin has to split his Burst and the Vostok is still Mimetism -6 and ignoring Cover, I can manage to land enough hits to kill him.
After this, the Combined Army just repositions a bit to be as annoying as possible in my last turn.
Bottom of 3 – Corregidor
My order pool looks small, for what I need to archive. I have Carlotta left off the board and need at least one Command token to reform the Haris. I don’t think coordinating will help me. Hence, I decide to move Carlotta into group 1 to have the flexibility and see what happens during my turn.
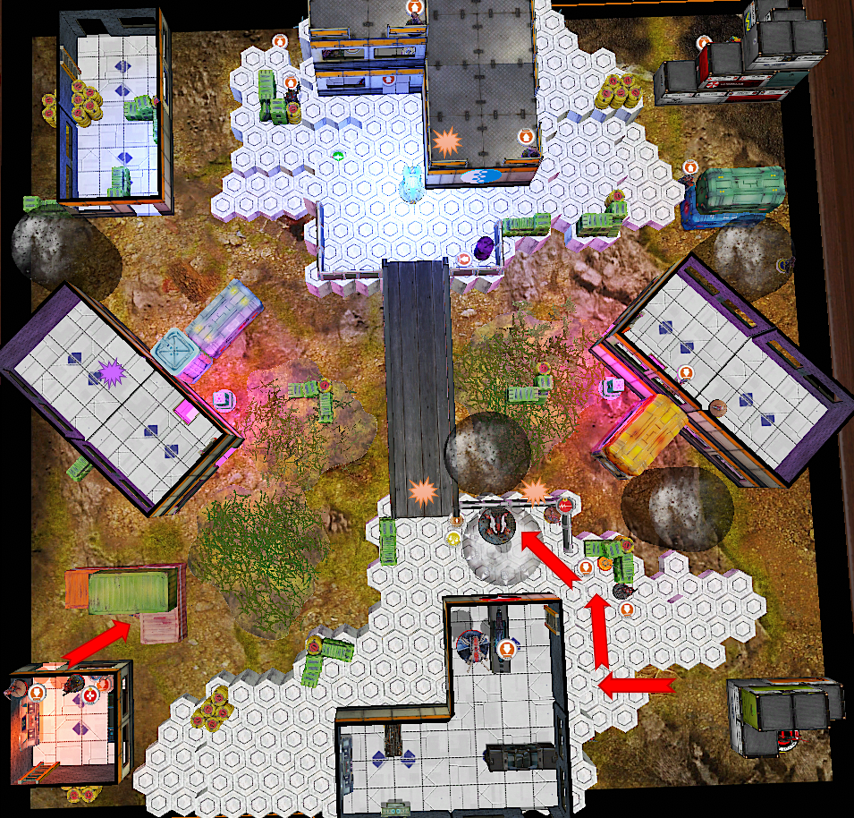
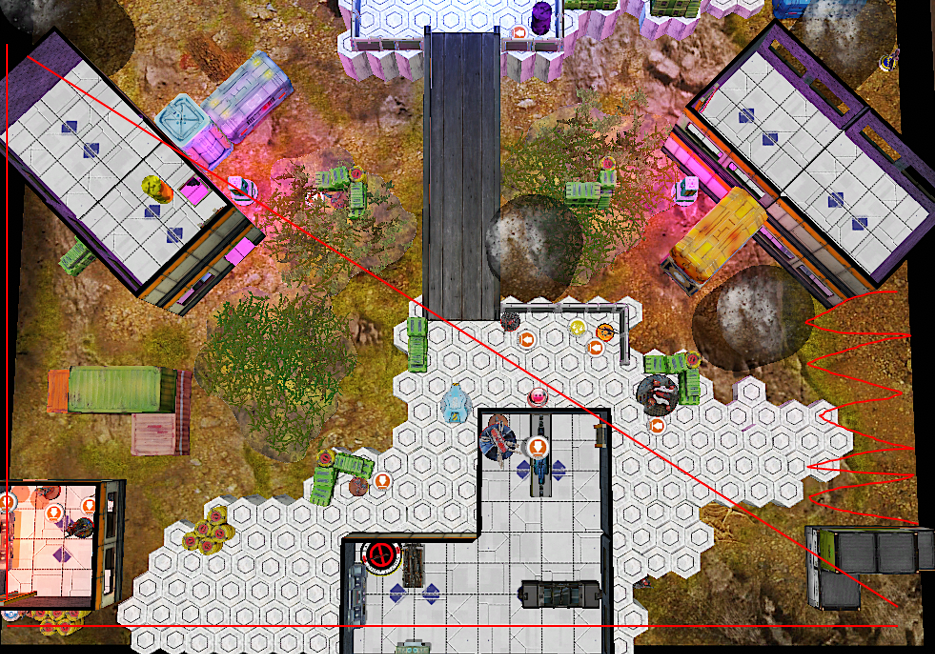
I do a last desperate push to the Console with my Haris. The Vostok stays the leader and shoots everything on its path, splitting the burst most of the time. I offer the other teammates as targets as well, relying on their Dogged and NWI Skills. The only thing I’m afraid of here is the Evader getting stunned by the Ikadron Flash Pulse, because then he can’t attack the console anymore. During the first order this works fine, because my opponent shoots the Jaguar just to realize he is going dogged and is not even relevant for my plan.
It takes a whole lot of orders even with unopposed shots to get rid of the Pitcher, the Raziat and finally the Ikadron. So, I end up stranded before even reaching the console. And even if I would, there is the Caliban that reveals himself and Bit being able to Hack the Vostok and the Evader.
Finally, Carlotta comes in to Secure the HVT. My Lieutenant has no use for his order, since he is too far away.
The game ends with a loss for me 9 – 1. We both ignored the Panoplies. But at least I got my revenge on the Raziat.
Post Game Analysis
The game was definitely lost for me by the play of the Raziat. He did cost me a lot of orders. And thus, the game was lost for me by the facing of my units.
It’s a common mistake and I really should have known better, but my facing could have been better. Especially the Vertigo could have watched a larger part of my left quadrant and there was no reason to keep that area in my back arc, because there was nothing it could see on the right side because it was prone.
Besides that, I think I had some bad Luck, especially when the outcome did hurt me especially hard (Mobile Brigada F2F, Bandit F2F, Raziat F2F vs. Alguacil & Mobile Brigada).
On the other hand, the Vostok showed its power level again. With Marksmanship and Mimetism or White Noise it is possible to shoot even in a bad range band.
I think the game was won for the Combined Army by the Greif Operator. It was surprising for me how easily and efficiently he could destroy the console. But this might be supported by the map design, where the center is very open, but it is hard to set up a defense watching the console.
I’m still thinking about a triangle deployment. Sometimes it feels hard for sector armies split over the whole deployment Zone since the fireteams already focus a lot of units to one spot. Additionally, with 3 Infiltrators I also cover some midfield and then sometimes for me the area covered feels too large. But by deploying in a triangle, I give up one side flank and cover a smaller surface with shorter edges. This gives me the opportunity to protect this area better, especially when the offensive Haris is moving out. But this way I’m committing to one side as well.
Pingback: Mission 036 Report: Fighting in a Fishbowl – Bromad Academy