Armoured Fury: Come and Get It!
- Mission – Looting and Sabotaging
- Armies: Haqq v Hassassins
- Deployed first: Hassassins
- First turn: Hassassins
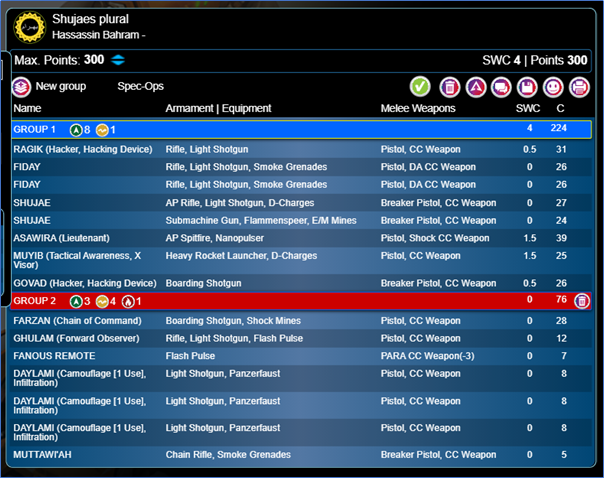
Hassassins list:
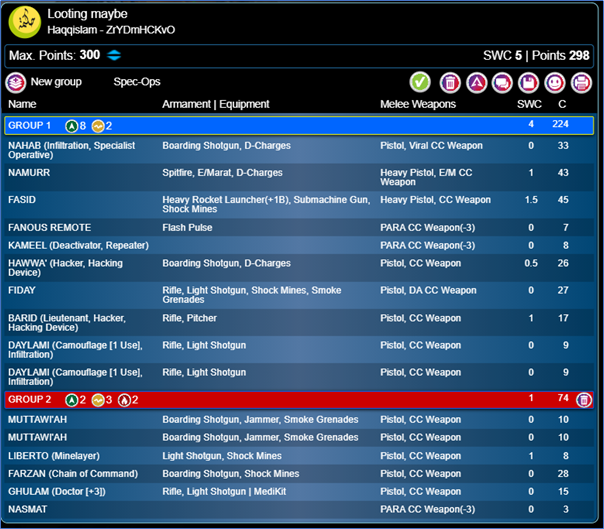
Haqq list:
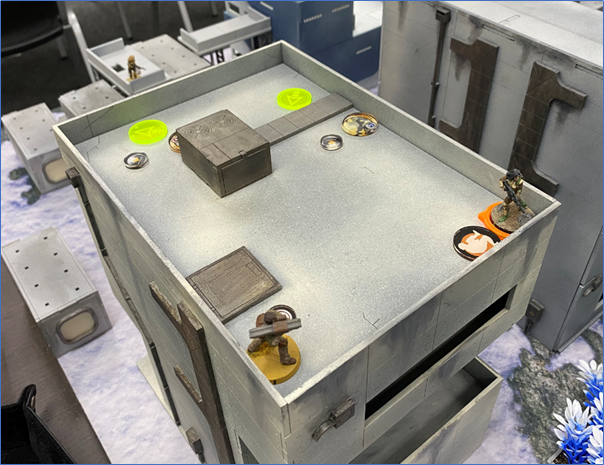
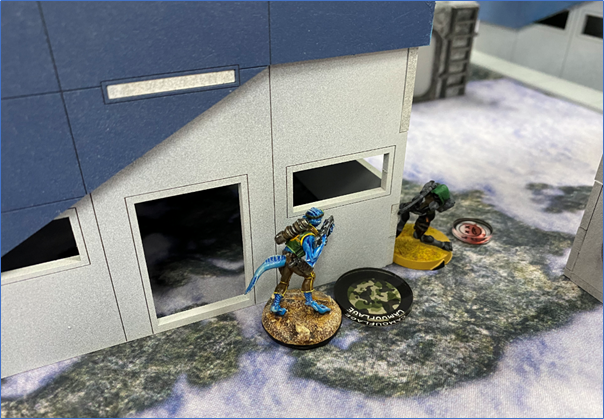
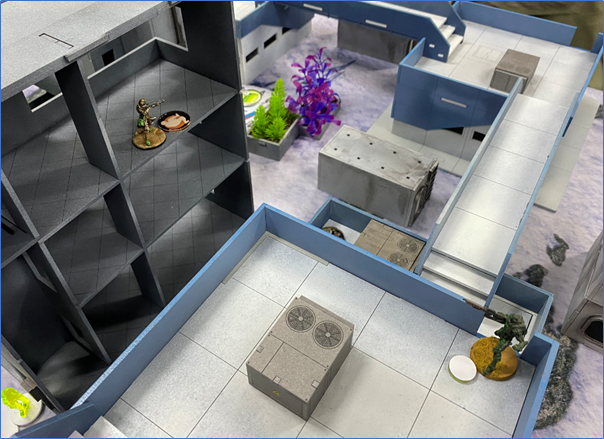
We deployed the depression zones near the AC2 but due to confined space around the objective, they were placed on routes to access them. Not a fan of these zones, however, we were both playing lists with several terrain total units and no hard AROs, so we generally benefitted from their inclusion
HB Deployment: ~10mins
- Callum spent a command token to hold two units in reserve.
- Haris on his left flank with a view of using the walkways to access my DZ.
- First Fiday was placed outside the building nearest my AC2.
- X3 Daylami were deployed on the tall building in the middle with a decent view of my DZ.
- First Shujae deployed on the other flank to access the panoply

Haqq Deployment: ~20mins
- Deployed defensively around my AC2 with both jammers, Barid and baggage bot
- One Daylami placed to counter callum’s
- Other Daylami placed to slow down his haris
- Libertos and mine placed to counter his first fiday
- Took a long time to place my three attack pieces
- Fiday placed inside building nearest Callum’s AC2 (figure he was relatively safe there as Callum didn’t deploy anything around it other than a Fanous)
- Nahab placed on the halfway line in the city square looking at his Fiday.
- Namurr placed on my right flank to counter his haris
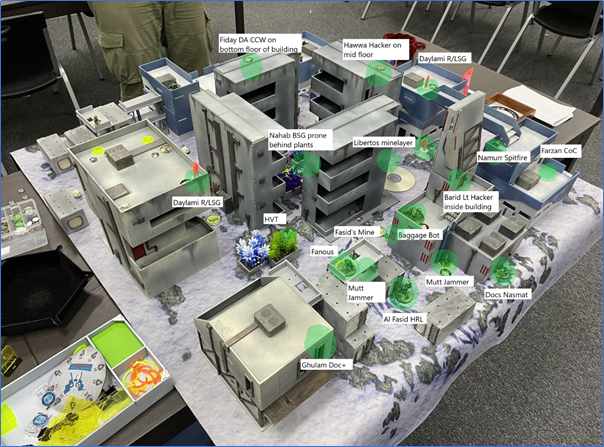
Reserve HB:
- Placed a second Fiday inside the building nearest my AC2
- Placed a second Shujae on the other flank to his first
Reserve Haqq:
- Placed Fasid HRL and mine covering the AC2
Turn 1
HB ~20mins
Callum spent orders moving the fiday out of LoF of the Nahab before throwing smoke. Unfortunately, he ended in jammer and mine range, not only dying to the mine, but also failing to land the smoke ☹ He then tried to take out the Fasid with Daylami Panzer but bad dice turned on him and my own Daylami took them out in ARO. Shujae moved up to grab something from the panoply but got flashed. He thought about throwing his other Fiday at the AC2 but it wouldn’t be enough to destroy it and the Fiday would certainly die to ARO. He moved his haris into a better position and passed turn
Haqq ~20mins
Moved the Namurr up along walkways prone until close enough to engage the Muyib HRL. Was able to put it dogged before going NWI on the second attempt (thank goodness for Total Immunity) and failed guts prone.
Dropped the Ghazi supporting his haris to dogged with the Daylami R/LSG.
I know people always take the Panzer, but I am finding the rifle incredibly useful as a cheap piece to engage soft targets. The additional range keeps you out of template danger and the extra dice makes up for the average BS.
I couldn’t attack the AC2 while the Muyib was still up and I didn’t think I had the orders left anyway, so instead I moved the Fasid, placed another mine near the AC2, before returning to his original position and going into suppressive fire.
Rest of the turn was spent moving the Nahab into striking position for next turn
Turn 2
HB: ~15mins
Callum, using a couple of command tokens, moved some units around before going on the offensive with his Shujae again. Unfortunately, bad dice stunned the poor Shujae again and he retreated back to the safety of the Panoply.
He moved forward with the Govad and Asawira, looking to remove my Namurr. I revealed my Hawwa but was oblivioned by the Govad hacker in response. I also forgot Govad’s had veteran so my ARO oblivion would’ve been useless anyway. He ran out of orders to engage the Namurr and passed turn.
Haqq: ~15mins
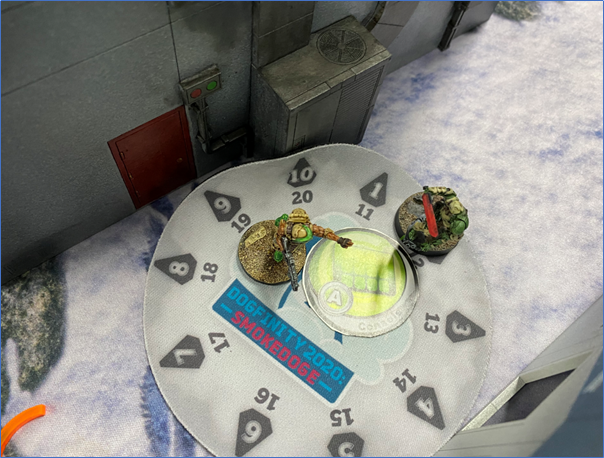
The time was now. The Asawira was still watching the AC2 but I was able to get smoke down from the Fiday, then coordinate both he and the Nahab into cc with the AC2 for that +1B. It took three orders and 14 saves but was finally destroyed. The Nahab also bagged Net Undermine on the way in.
Rest of turn was moving the Libertos up to gun down the Shujae and place a mine to slow down the Asawira
Turn 3
HB: ~10mins
Callum only had one shot left to destroy the AC2, so he threw his remaining Fiday at it. It copped SMGs, jammers, flash pulse and a mine and unfortunately, failed to put any damage on it before dying.
He moved his Farzan forward, pulling an EXP CC weapon from a panoply. (that would’ve been useful two turns ago!)
Callum dropped in a Ragik to spite kill my Fiday, His Asawira whiffed shooting my Nahab, who dodged into total cover and then killed my Namurr who in turn shot it with her E/Marat, turning the Asawira into a fine statue
Haqq: ~5mins
There was not much left to do but go for the panoply. Moving a mutt forward, Callum blocked its path with his other Shujae who promptly dodged every shotgun I fired at it. Eventually locking it in cc. With three orders left I ran my Fasid out into his remaining guns, tanking every save to reach the panoply and promptly fail the WIP check with my last two orders!
End of Game
Hassassins: 1
Haqq: 9
Summary
Great game Callum, had a blast playing you and how interesting a Haqq v Haqq game can be. I think I played pretty well, the plan to use the fiday and Nahab as a double team paid off, even though I was concerned whether the Nahab would live past turn 1.
The defensive function of the list worked well too. Both Mutts doing their jobs brilliantly, I could’ve gotten away with using the 6pt version, but the shotgun and smoke are super handy, and I had points left over.
The inclusion of the Fasid (for the armoured fury challenge) paid off. It’s armour was never really tested, Callum’s bad dice with the panzerfaust saw to that, but it did what I hoped it would do, which was to defend the AC2 with its heavy armour and mines and shrug off small arms fire.
The other inclusion for the challenge was the Namurr. Not strictly high armour, but her Bioimmunity and BTS3, coupled with total immunity makes her a tough nut to crack. She was also my only real attack piece in the list which was good since I needed something to deal with the Muyib HRL, even if Callum only needed 9’s to save.
All in all, I had fun running this list and would play it again. I enjoyed the infiltrating Nahab and will probably use it again as it can be easily supported by Daylami and Libertos.
I might change up the Lt choice as its inclusion pretty much meant I needed CoC, where those points could be spent elsewhere (like on a second Nahab!).
The doctor was also only there to bring my Fasid back, or to force an opponent to kill it outright. I don’t run doctors often, even in Haqq, as most of my valuable pieces are often not in the DZ when they go down and rarely ever go unconscious when they do.
Callum admitted the list wasn’t exactly tailored for Looting. If he could play again, he’d probably swap the Ragik out for another Shujae or invest in something to protect the AC2 (like jammers). He also explained why he bunched his daylami on that one rooftop. It was in case I had something nasty, he could coordinate panzer from that vantage point. Unfortunately, my counter deploying Daylami stopped him from doing that effectively.
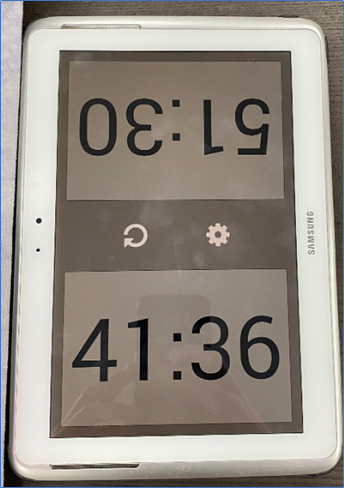
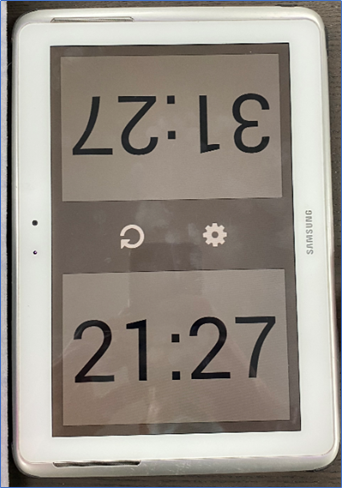
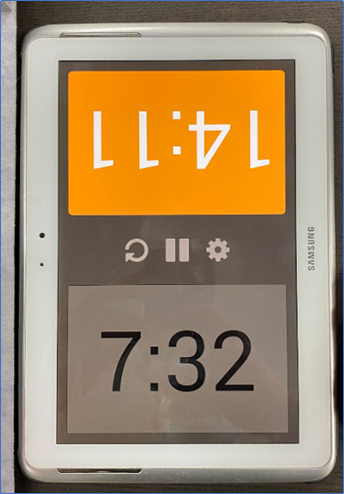
Chess Clocks!
We also played with clocks for the game. Some takeaways from that experience
- I took much longer to deploy than I thought. Reasons for this:
- I was going second, so more to consider (facings, position etc)
- I was using an unfamiliar list and got the number of camo tokens wrong a couple of times
- I had a good plan for my defence, but my attack pieces were vulnerable to a first turn alpha. So, I spent probably the most amount of time figuring out where to place them so they were safe from harm, but also not in places which would be order intensive to remove them from
- Once the game was going, we took roughly the same amount of time for each turn (turn 1: 20mins, Turn 2: 15mins, Turn 3: 5-10mins)
- Take time at the end of your turn, after spending the last order, to clarify anything to your opponent before passing time back to them. It’s more courteous and what you would do without a clock, just do it on your own time. For example, using your last order to place four models in suppressive fire. Make sure your opponent understands which of the four you are selecting before passing time over.
- Using clocks forced me to make decisions. I was in two minds about engaging the Muyib with my Namurr, as I wanted to keep her alive for later. However, it was also my best gunfighter and the presence of the clock forced me to use her aggressively rather than spending orders, trying to be sneaky with a Libertos or my Fiday
- It kept my mind on the objective. Knowing how much time I had left, allowed me to pause and step back. I didn’t need to do everything on turn 1. I had two more turns to accomplish my objective which helped focus me on what I COULD achieve this turn.
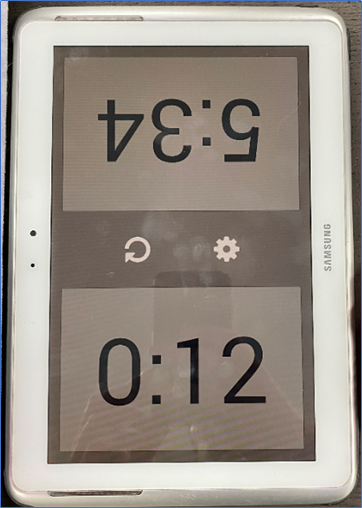
Total time used:
- Hassassins = 54mins
- Haqq = 60mins
Pingback: Mission 34 Report: Armored Fury – Bromad Academy