Mission 001 Update: Ride On!
We’re halfway through the first mission, Mount Up!
The mission ends on August 31, 2018. If you write in with some post-game analysis, battle reports, a few pictures, or general thoughts on the how your game went with or against (for you non-Nomads players) a Zondnautica profile, you’ll be entered to win some Micro Art Studios stuff this month! Write to [email protected].
Now that we here at the Bromad Council have had some time to play some game ourselves, we’re sharing some of our experiences for your consideration. The uncut battle reports are available here: Mercenary Recon Corps – Bromad Academy Mission 001
We’ll be finishing up the month with a summary of all your feedback, but we’ve included some in the mid-month report to give you some ideas. Without further ado, let’s talk tactics!
Deployment
Deploying the Zondnautica in a safe position is quite challenging due to its 55mm base and its 8″ impetuous move. Unless you’re very careful, an aggressive opponent can often get a flank on it by pushing a HMG-rangeband weapon into the midfield and take it out in your first reactive turn.
In the Recon+ deployment example below, you can see that the Zondnautica is deployed in such a way that most of the 8″ move will be used up by moving around the building, allowing us to use the impetuous order for smoke.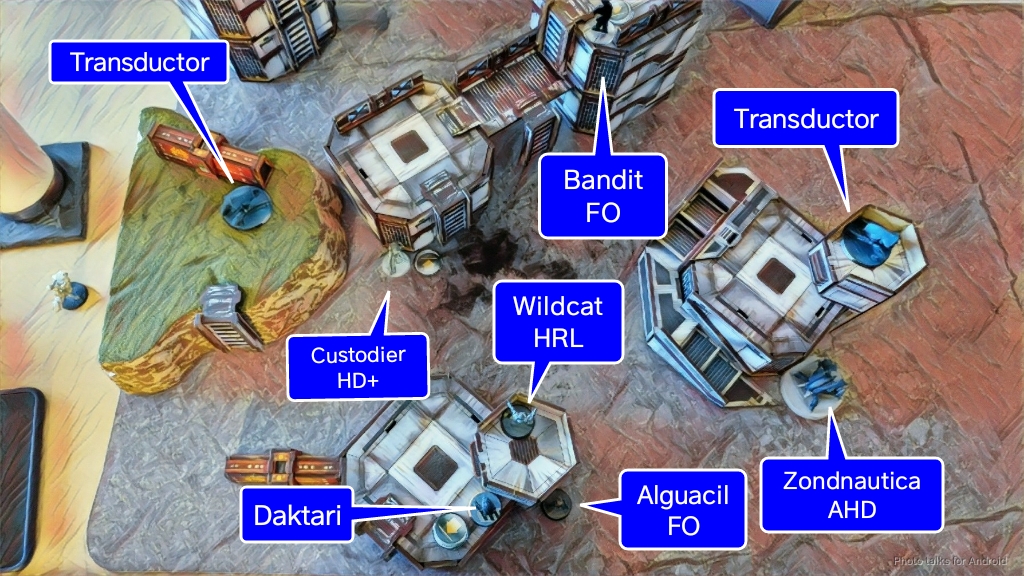 The Zondnautica is also deployed deep in the deployment zone, forcing an opponent who wants to kill it to either bring in AD, impersonators, or push all the way into the deployment zone.
If you’re fielding Vanilla Nomads, you can make use of Morlocks as a smoke screen for your more expensive and more aggressive Zondnautica.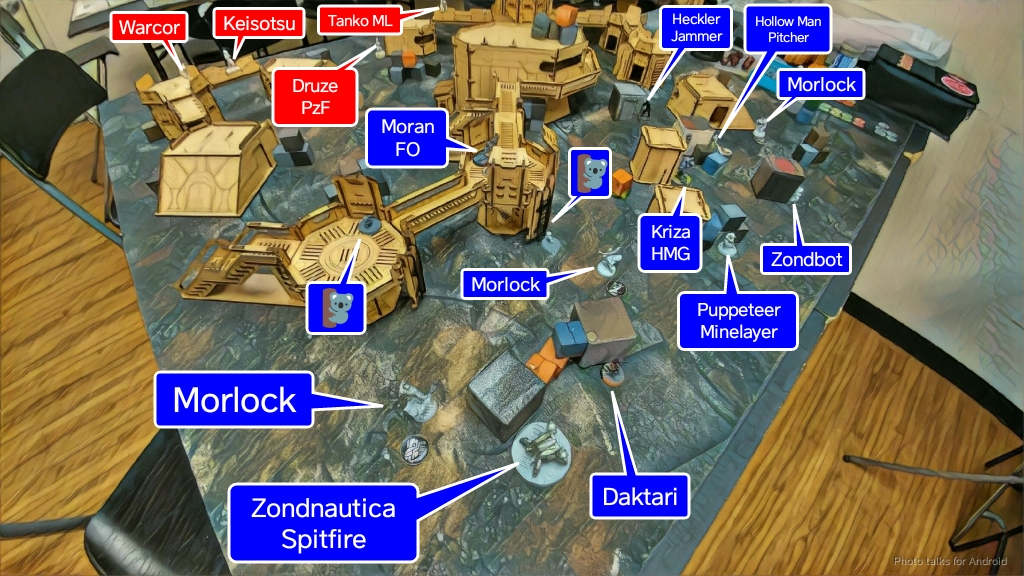 Careful positioning of the Zondnautica basically ensures that is going to the left here for its impetuous move. The terrain blocks most LoF to the enemy deployment zone, in particular the Warcor and linked Tanko ML AROs. However, there are two gaps through which the Warcor or the Tanko could draw line of fire, one all the way at the left table edge and one under the Warsen.al Comanche bridge. There are two Morlocks positioned to throw smoke first to cover these gaps. If either fails, you can then cancel the Zondnautica impetuous order.
The Zondnautica also mobile enough and a high enough threat for some opponents to dedicate serious order pool resources to take it out. In this example case, the Zondmate (proxyed by the unpainted REM) and Zondnaut (at the base of the ice terrain) were deployed dismounted with the Zondmate covering an approach to a Hollow Man and an Interventor Lieutenant and the Zondnaut covering a longer central firelane (only reached out to the midfield).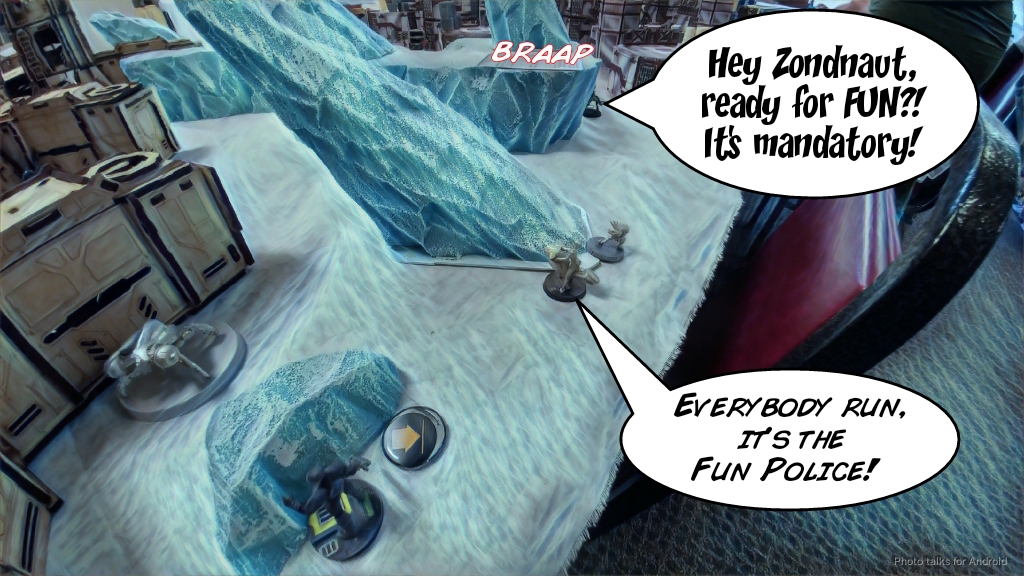 The opponent had raced a Perseus/Securitate link across the table, taking out the Zondnaut, who was forced to dodge instead of shooting at an ODD model in cover. While the real target was the nearby Interventor Lt, with the link so far advanced the Zondmate’s chain rifle was enough of a threat to force the opponent to remove the fast-moving template weapon. Thankfully, in this game he ran out of orders before being able to shoot the Interventor.
This is another example of a very conservative Zondnautica deployment–the positioning was such that the opponent had to push deep into the deployment zone to get a flank shot on the Zondnaut. Tunguska has more trouble safely deploying the Zondnautica due to a lack of cheap screening troops like Morlocks and Jaguars. In this case it may be worth using the Zondmate to screen corners if going second.
Some of the early feedback from Bromads is to deploy dismounted and use the Zondmate and Zondnaut together to get a “poor Nomad’s 360 visor” so to speak. Just be careful of templates!
Positioning and Aggressiveness
As the the Zondnautica is the first bike available to Nomads, it’s worth talking briefly about positioning, especially in the first turn of the game. Assuming you’ve spent your impetuous order, the Zondnautica may now be pushed up the board and behind some protective smoke.
Don’t just leave it there! Consider dismounting and covering two midfield approaches, one with the Zondmate’s chain rifle and the other with the Zondnaut. If you’ve taken the AHD or Spitfire profiles, consider throwing them into suppression. This is quite dangerous with the AHD, so be sure to evaluate the risks before doing it. It’s important to remember to dedicate a single order to reposition the Zondnautica before passing the turn, so you’re not left in a position like this:
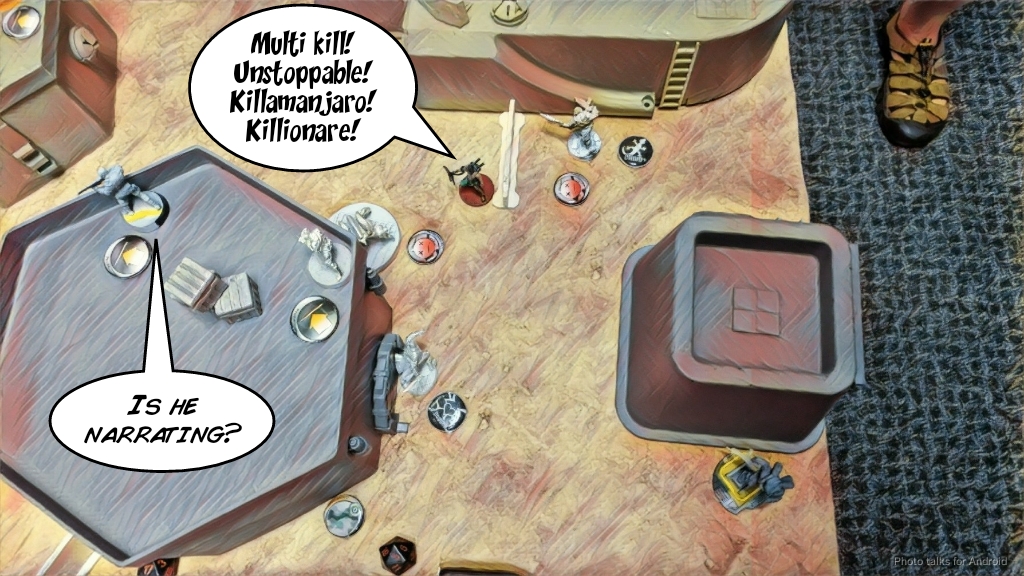 That particular Mutt tanked over 6 chain rifle shots after climbing down the ladder to the right of the Krakot at the top of frame. In this case, the Zondmate being left out to corner guard was fine, but the Zondnaut was not dismounted. That particular approach was covered by 3 chain rifles, and eventually the Mutt died to repeated shots from the dogged Morlock. Had the Zondnaut been repositioned to behind the hexagonal building, it would’ve been able to add some additional shooting from outside of chain rifle range against the Mutt and possibly preserve the Zondnautica’s order against the rampage of the Mutt.
Zondnautica are also fast enough that they can be used as anti-Impersonator pieces. You can use the Zondmate to block the base of a ladder that a Fiday is at the top of, for example. Since climb is a long skill, the Fiday would be forced to break marker state. You can then cover the building that the Fiday is on top of from a different angle with the Zondnaut.
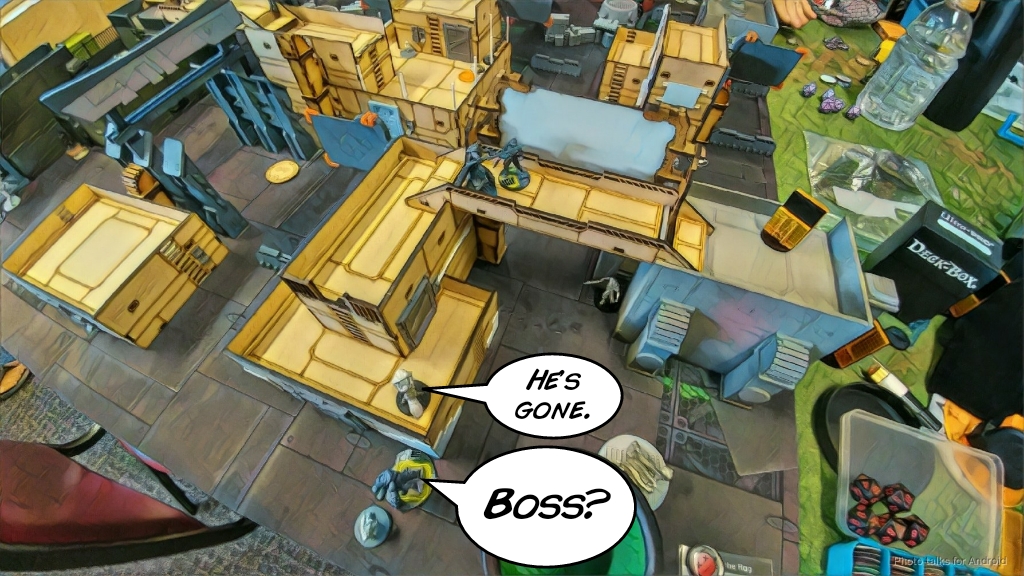 While the terrain and deployment didn’t allow for counter-deploying the Fiday by ladder blocking with the Zondmate in the above example (this was Power Pack), the intent was to dodge the Zondnaut into contact with the ladder, but the dodge roll failed.
This is also an example of an interesting split-level Zondnautica dismounted deployment. One other potential option would have been to place the Zondmate atop the building to the right, where the S2 silhouette template is sitting, but there was a hostile Q-Drone on that side of the table within an easy move of LoF of that rooftop.
Some of the feedback we’ve been getting from Bromads from around the ‘Sphere is that it’s often better to delay a rush with the Zondnautica until Turn 2, after some of your other heavy hitters have been able to clear out AROs, so that’s worth considering as well.
Combat Tricks
Since we have a G:Sync’ed Zondmate, we can leverage it to do all sorts of efficiency-boosting and bad-decision forcing. In a game against ALEPH (the great enemy), the Zondnaut and Zondmate were within an impetuous move of an over-infiltrated camo token.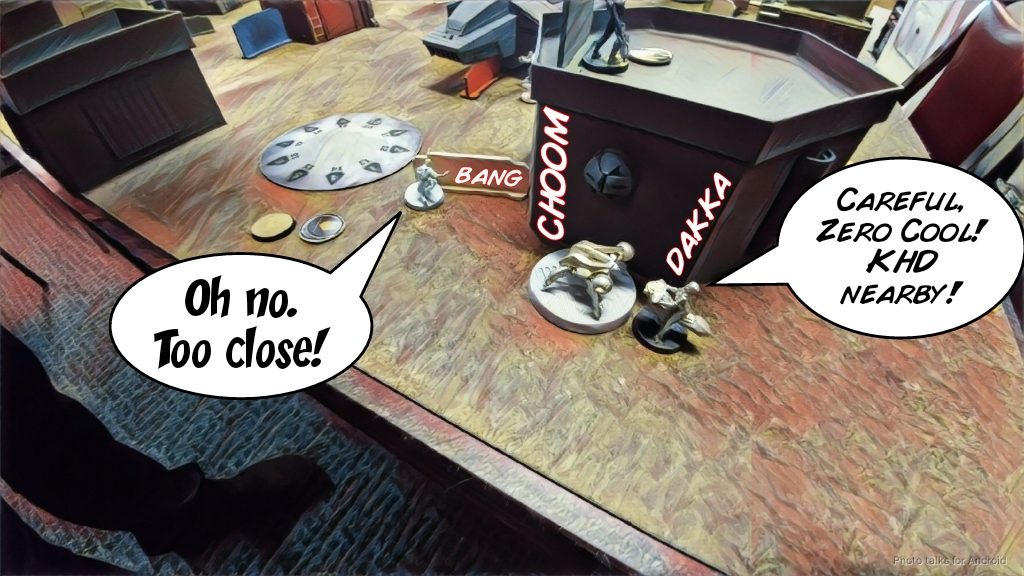 After covering LoF to the situation with a Morlock (just another example of using Morlocks to protect the Zondnautica), the Zondmate’s/Zondnaut’s impetuous move took them into LoF of the camo token. This forced a bad decision–does the ALEPH player reveal to shoot, place a mine, or just let the Nomad player get a free double discover with the two models? The mine probably would’ve been the most troublesome ARO, but in this case the ALEPH player elected to try and take out the Zondnaut, dying to the Spitfire and the Chain Rifle.
It’s also worth remembering that the Zondmate has Electric Pulse, so you can force bad decisions there as well. In the following situation against a Seraph, the Nomad player drove the Zondmate into base to base with the Seraph, threatening Electric Pulse.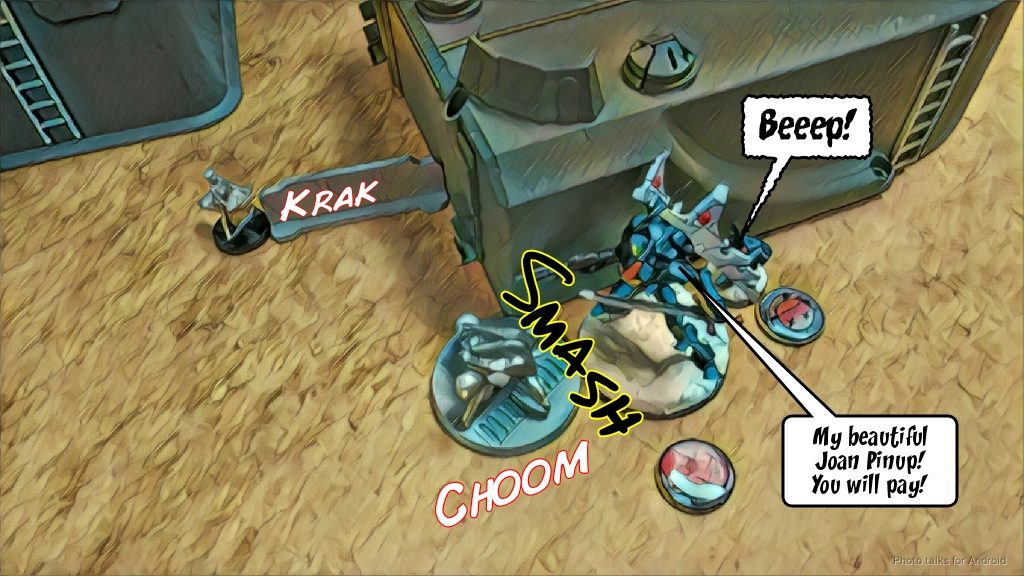 The Military Orders player elected to CC the Zondmate instead of being immobilized on his turn, letting the Zondnaut unload her boarding shotgun as a normal roll.
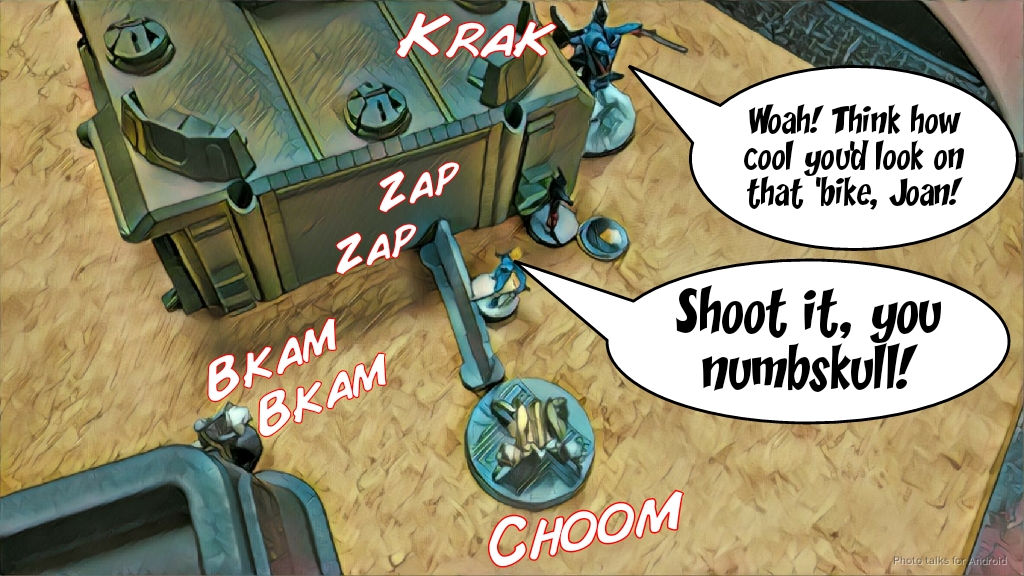
The Chain Rifle and Boarding Shotgun also allow you to cover a wide swath of models with templates, some of which contest dodge rolls. From the same game, and as a leadup to the above example, the Zondmate and Zondnaut were able to take out a warcor (proxied by Joan) and an Order Sergeant hacker without any trouble:
 There are plenty more things to discover about the Zondnautica, and we’re sure that you’ve got thoughts and experiences that we’ve missed!
We’ll be finishing up this mission at the end of August 2018, so get your battlefield data and thoughts in to [email protected]. Go Go Nomads!